WHEELSANDTIRESTires
8
2.Whenthecauseoftheairleakhasbeendetermined,removetirefromtherimandrepairasrequired.SeeTire
Removalonpage8-3.
TIREREMOVAL
NOTE:Tiremustberemovedorinstalledfromthevalvestemsideoftherim.
1.Removethetireandwheelassemblyfromthevehicleasinstructedabove.SeeWheelRemovalonpage8-2.
2.Removethevalvecapandvalvecoreandallowairtoescapefromthetire.
3.Ifpossible,useatiremachinetoremovethetirefromtherim.
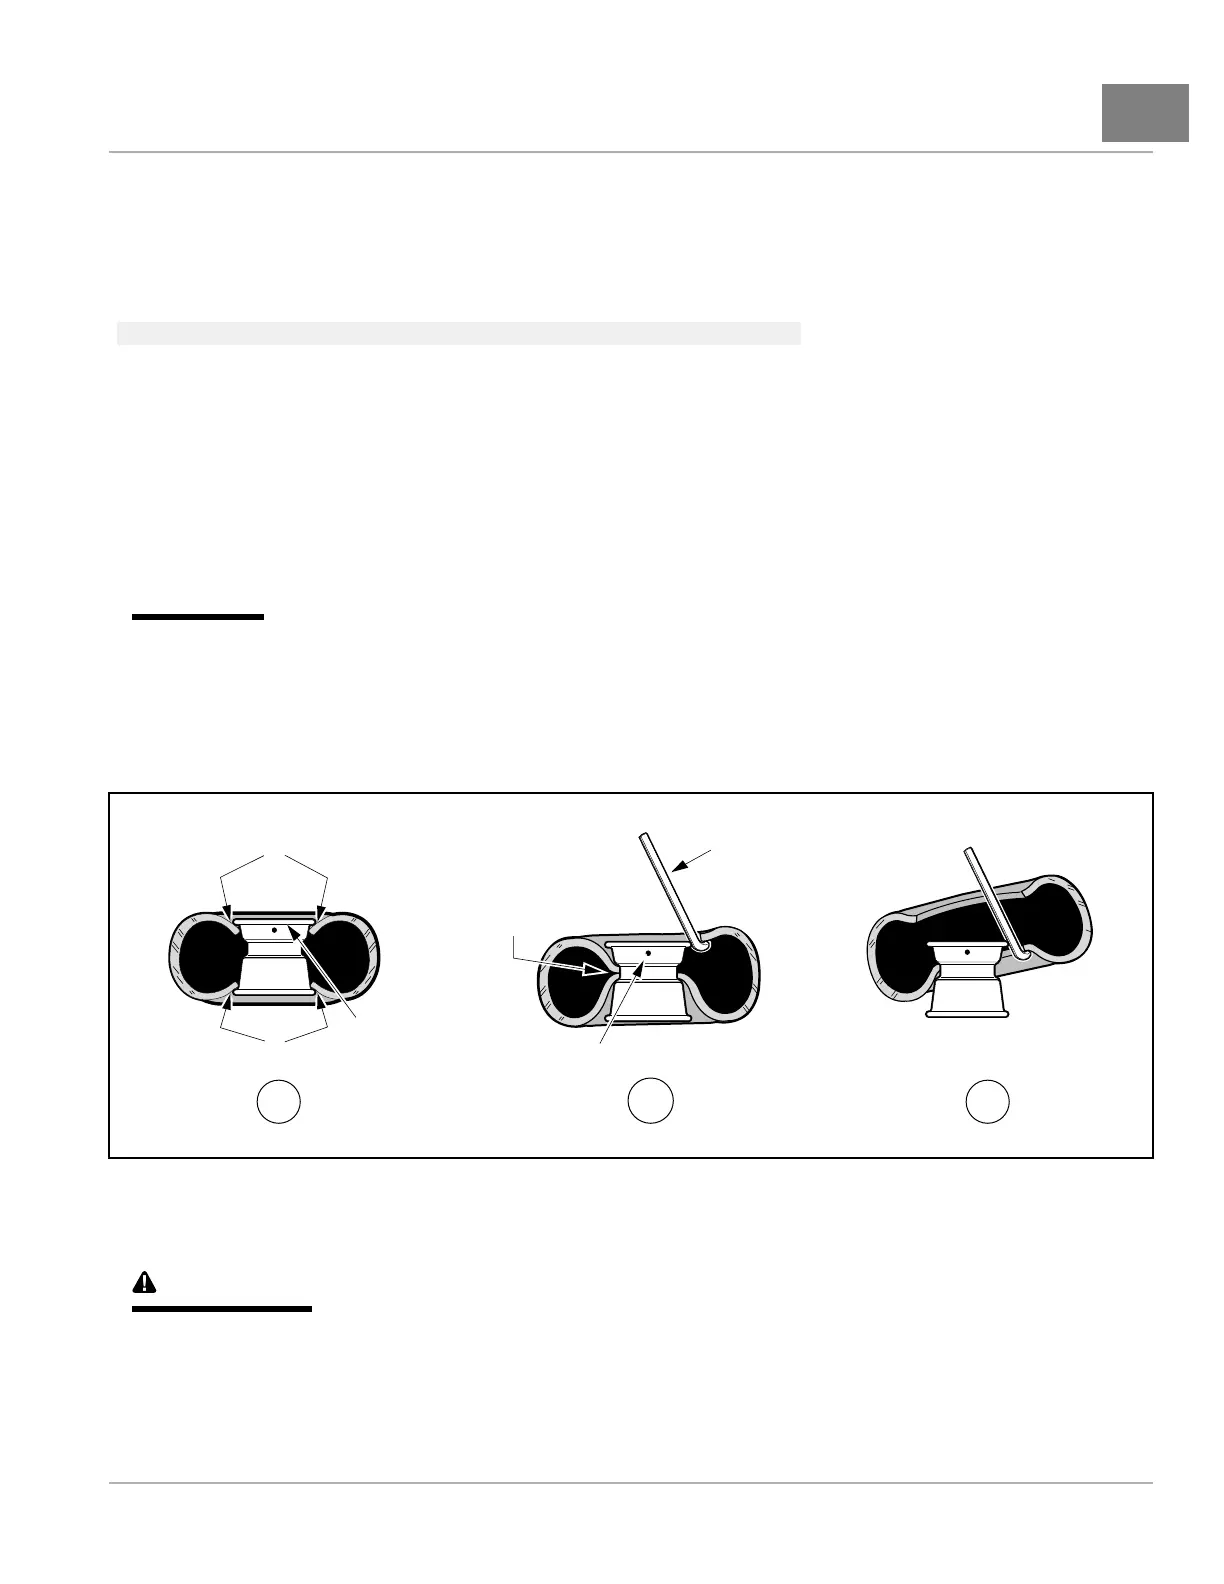
3.1.Ifatiremachineisnotavailable,loosenbothtirebeadsbyapplyingpressuretothetiresidewallsand
pushingthetirebeadawayfromtherimangeandintotherimwell(Figure8-2,Page8-3,DetailA).
3.2.Withthevalvestemsideofthewheelup,useatiretooltocarefullystarttheupperbeadovertheedgeof
therim(Figure8-2,Page8-3,DetailB).SeefollowingCAUTION.
CAUTION
•Toavoiddamagetothetire,donotuseexcessiveforcewhenstartingthebeadovertheedgeoftherim.
3.3.Whentopbeadisfreeoftherim,pullthebeadfromthebottomsideoftherimupintotheupperpartof
therimwell.Insertthetiretoolunderthelowerbeadasshown(Figure8-2,Page8-3,DetailC)and
carefullyprythelowerbeadovertherimange.
3.4.Oncethelowerbeadisstartedovertherimange,thetirecanberemovedfromtherimbyhand.
1.UpperTireBeads2.LowerTireBeads3.RimFlange4.TireBeadsPositionedInRimWell5.ValveStemSideUp6.TireTool
Figure8-2TireRemoval
TIREINSTALLATION
WARNING
•Whilemountingorinatingtire,keephands,ngers,etc.fromexposedareasbetweenthetirebead
andrim.
1.Cleanbothtirebeadstoremovedirtorotherforeignmatter.
2.Wherethetirebeadsseat,cleantherimwithawirebrush.Wipeawayanydebriswithacleancloth.See
followingNOTE.
2009-2012XRT950MaintenanceandServiceManualPage8-3
 Loading...