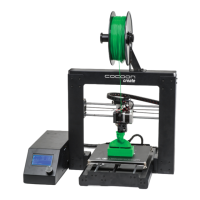
Setup
3.3 Removing Filament:
1. With the printer initialised, press the Navigation Dial to enter the menu system.
2. Navigate to, and select Quick Settings > Preheat PLA or Preheat ABS depending on the
material.
3. Wait for the 3D printer to automatically return to the home screen, after approximately 15-30
seconds.
4. Check the temperature of the Extruder and plate on the LCD. When the temperatures are
within a few degrees of the target, you are ready to remove the lament.
NOTE: Preheat PLA/Preheat ABS will still be shown, even after temperatures have been reached.
5. Depress the Extruder spring lever. Push down on the lament gently so that it starts to
extrude from the nozzle.
6. When lament is extruding, quickly, but gently pull the lament upward. If it is done correctly,
the end of the lament will pull out into a thin hair like strand.
NOTE: The aim is to sever the lament where is it soft (inside the nozzle). Swift upward action will
ensure that the lament does not cool down before exiting the nozzle inlet. If the lament gets stuck,
please see the troubleshooting section.
3.4 Storage:
Both PLA and ABS laments are sensitive to moisture. If stored in a humid environment, the quality
of the lament can deteriorate, with a tendency to bubble and spurt from the nozzle tip. This will
aect print quality, so when storing PLA or ABS for an extended period of time, follow these tips.
• Store in a sealed, air tight bag/container. We recommend a vacuum seal bag
• Store with a silica gel (moisture absorber) pack. One is included with each lament spool
4. Using the Micro SD Card
4.1 Loading les from your Computer:
1. Insert your MicroSD Card into a card reader or memory card slot and connect to your
computer (refer to your computer manual for further instructions if required)
2. The Micro SD Card will appear as a folder (refer to your computer manual for further
instructions if required)
3. Copy your converted GCODE les to the Micro SD card, then safely remove