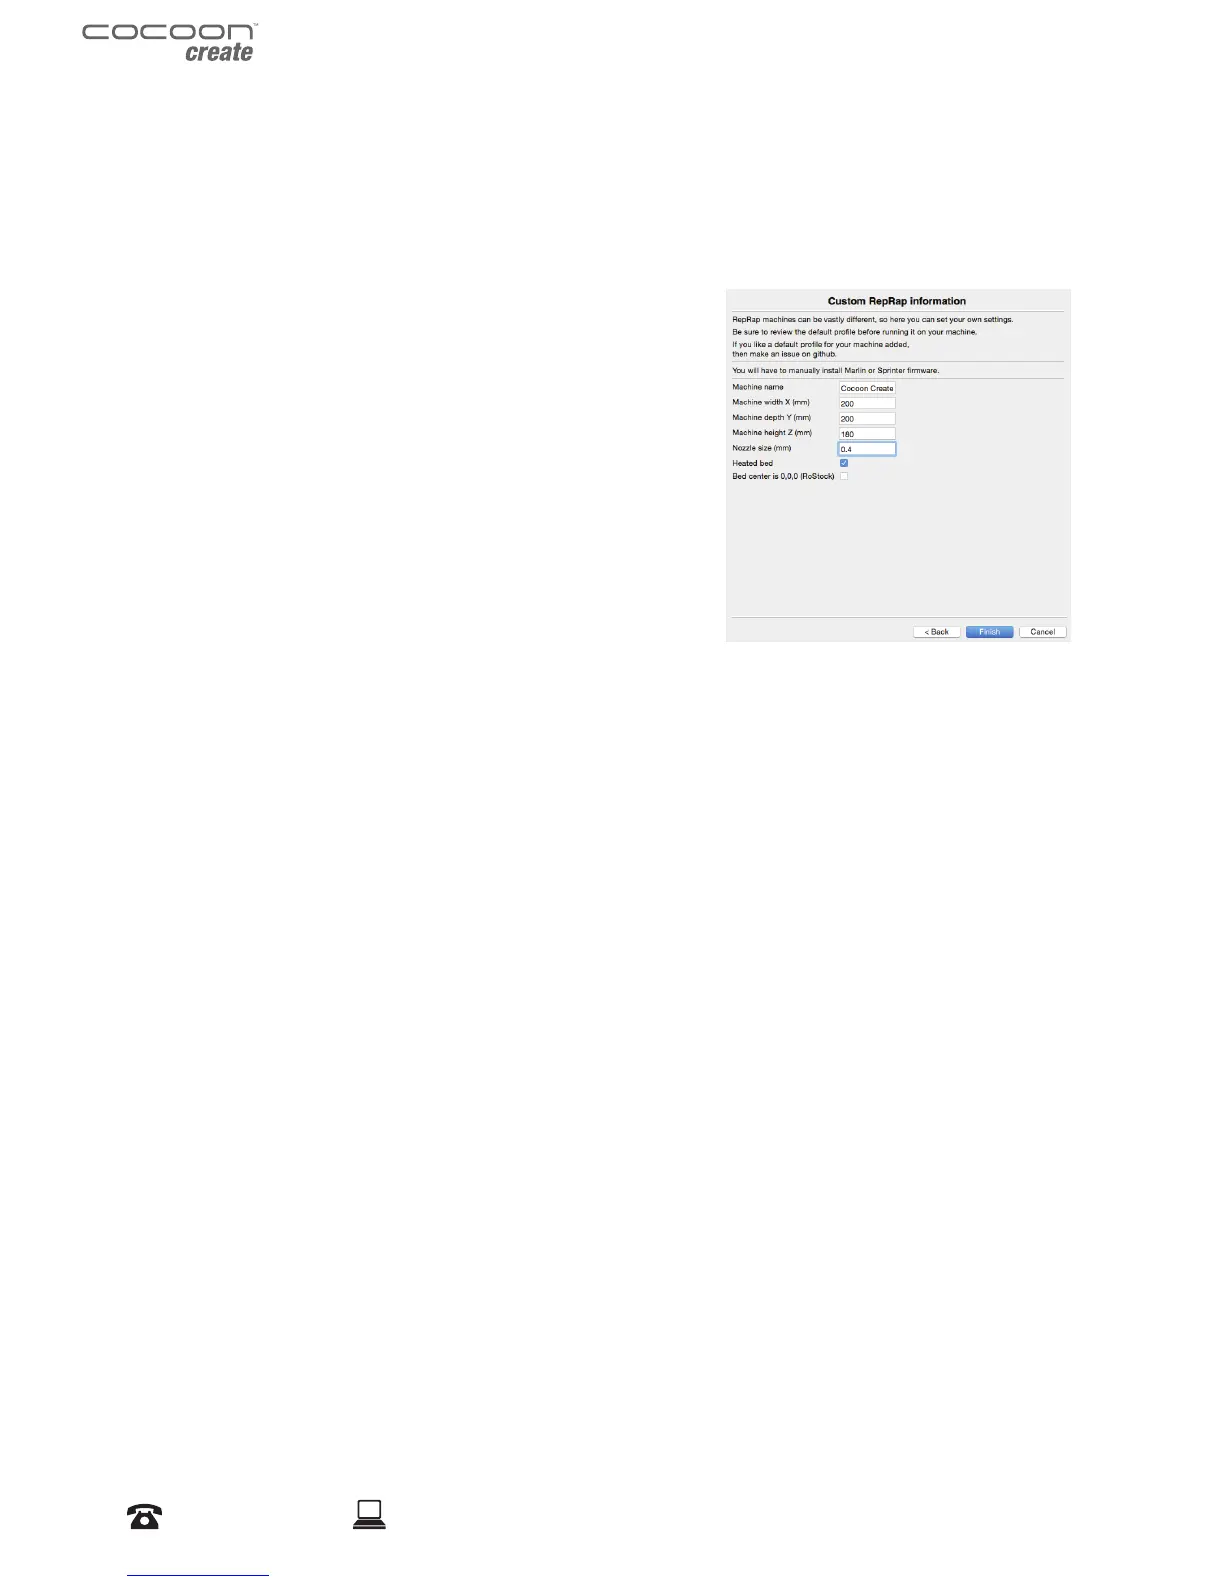
6.2 Adding your Cocoon Create 3D Printer to Cura
1. On rst launch, Cura will ask you to add a 3D printer. Alternatively, you can add a 3D printer
by selecting Machine > Machine Settings > Add New Machine
2. Select Other
3. Select Custom…
4. Enter Machine name as ‘Cocoon Create’, or your
desired name
5. Input Machine width and depth as 200
6. Input Machine height as 180
7. Change Nozzle size to 0.4mm
8. Ensure Heated Print Bed is ticked
9. Select ‘Finish’
6.3 Loading a 3D Design into Cura
1. Clear the platform using File > Clear platform…
2. Then, load your 3D Design le onto the platform using File > Load model le…
3. Load any le with the following extensions: .STL, .OBJ, .DAE, .AMF
TIP: You can load more than one le onto the platform. Cura will automatically move the
additional les to t.
NOTE: Files in grey are outside of the print area and need to be moved or scaled to t.
6.4 Viewing and Positioning your 3D Model in Cura
Changing the View:
• Zooming In/Out: Use the mouse scroll wheel
• Rotating the View: Hold down the right mouse button and move the mouse
Move Position:
Move your model to change where it is printed on the build plate. Do this by left clicking on the
model and dragging it to the desired location. The black outlined corner represents the lower left
hand corner of the Heated Print Bed on your printer.
Using Cura