PR120H
MECHANICAL MAINTENANCE
Version: 5
Page: 22 of 24
Date: 2022.12.13
Inspection and maintenance
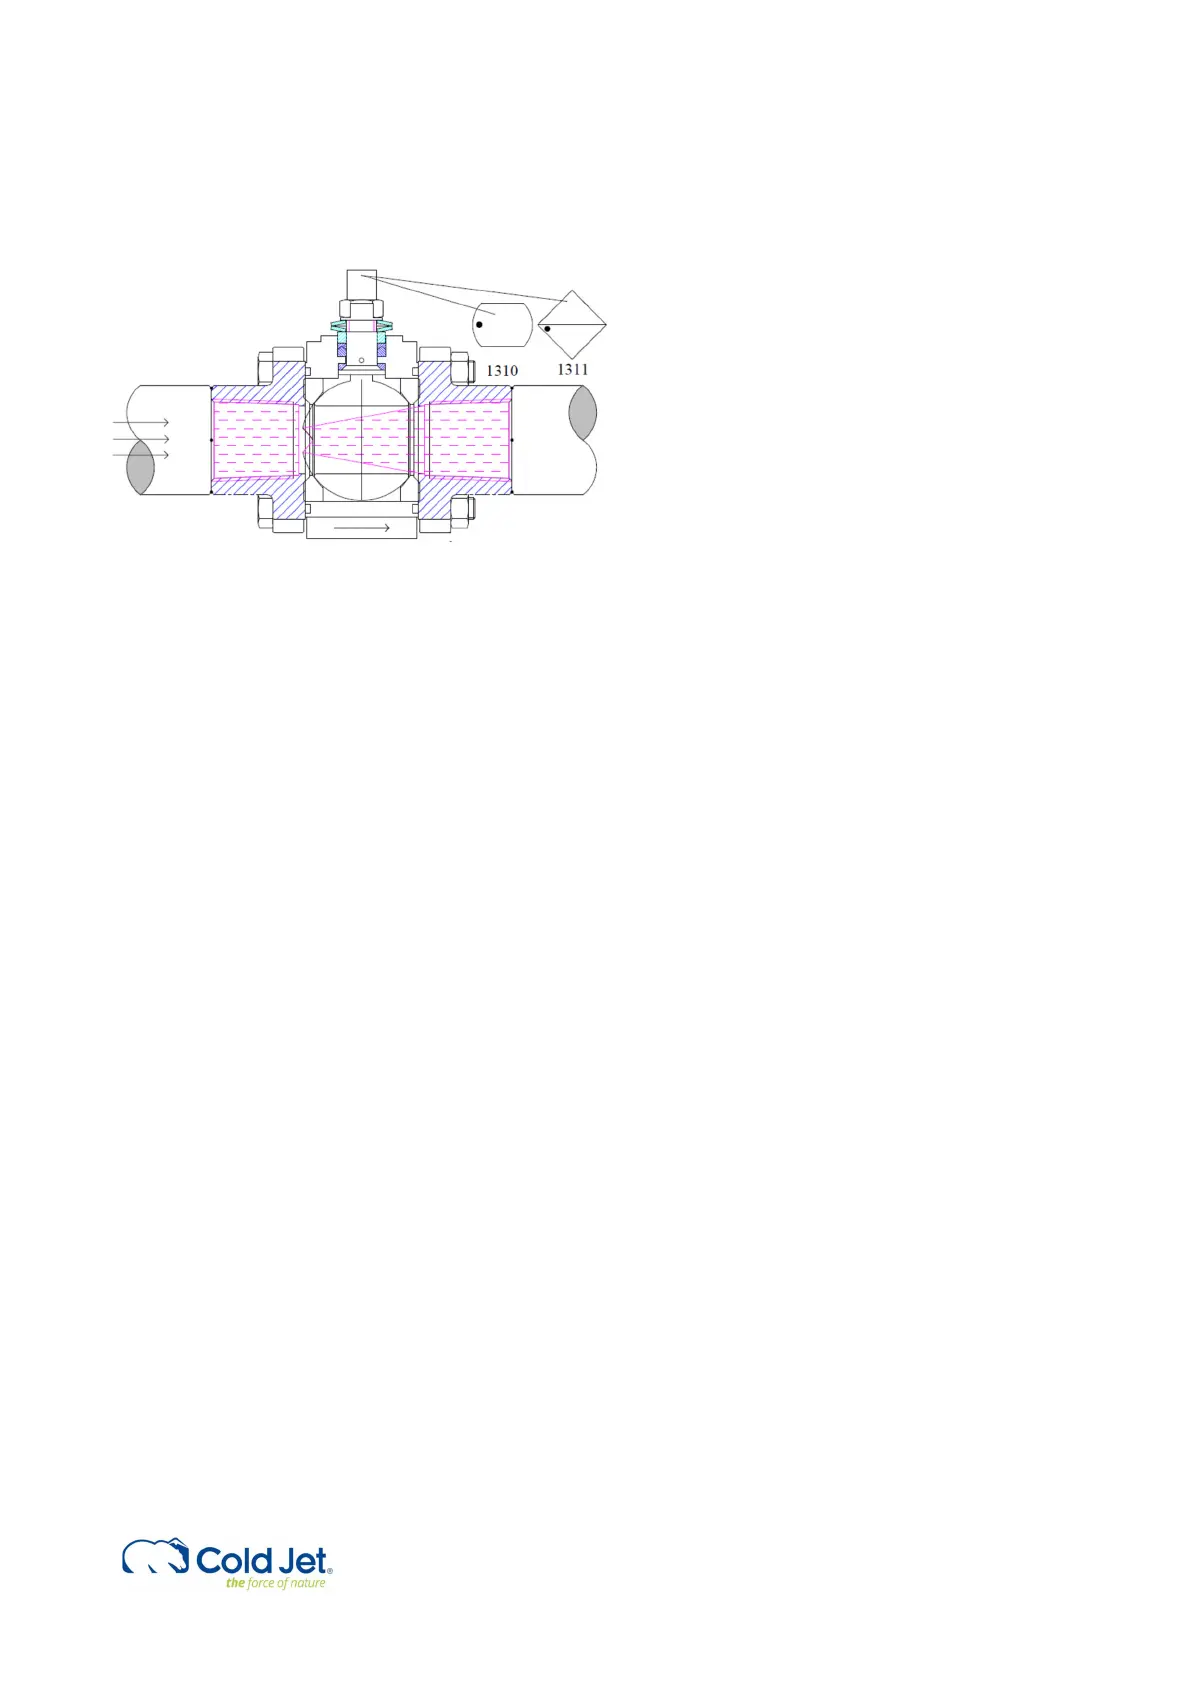
1. Inspect the components of the valve for wear or damage and replace where necessary
2. Replace: Seat [4], Joint Gasket [5], Stem Seal [7] and [8]
Assembly of the ball valve
Before beginning the assembly always check that all the o-rings and gaskets are compatible and are properly
housed in their lodgings, and all the components are greased correctly using standard commercial grease.
1. Refit the stem [6] in the valve body [1].
2. Fit the new stem seals [7], [8] and lock saddle [11] before tightening the nut [12] to the top of the
stem.
3. Refit the ball [3] in the body [6] ensuring that V-cut is facing in the output side of the flow direction.
4. The bore for pressure relief is to face the input side when the valve is closed.
5. Replace the seats [4] and joint gaskets [5] and mount the end caps [2] to the body and tighten the
bolts [16], [17] distributing the force evenly until the end cap is securely home. Caution should be
taken not to "pinch" the o-rings during this assembly procedure.
Note: The position of the V-port is marked on top of the stem
Reinstall the valve unit
Install the complete valve unit [1.2] by tightening the 4 screws [1.4]. Connect the flexible hose [1.7] and plug
in the electrical connection and the pneumatic tube [1.1] for the actuator.
Note: Inspect for leaks during production start.