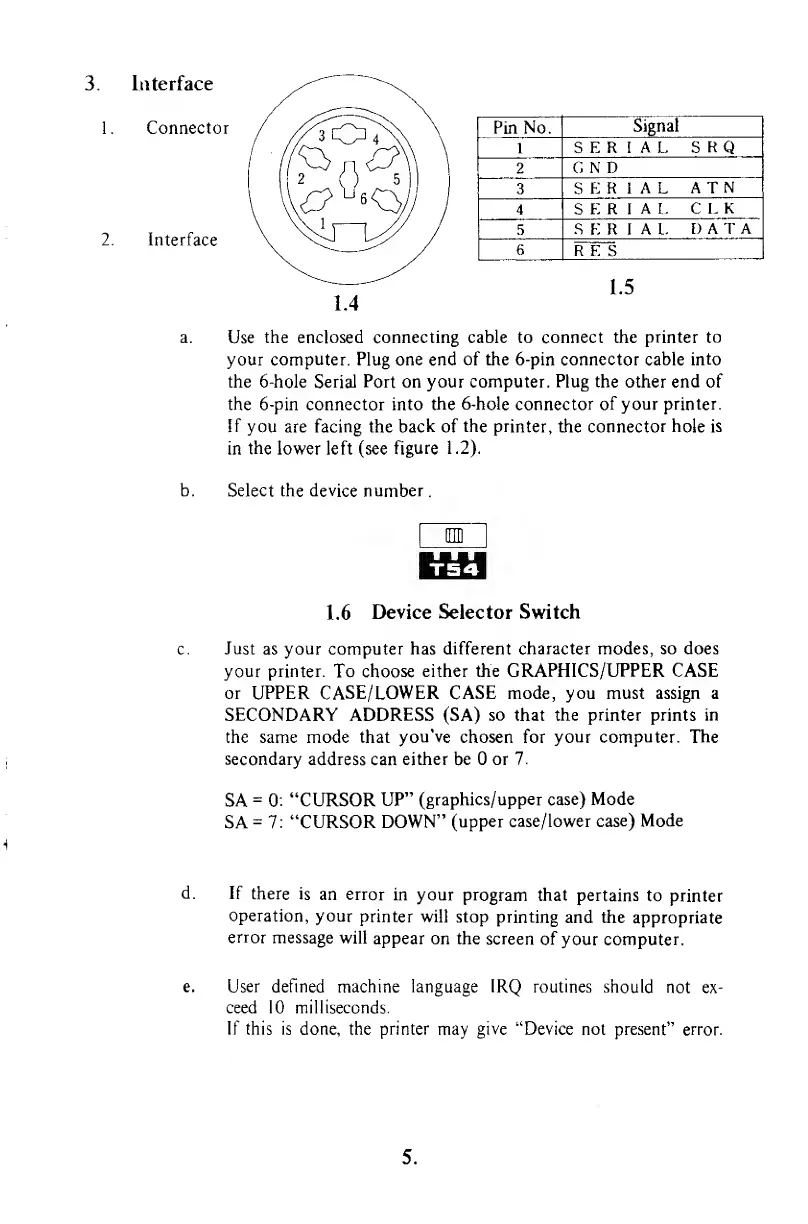
3. Interface
Connector
Interface
Pin No.
Signal
l
SERIAL
SRQ
2
G
N D
3
SERIAL
ATN
4
SERIAL
CLK
5
SERIAL.
DATA
6
RES
1.5
a.
Use
the enclosed connecting cable to connect the printer to
your computer. Plug one end of the 6-pin connector cable
into
the
6-hole Serial
Port on your computer.
Plug
the other end of
the 6-pin connector into
the 6-hole connector of your printer.
If
you are facing the
back
of
the
printer,
the
connector hole is
in
the
lower left (see
figure
1.2).
b.
Select
the
device number
.
1.6
Device Selector Switch
Just
as your computer has
different character modes, so does
your printer.
To choose
either the
GRAPHICS/UPPER
CASE
or UPPER CASE/LOWER CASE mode, you must assign a
SECONDARY
ADDRESS
(SA)
so
that
the printer prints in
the same mode that
you've
chosen for
your computer. The
secondary address
can
either be or
7.
SA
=
0:
"CURSOR
UP"
(graphics/upper case)
Mode
SA
=
7:
"CURSOR DOWN"
(upper case/lower
case) Mode
If
there
is
an error
in your
program
that pertains
to
printer
operation,
your
printer will
stop
printing
and the
appropriate
error
message
will
appear on the
screen
of
your computer.
User defined
machine
language IRQ routines
should
not ex-
ceed 10 milliseconds.
If this is done,
the
printer
may
give "Device
not present"
error.
5.