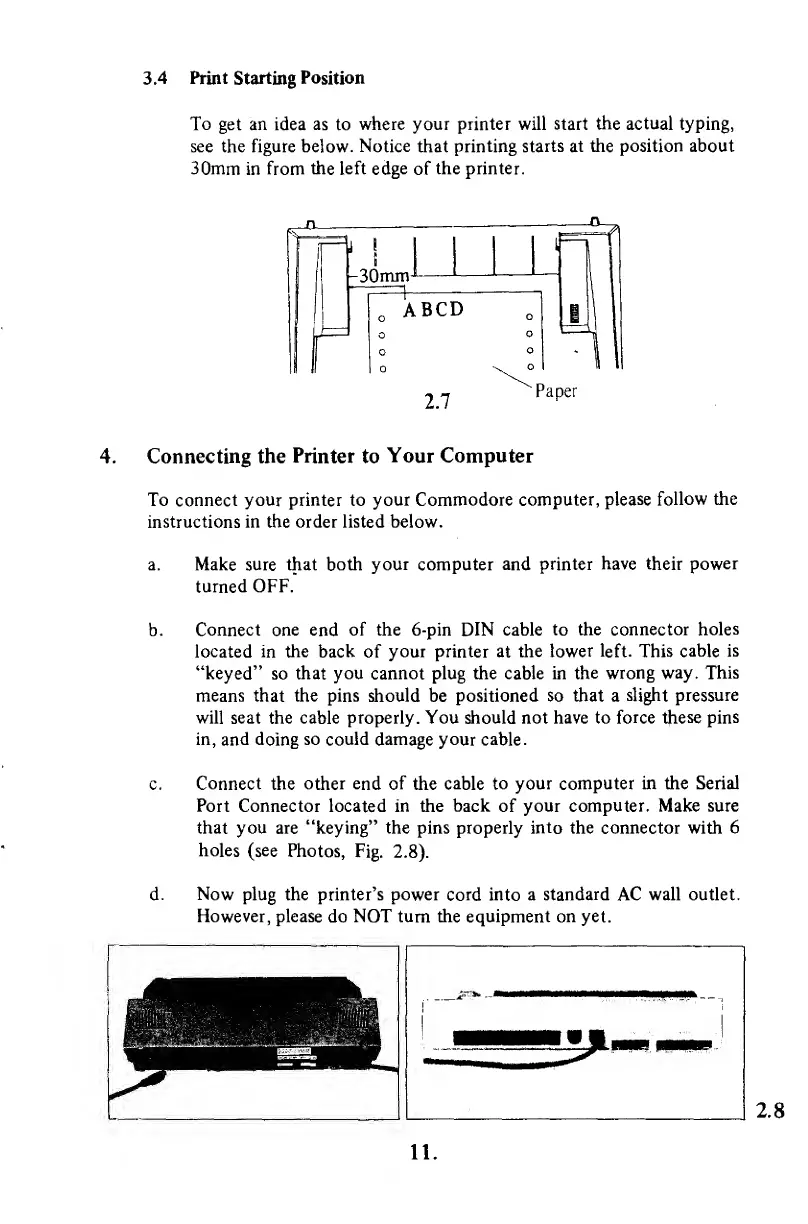
3.4 Print Starting
Position
To
get an idea
as
to
where your printer will start
the actual
typing,
see the figure below.
Notice
that
printing starts at the position about
30mm
in
from
the left
edge
of
the printer.
^°
—
(.!
.
I
fn
^UTTtrn
1
L
o
ABCD
ll
o
o
o
o
\
°
-
11
2.7
Paper
4. Connecting the
Printer
to
Your Computer
To connect your printer to
your Commodore computer,
please
follow the
instructions in the order listed below.
a. Make
sure
that both
your
computer
and printer
have their power
turned
OFF.
Connect one end
of the 6-pin DIN cable
to the connector holes
located in the back
of
your printer at the
lower left.
This
cable
is
"keyed"
so
that you cannot plug the cable in
the wrong way.
This
means that the pins should
be
positioned so that a
slight
pressure
will seat the cable properly. You should not have to
force these pins
in,
and doing
so could
damage your cable.
Connect
the
other end of
the
cable to
your computer in the Serial
Port
Connector located in the
back
of
your computer. Make sure
that you are "keying" the pins properly
into
the connector with 6
holes
(see
Photos,
Fig.
2.8).
Now
plug the printer's power
cord into
a standard
AC
wall outlet.
However, please
do
NOT turn the equipment on yet.
2.8
11.