Maintenance work to be completed every 24 months
48 A190-930TX_EN_03_ 2009-02-06
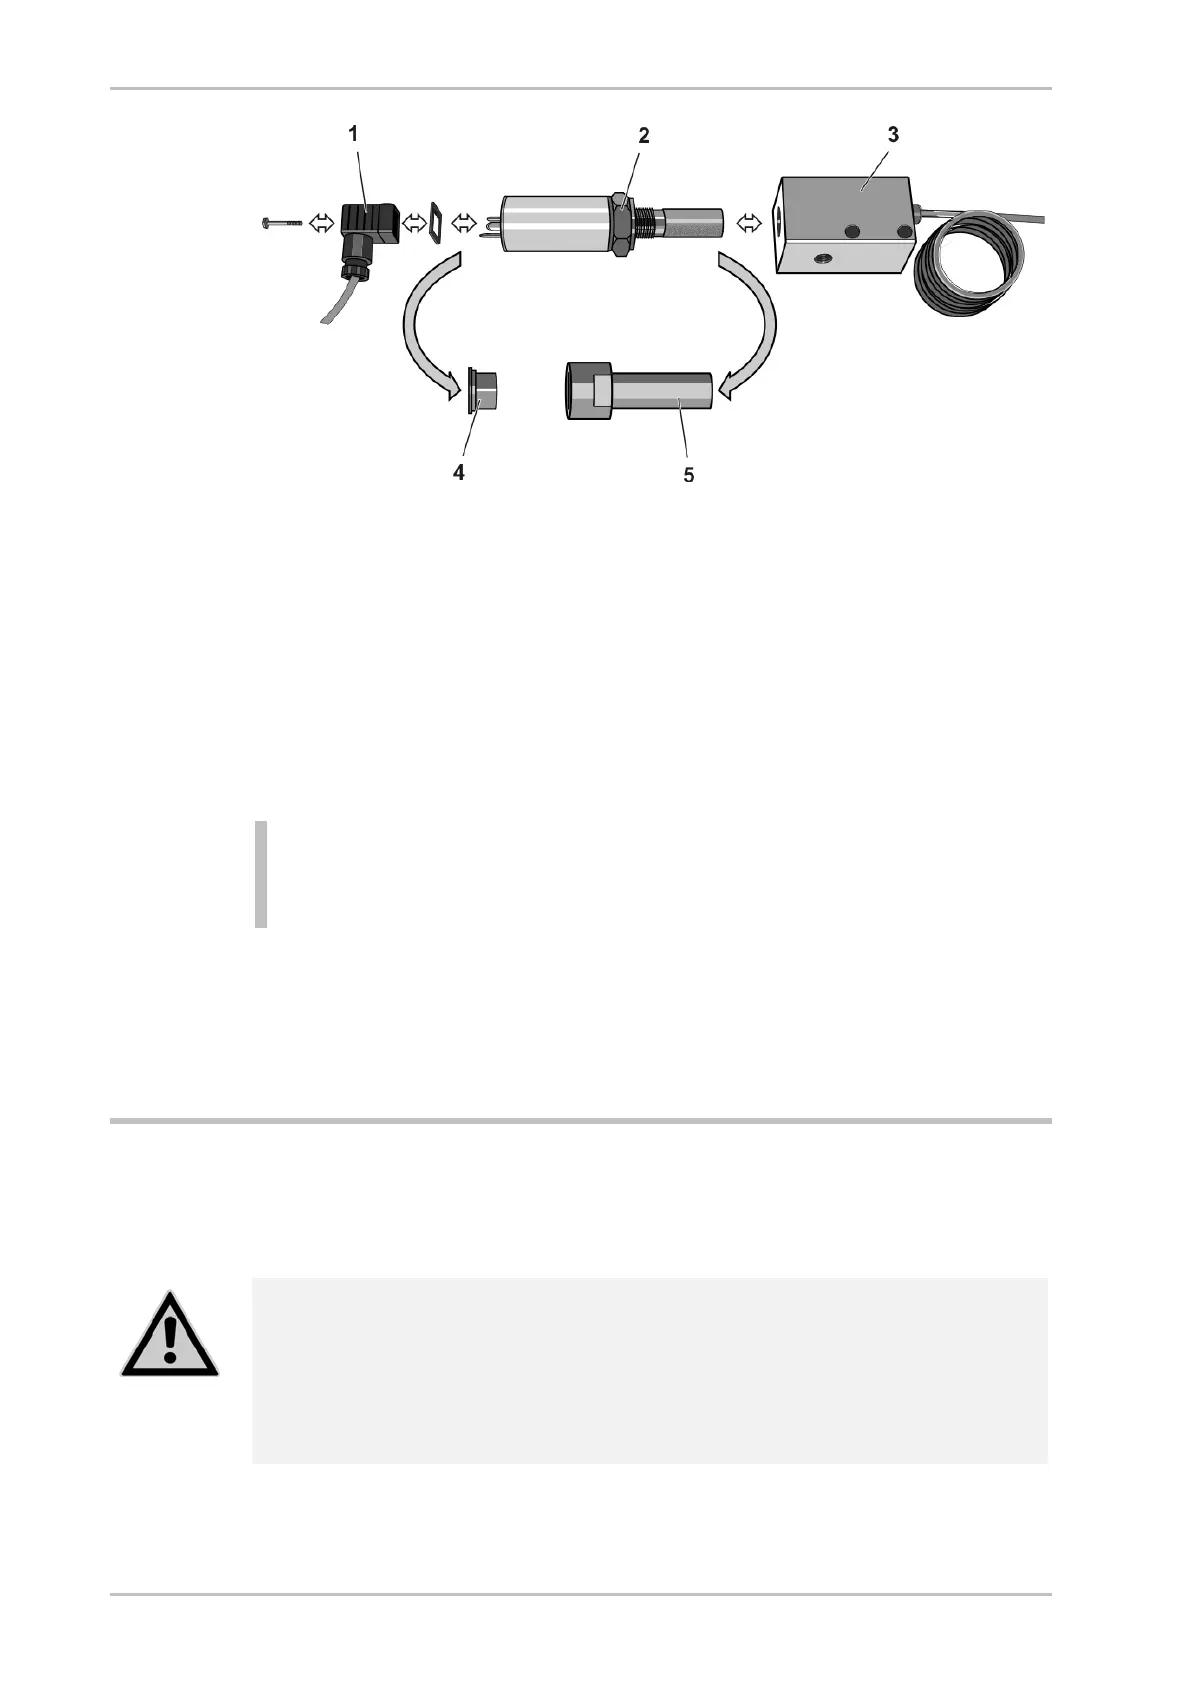
Installing / dismantling pressure dewpoint sensor
► Loosen the screw at the adapter (1) and disconnect signal cable with the
adapter and seal.
► Remove dewpoint sensor from the sensor cell (3) by turning the nut (2).
► Take the new dewpoint sensor (2) from the box, remove the protective caps
(4, 5) and screw it into the sensor chamber (3).
► Place seal onto sealing face; connect adapter (1) and secure it by tightening
the screw.
► If no other maintenance work is to be carried out: Restart the dryer (see
page 41).
Note:
For posting, the dewpoint sensor must be equipped with protective
caps and placed in a solid box.
► Place the protective caps (4, 5) onto the old dewpoint sensor and pack it
properly in the box.
► Send the old dewpoint sensor to the manufacturer.
Maintenance work to be completed every 24 months
Service expansion valves
Replace the seals of the expansion valves every 2 years, even if there is no sign
of wear or damage. Please observe the following general safety instruction:
Risk of serious injury when removing the valve hood!
The hood is equipped with springs that are under pressure. If removed
incorrectly, the hood might be propelled at high velocity.
If an expansion valve is defective, return it to the manufacturer for repair,
as he has suitable tools to open the device. Alternatively, order a new
expansion valve.