32
COVER THE AIR END INLET PORT TO
PREVENT FOREIGN MATTER FROM
ENTERING THE CYLINDER.
4. Using a flat bladed tool remove the valve
plate seal ring (o-ring) retaining ring.
Remove the seal ring. Discard seal ring.
5. Lift and remove the valve plate as-
sembly and spring from the valve body.
6. Using the correct size socket wrench
unthread and remove the piston
retaining cap from the valve body.
7. Lift and remove both piston springs (one
large, one small) from the valve body.
8. Lift and remove the operating piston
assembly from the valve body. Remove
the piston seal ring (o-ring) from the
piston.
9. Thoroughly clean all parts. Make certain
the air passage in the valve body and
the air holes in the piston assembly are
clean.
10. Inspect all parts for wear or damage.
(Chipped, score marks, etc.) Replace
worn or damaged parts as required.
If the valve plate assembly must be
disassembled to replace parts, etc., continue
with Step 11. If the valve plate assembly is
suitable for reuse, proceed to Step 12.
11. To disassemble the valve plate
assembly proceed as follows:
a. Clamp the piston section of the plate
assembly in a soft (wood, brass) jaw
vise.
b. With he correct size hexagon
socket head capscrew (allen)
wrench unthread the valve plate
retaining capscrew from the piston.
c. Remove the valve plate and spacer
from the piston.
d. Reassemble in reverse order. Make
certain that the spacer is in place
and that the socket head capscrew
is securely tightened.
12. Install a new o-ring seal on the operating
piston.
13. Lubricate the piston o-ring seal and
piston bore with a silicone lubricant.
(Suggest Dow corning 55M or
equivalent).
14. Install the operating piston into the valve
body bore. Take care not to cut or
deform the o-ring seal.
15. Install the two operating piston springs
into the valve body.
16. Coat the threads of the piston (spring)
retaining cap with Locktite 271 or
equivalent. Thread the retaining cap into
the valve body and tighten securely.
17. Coat the valve plate assembly piston
and valve body bore with silicone
lubricant (suggest Dow Corning 55M)
and install the spring and valve plate
assembly into the valve body.
18. Install the valve plate seal in the valve
body. Make certain that the seal ring is
firmly seated in the groove. Reinstall the
seal retaining ring.
19. Using a new gasket, install the intake
valve on the air end. Tighten the
attaching capscrews securely.
20. Reinstall the air cleaner assembly on the
intake valve.
21. Reconnect all control air lines to the
intake valve. Tighten all fittings securely.
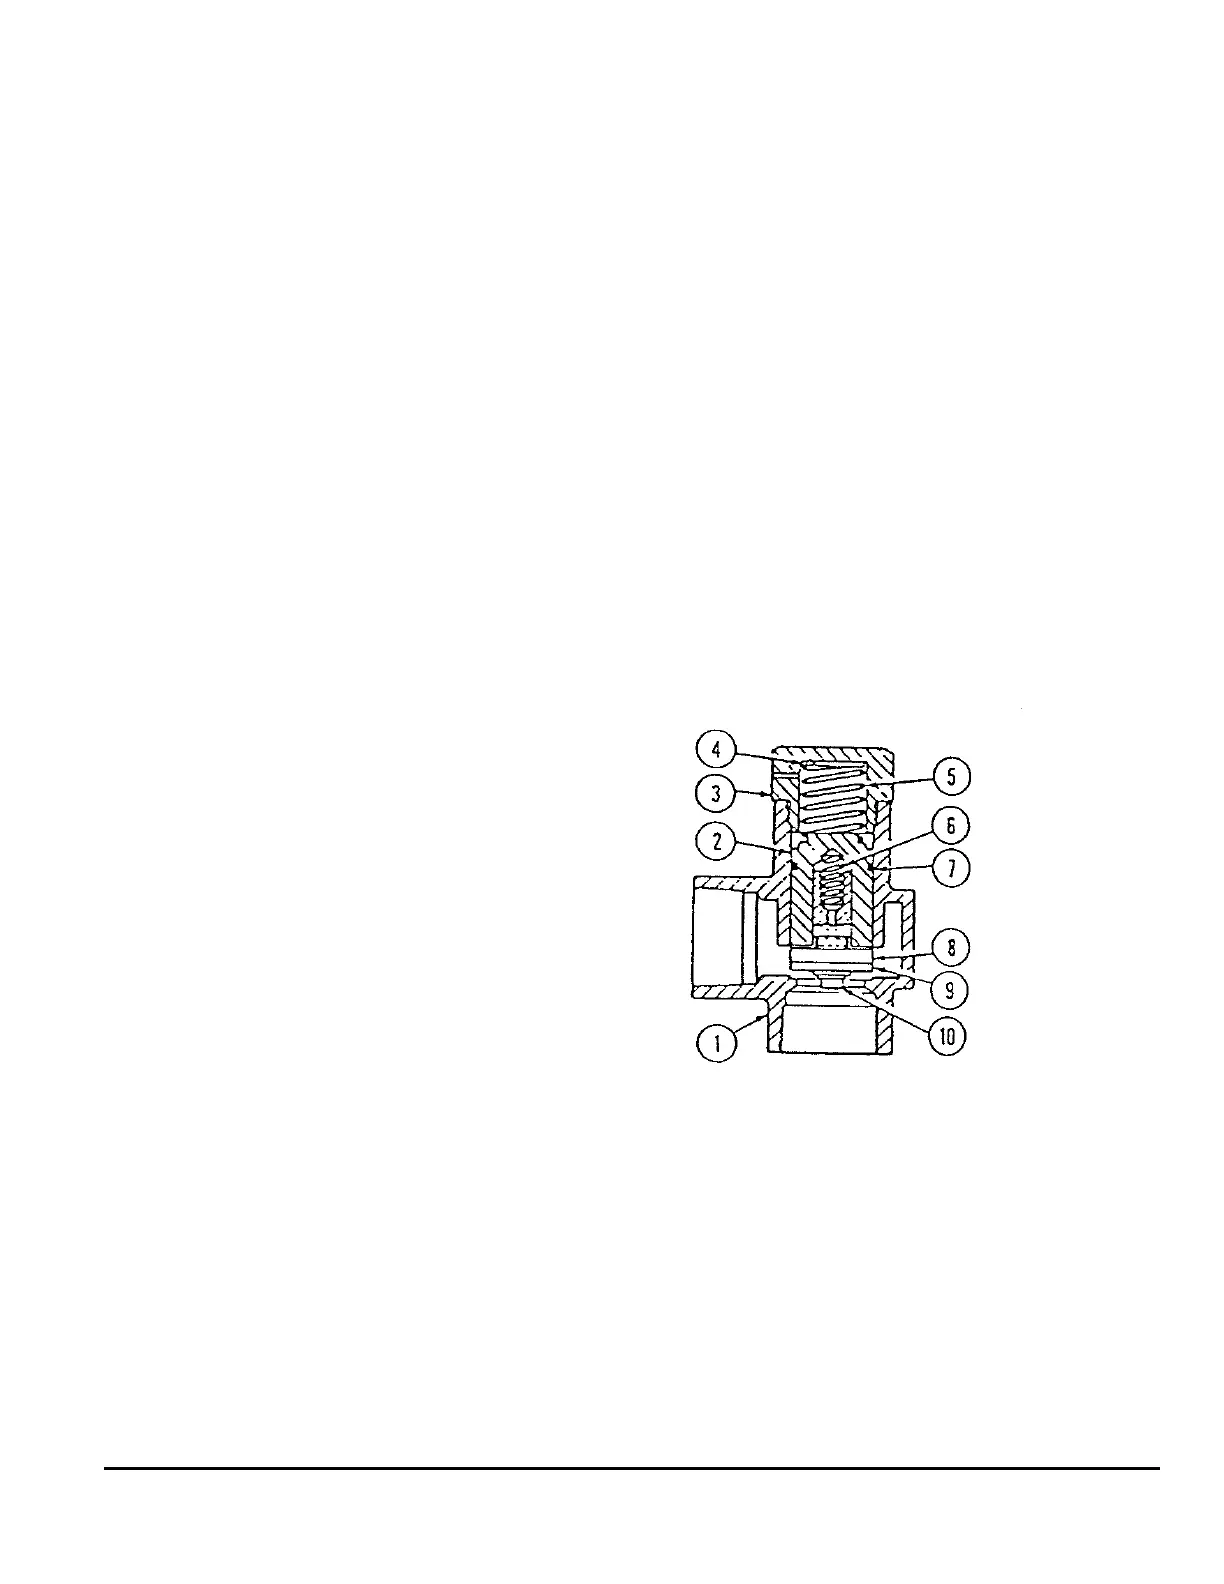
FIGURE 13
MINIMUM PRESSURE/CHECK VALVE
1. Valve Body
2. Piston
3. Cap
4. Shim
5. Large Spring
6. Small Spring
7. Seal
8,9,10. Valve Assembly
MINIMUM PRESSURE/CHECK