42 43
FEATURES
C
ONTOUR
®
NEXT ONE blood glucose monitoring system
View Target Ranges
WARNING
Discuss your Target Range settings with your health care
professional.
When the Meal Marker feature is On, your meter displays
a Fasting, Before Meal, After Meal, and Overall
Target Range. You can change these ranges only in the
C
ONTOUR
IABETES app.
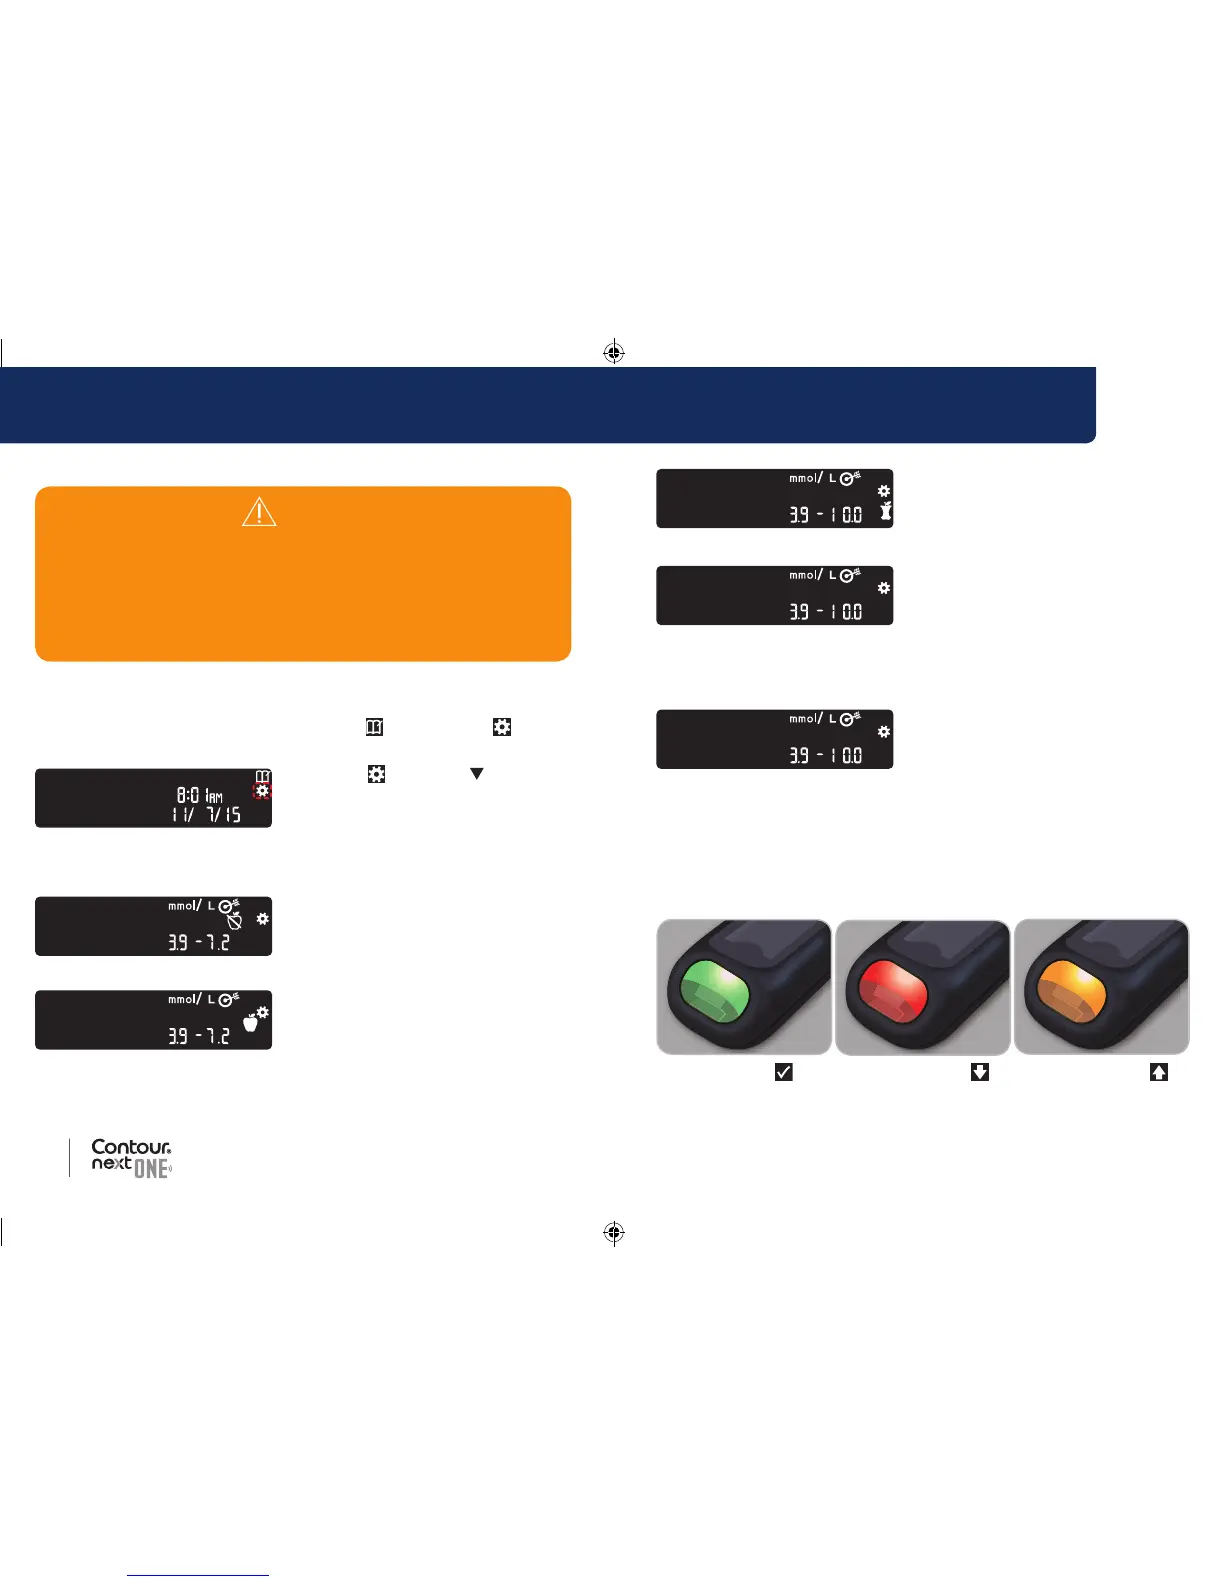
If your meter is not ON:
1. Press and hold the OK button until the meter turns on.
The Home screen has 2 options: Logbook
and Settings .
2. To highlight the Settings
symbol
, press the button.
3. When the Settings symbol is
blinking, press the OK button to
enter Settings.
4. Continue to press the OK button until you see the Fasting Target
Range screen below.
5. To move to the next Target
Range, press the OK button.
The meter displays the Before Meal Target Range.
6. To move to the next Target
Range, press the OK button.
The meter displays the After Meal Target Range.
7. To move to the next Target
Range, press the OK button.
The meter displays the Overall Target Range.
8. To move to the next screen, press
the OK button.
When the Meal Marker feature is Off, your meter displays the Overall
Target Range.
You can change this range only in the
C
ONTOUR DIABETES app.
9. To move to the next screen, press
the OK button.
The meter displays the Target Lights screen.
Set Target Lights (smartLIGHT)
Your meter comes with the Target Light setting turned ON.
When this feature is On, the test strip port on your meter displays a
Target Light in a colour that corresponds to your test result.
In Target Below Target Above Target
85096877_CntrNxtONE_UG_EN.indd 42-43 9/21/16 3:47 AM