1-1
1010PVNFM-3ASection 1
1. GETTING STARTED
1.1 INTRODUCTION
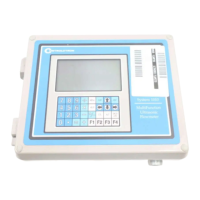
Congratulations on your purchase of the System 1010PVN Permanent Flowmeter. Intended
for dedicated applications, this versatile transit-time meter is easy to set up and operate. The
1010 meter represents the state-of-the-art in computerized instrumentation. We are confi-
dent that in a very short time, you will appreciate its unrivaled performance and features;
especially Controlotron’s ground breaking enhanced transit-time Digitally Coded MultiPulse™
technology and the on-line automatic and interactive site setup help facility. This manual
covers single channel and dual channel/path meter types.
This section shows how to install the System 1010PVN Permanent flowmeter with a minimum
of effort. It will show how to use the Installation Menu to set up the system for transit-time
and Clamp-on operation. It also shows the basic connections to and from the meter. For addi-
tional information on connections, see the drawings at the end of manual.
1.2 IMPORTANT SAFETY CONSIDERATIONS
The System 1010PVN Permanent meter operates from either an external AC or DC power
source. Please observe all the electrical safety codes, etc., that apply to your application. We
recommend that only experienced personnel with knowledge of local electrical codes and
safety operating procedures perform the installation and wiring. It is solely the user’s respon-
sibility to operate this equipment safely. Controlotron cannot accept responsibility for any
damage that may occur due to failure to observe any local safety rules.
If this equipment is used for a hazardous application (high line pressure, hostile liquid charac-
teristics, perilous atmosphere, etc.), the end-user must ensure that only properly trained per-
sonnel are involved in its installation and operation.
Please do not let the size of the Installation Menu intimidate you. Almost all menu cells al-
ready contain default parameters. To begin operation, you only need to access the menu cells
that control a required parameter, such as the pipe outer diameter. You will see that by ac-
cepting most defaults, you can set up the meter in about five minutes.
1.3 FLOWMETER INSTALLATION STEPS
Typical steps to complete the installation procedure.
• Collect the site data (pipe and liquid data, part numbers, etc.)
• Choose a mounting location for the flow computer and transducers.
• Mount the flow computer at the selected location.
• Prepare pipe for transducer mounting.
• Access the Installation Menu and create a site (see paragraph 1.7.3).
• Enter pipe parameters (see paragraph 2.2).
• Invoke transducer install procedure (see paragraph 2.4).
• Mount transducers on pipe and connect to flow computer (see Section 3).
• Complete transducer install menu operation (see paragraph 2.4).