May 2009 | Revision 6.0
4-2
CHAPTER 4.0 | DRIP PAN ACCESSORY INSTALLATION
4.2 Installation instructions
1. Take one (1) of the guides (item D) and join it with the drawer glide (item C - “C” shape)
using three (3) of the countersunk screws (item E)
2. Using the sheet metal screws (item F), screw the guides into the bottom of the Adaptis
cabinet below the base. Note that this operation may require tilting the unit slightly to
gain access. Exercise caution here and ensure the unit door is locked. (See figure 4.3)
3. The other two drawer glides (“Z” shape) must now be screwed into the bottom flange
of the drip pan base (item B). (See figure 4.4)
4. Using the sheet metal screws (item F), screw the guides into the bottom of the Adaptis
cabinet below the base. Note that this operation may require tilting the unit slightly to gain
access. Exercise caution here and ensure the unit door is locked.
5. The other two drawer glides (“Z” shape) must now be screwed into the bottom flange
of the drip pan base (item B).
6. Insert the drip pan (item A) into the base (item B).
7. Slide the drip pan into the glides. (See figure 4.5 for the complete drain pan installation.
For inspection, slide the drip pan toward the outside of the unit and inspect the level
and cleanliness of water. If necessary, remove the drip pan (slide all the way to the front,
and then tilt it upwards slightly), drain it and clean it using non-abrasive detergents.
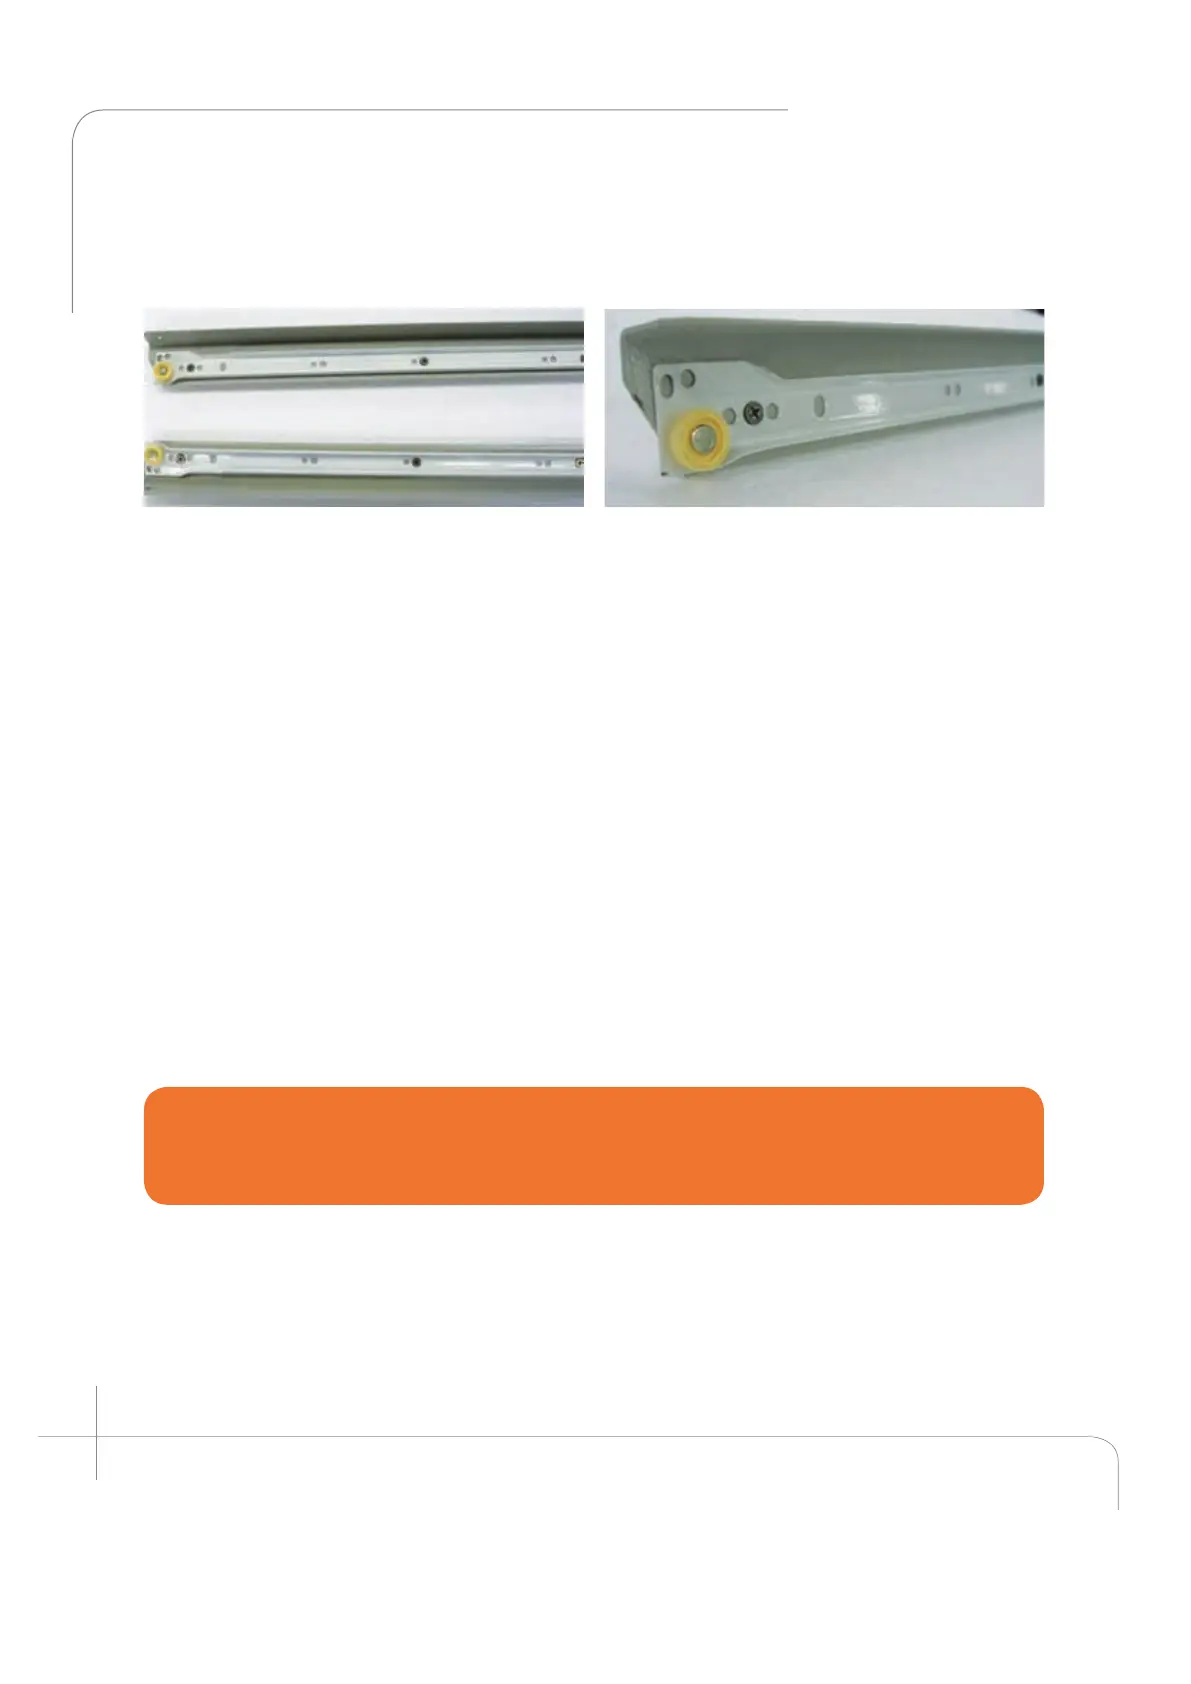
Figure 4.2: The glide’s wheel must be installed
toward the guide’s end.
Figure 4.1: : The two “C” shaped glides must be
installed with three countersunk screws.
 Loading...