Types VW and VWV Maintenance Instructions
10
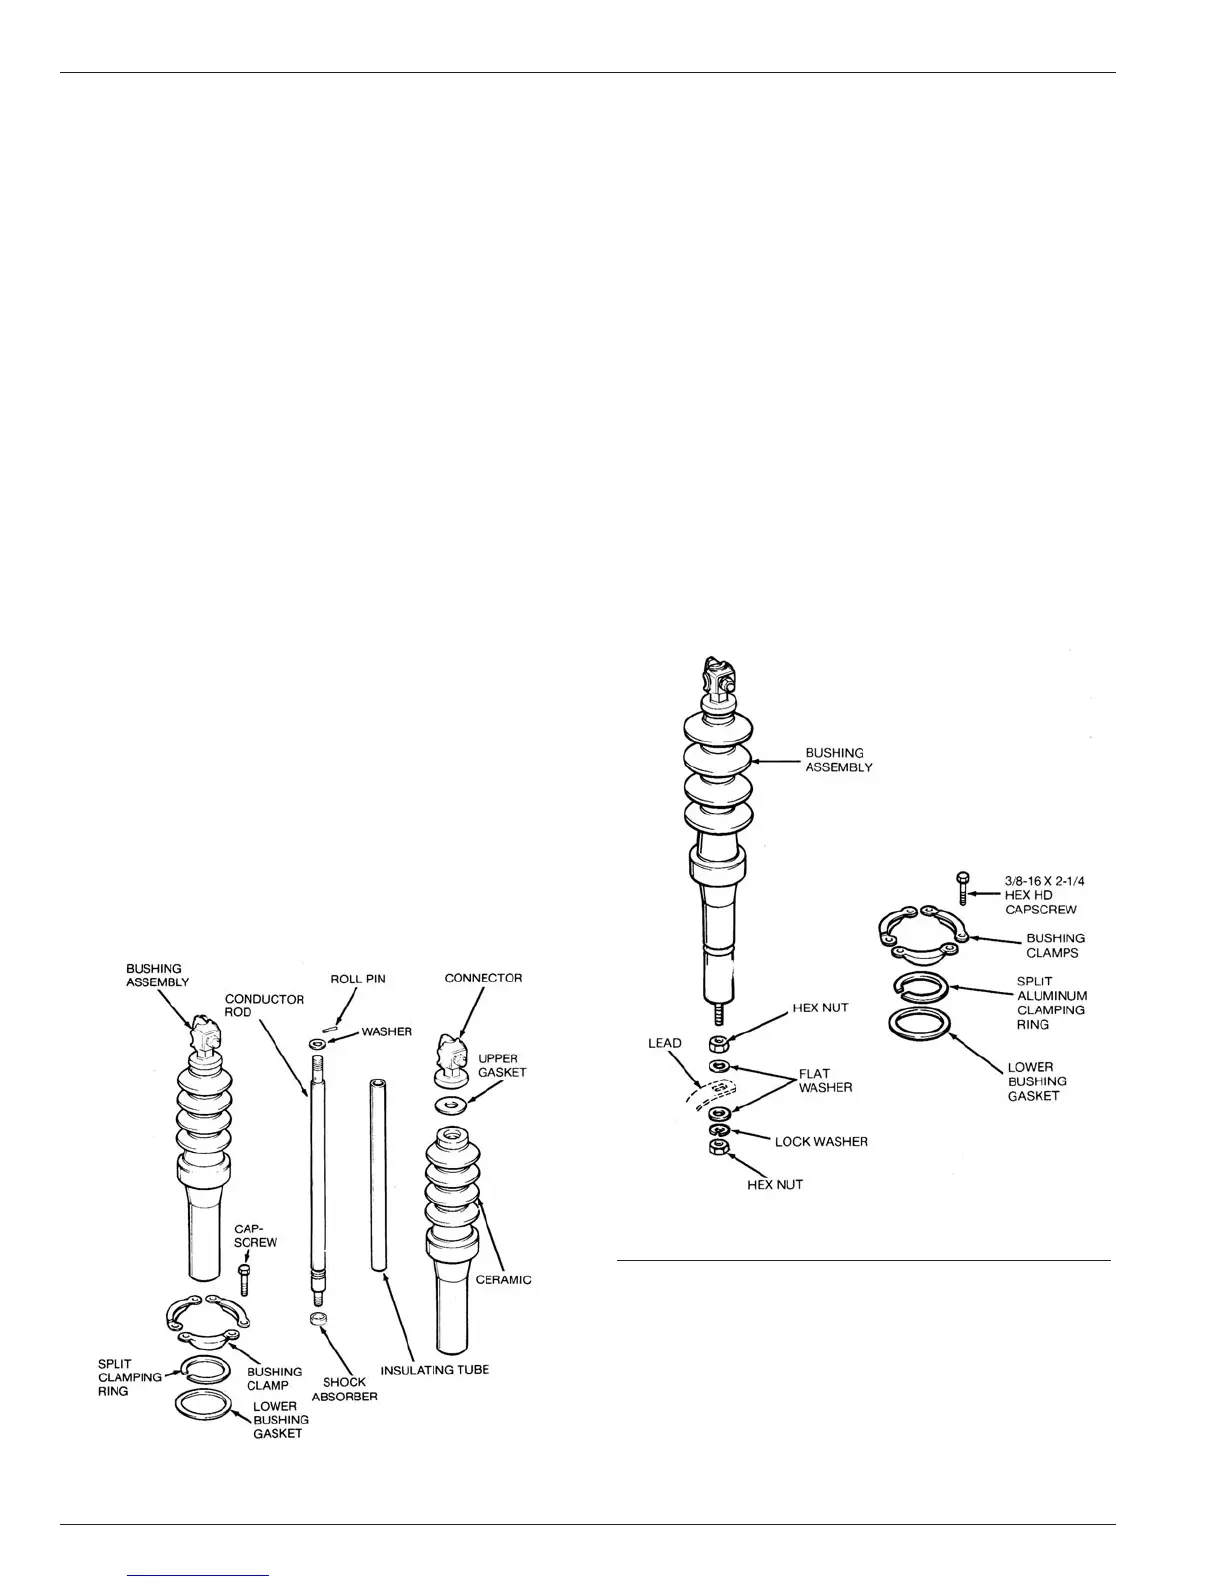
5. Using a new gasket, install new porcelain over bushing rod
and into the head. Make sure roll pin, on end of the rod, is
seated into locking groove at the top of porcelain.
6. Position clamping ring with split centered between the two out-
side clamping bolts.
7. Reassemble bushing to head casting with bushing clamps.
Tighten clamping bolts evenly, a little at a time, to 10-15 ft-lbs
torque.
NOTE: Clamping forces must be applied gradually and equally in
rotation to each bolt. This results in an evenly distributed gasket seal-
ing pressure.
8. Install a new terminal gasket and reassemble terminal to bush-
ing rod, tighen to 35 ft-lbs torque.
NOTE: Apply a very small amount of petroleum jelly to the knurled
surface of the inside face of the terminal before assembling the ter-
minal to the bushing rod.
Replacing the Bushing with the
Recloser Untanked.
Refer to Figure 14 and proceed as follows:
1. Loosen terminal.
2. Disconnect bushing lead from bottom end of bushing rod.
3. Remove three hex head capscrews and clamps that
secure bushing to head and lift out complete bushing
assembly.
4. Remove and discard lower bushing gasket.
5. The complete bushing assembly can be replaced or new
porcelain only can be installed depending upon the extent of
damage. If new porcelain only is to be installed, proceed as
follows:
A. Unscrew bushing terminal and withdraw the rod from bot-
tom of porcelain; discard terminal gasket.
B. Insert rod assembly all the way into the new porcelain,
making sure roll pin is seated in the locking groove in top
of bushing.
C. Assemble terminal to bushing rod using a new terminal
gasket; loosely tighten.
NOTE: Apply a very small amount of petroleum jelly to the
knurled surface of the inside face of the terminal before assem-
bling the terminal to the bushing rod.
6. Twist off the split aluminum clamping ring from old bushing
and install on new bushing, if it is in good condition; replace
if damaged.
NOTE: The clamping ring cushions and distributes the pressure
between the porcelain and the clamps. DO NOT OMIT.
7. Install bushing assembly (new or reworked) into head using
a new lower bushing gasket.
8. Position clamping ring with split centered between the two
outside clamping bolts.
9. Reassemble bushing to head casting. Tighten clamping bolts
evenly, a little at a time, to 10-15 ft-lbs torque.
NOTE: Clamping forces must be applied gradually and equally in
rotation to each bolt. This results in an evenly distributed gasket
sealing pressure.
10. Tighten terminal to 35 ft-lbs torque.
11. Reconnect the lead to the bushing rod.
TYPE VWV27 and VWV38 BUSHINGS
The bushings used on Type VWV27 and VWV38 reclosers are
oil-filled. The special fixtures and procedures required to assem-
ble these bushings is beyond the scope of normal shop mainte-
nance repair. Therefore if an oil bushing is in any way damaged,
the complete bushing assembly must be replaced. Refer to Fig-
ure 15 and proceed as follows:
1. Disconnect bushing lead from bottom end of bushing rod.
2. Remove three hex head capscrews and clamps that secure
bushing to head.
3. Remove and discard lower bushing gasket.
4. Twist off split aluminum clamping ring from old bushing and
install on new bushing, if it is in good condition—replace if
damaged.
NOTE: The clamping ring cushions and distributes the pressure
between the ceramic and the clamps. DO NOT OMIT.
Figure 14.
Bushing parts VW recloser.
Figure 15.
Replacing bushing, Type VWV27 and VWV38.