S280-30-7
7
CAUTION
Be sure the recloser is open (yellow operating handle under
the sleet hood is down) before untanking, so that the mecha-
nism can not be accidently tripped while out of oil.
CAUTION
Never use volatile solutions, detergents, or water-soluble
cleaners.
7. Clean all internal components.
A. Remove all traces of carbon by wiping with a clean, lint-
free cloth.
NOTE Although current interruption takes place in a sealed vac-
uum chamber, the closing solenoid contactor operates in oil and
will produce some carbon deposits.
B. Flush the mechanism with clean transformer oil.
8. Remove bushings.
A. Non oil filled bushing should be dismantled, cleaned and
inspected.
B. Oil filled bushing should be cleaned and inspected. DO
NOT dismantle oil filled bushings.
9. Replace all external seals and gaskets.
10. Inspect mechanism for cracks, carbon tracking, flashovers
or other damage. Repair or replace as required.
11. Check the condition of the closing solenoid contactor con-
tact tips. If the contact tips are eroded replace entire contactor
assembly. (See page 11 for replacement procedure.)
A. An oil sample taken near the bottom of the tank should
have a dielectric strength of not less than 22 kv rms.
B. Low dielectric strength indicates the presence of water or
carbon deposits. Replace the oil as necessary.
12. Inspect closing coil for cracks or other damage.
13. Inspect series trip solenoid.
14. Check the contact erosion of the vacuum interrupters.
A. Locate the scribe mark on the moving contact rod at the
top of the interrupter, Figure 8.
B. If the scribe mark falls below the top of the phenolic guide
when the interrupter is closed, the interrupter has
reached the end of its useful life and must be replaced.
(See page 10 for replacement procedure.)
NOTE: Procedure for manually operating the recloser when the
mechanism is out of oil is described on page 7.
15. Reinstall bushings, use new gaskets. (See page 8 for instal-
lation procedures.)
16. Drain the tank, and clean out all sludge and carbon deposits.
If oil is to be reused it must be filtered and the dielectric
strength checked.
17. Fill with new, clean insulating oil up to 2-1/4 inches below the
top of the tank flange. See Oil Condition on page 8.
18. Clean the head gasket seat and retank the recloser.
A. Move the yellow operating handle under the sleet hood to
the up position to avoid any possible binding while rais-
ing the tank.
B. Replace the head bolts and tighten to 35-55 ft-lbs torque.
Apply clamping force gradually and equally, in rotation,
to each bolt to achieve an evenly distributed gasket seal-
ing pressure.
19. Check the oil level with the dipstick in the head and adjust the
level to the upper line on the dipstick.
NOTE: If the recloser is equipped with an oil-sight gage, the oil level
should be above the sight gage. if the oil surface line is visible in the
window, add oil to raise the level to the upper line on the dipstick.
20. Perform high-potential insulation withstand test (page ) to
make sure the dielectric clearances within the tank have not
been compromised. Also, use a suitable tester to verify that
the recloser is operating per data plate specifications.
Manual Operation of the Recloser
The recloser may be closed and opened manually while the
mechanism is either in or out of oil.
MECHANISM IN OIL
For a tanked recloser (mechanism immersed in oil) use the fol-
lowing manual operating procedure.
1. To close the recloser.
A. Remove the closing tool port cover and gasket from the
side of the head casting. (See Figure 2 for location.)
B. Insert the KA9OR T-handle closing tool (furnished as an
accessory) into the closing tool port (Figure 9) and engage
the pin on the closing shaft.
C. Lift up the yellow operating handle under the sleet hood to
reset the mechanism.
Figure 8.
Location of scribe on movable contact rod of vacuum
interrupter.
84609KMA
SCRIBE
MARK
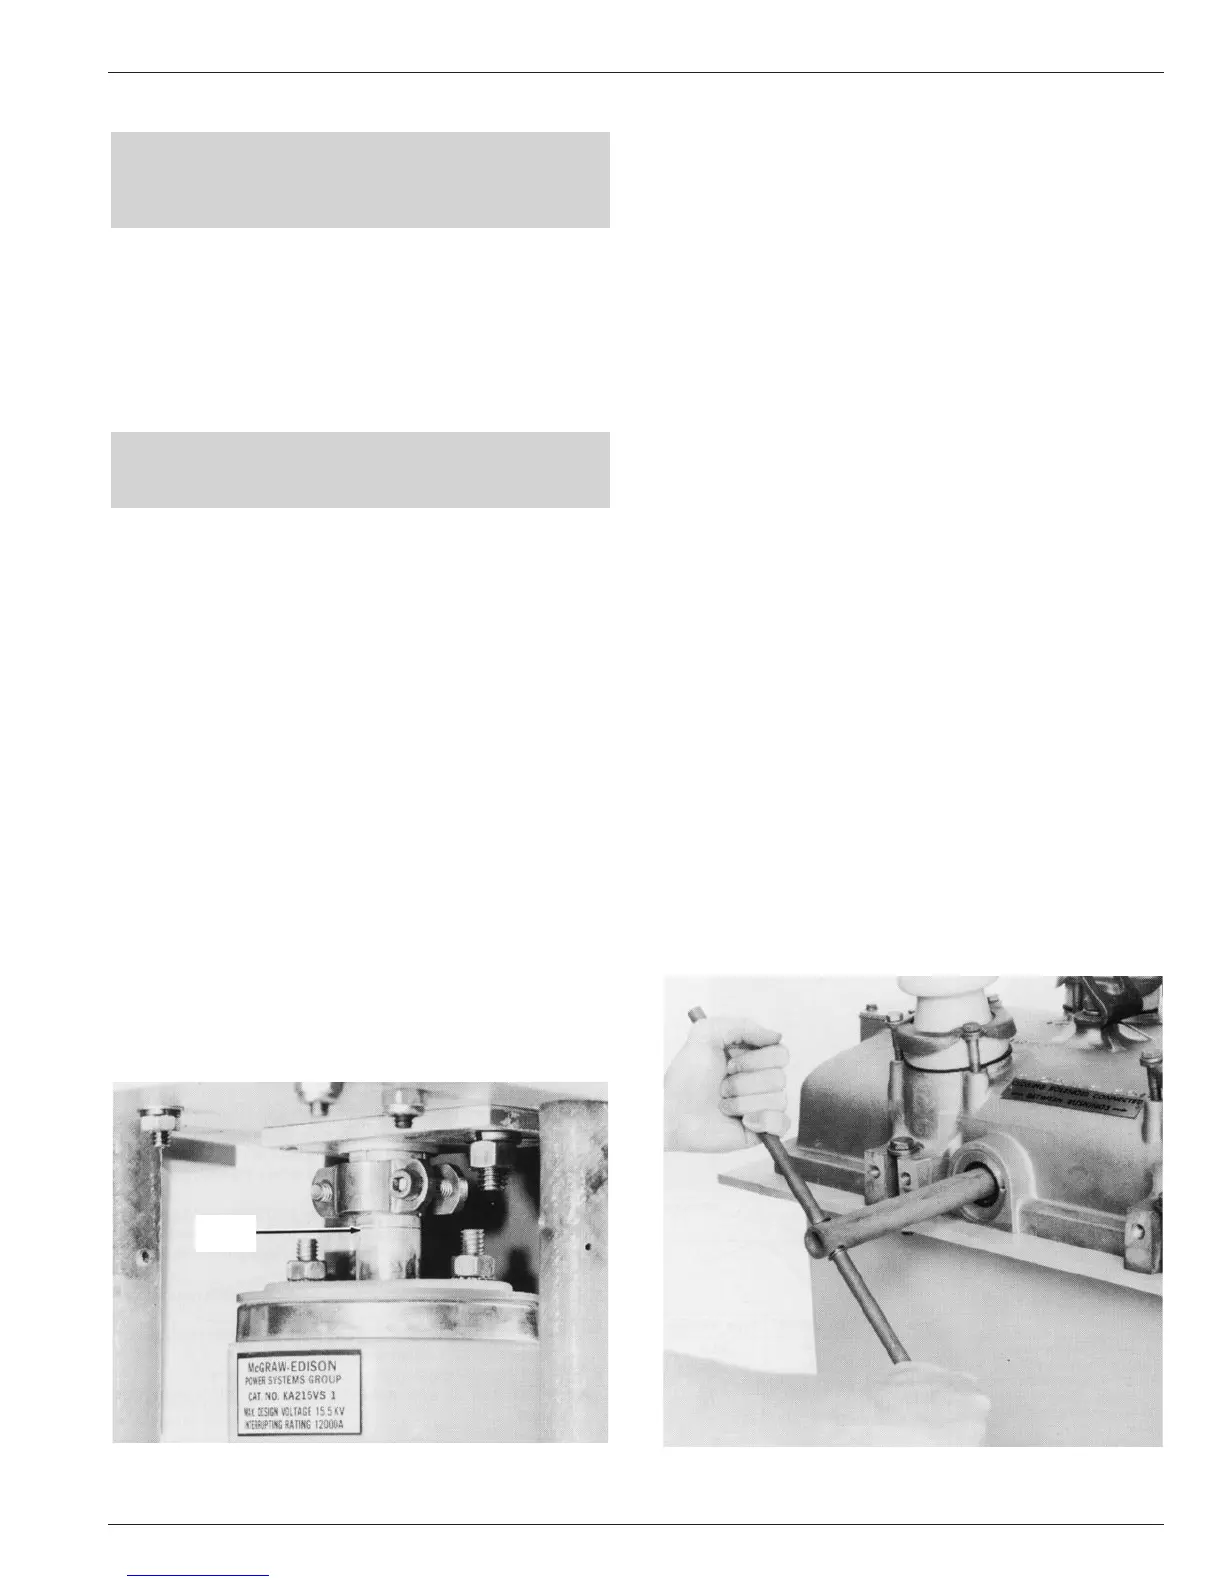
Figure 9.
Manually closing recloser.
86797KMA