Countertop Icemaker IMD Series Installation Manual
© 2004-2012, IMI Cornelius Inc. - 13 - Publication Number: 638085277INS
GEAR MOTOR
The gear motor is equipped with a start relay and a manual reset overload. When current is applied, the relay ener-
gizes and completes the circuit to the start winding. The motor reaches a predetermined speed and the relay drops
o
ut, disconnecting the start winding. The run winding remains in the circuit as long as current is applied.
The purpose of the overload is to automatically shut off the motor in the event of a mechanical bind of the transmis-
sion, an overload condition within the evaporator or an ele
ctrical malfunction. It does this by sensing amperage
draw. If the motor stalls the start relay would energize and stay energized. The amperage would surge to 5 to 6
times greater than normal draw. In this event the overload would shut off the transmission in 4 to 8 seconds.
If the motor is subjected to an abnormal load,
but does not reach stall condition, the overload will react, but over a
greater period of time. The reaction time depends upon the amperage to which it is subjected.
The overload, through the safety circuit, also shuts off the compressor.
Refer to Troubleshooting Guide.
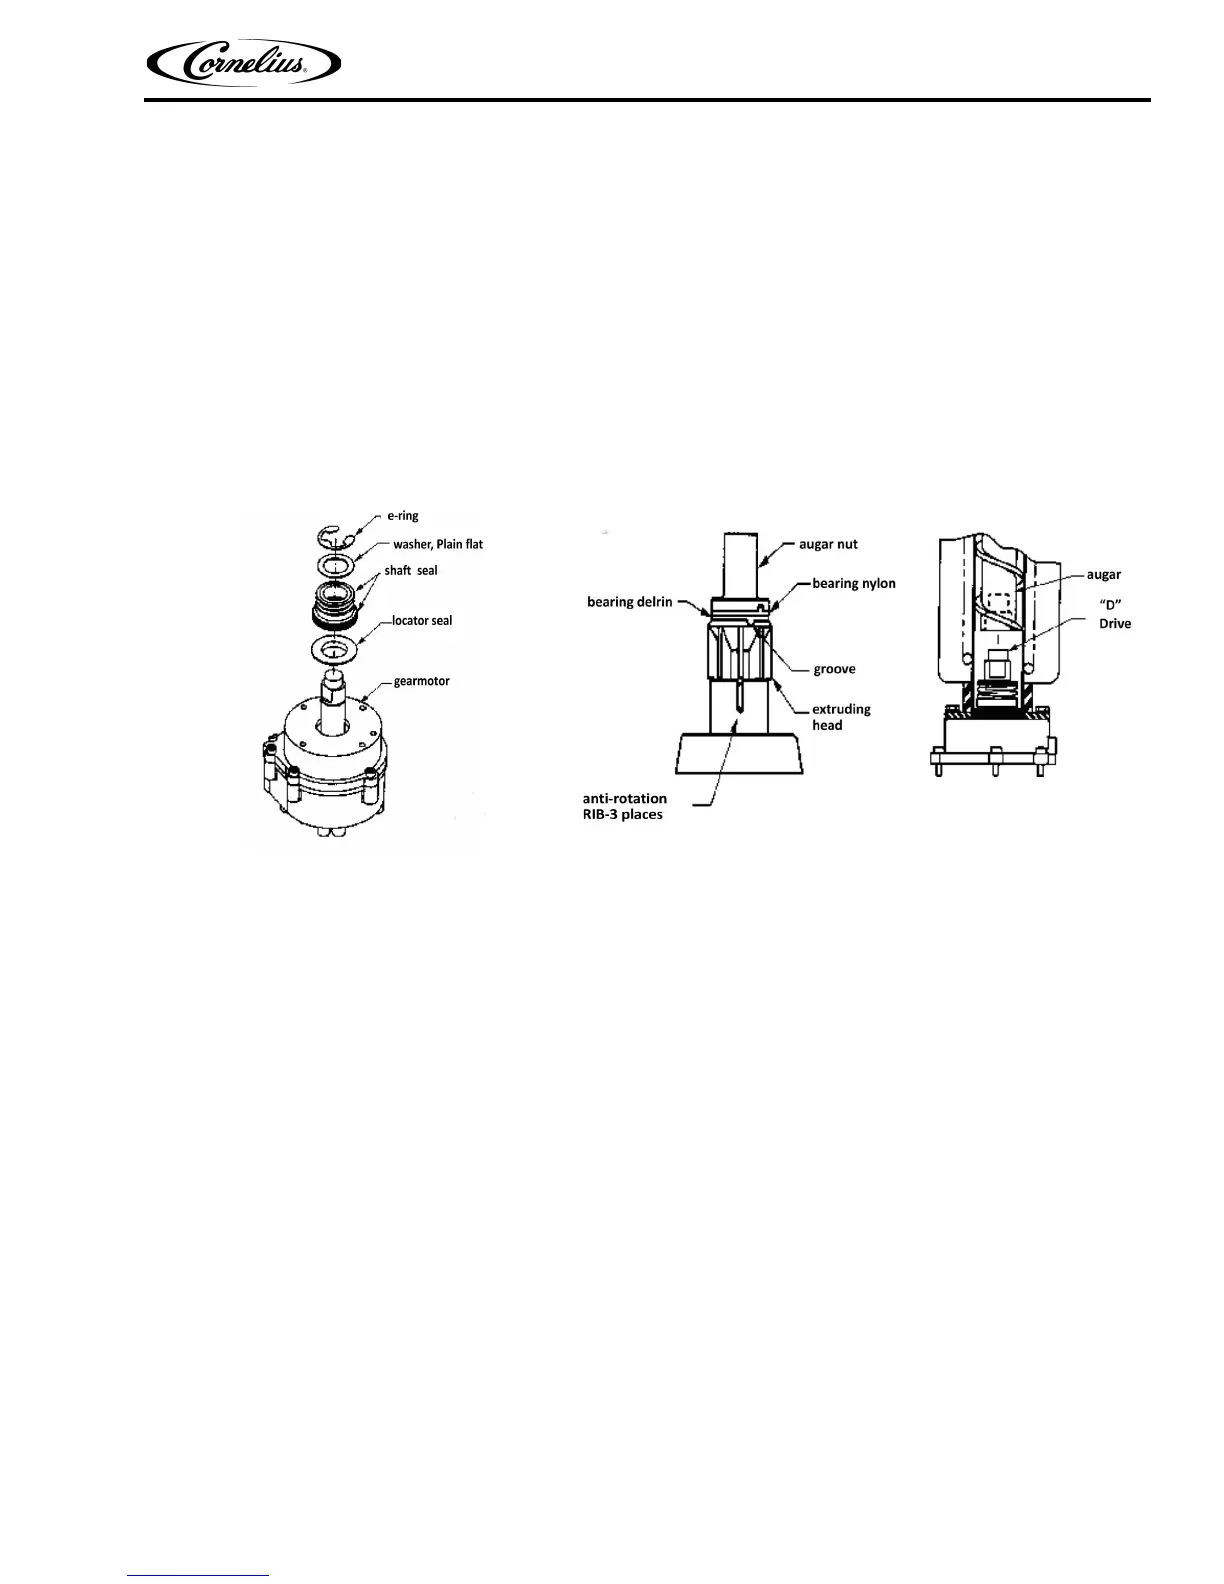
Figure 7. IMD 300 Shaft Seal Figure 8. Auger and Extruding Head Removal
SHAFT SEAL INSTALLATION AND REPLACEMENT-
1. Place shaft seal locator seat over gear motor output shaft, embossed side down, and push down until shaft
seal seat rests flush on top of gear motor.
2. Place rubber coated ceramic seal (important: ceramic face up) over output shaft and push down until seal rests
o
n top of the shaft seal seat. (Lubricate rubber on ceramic seal with [#06195] rubber lubricant.)
3. Place shaft seal with carbon face down (spring up) over
output shaft and push (gently) downward until seal
rests on carbon face of output shaft seal.
4. Push down on the washer compressing the spring on the output shaft seal. While holding the seals (down) in
p
lace slide the E-ring into the groove on the output shaft.
(See Figure 7)
 Loading...