8.5
Calibration
C-SMART·
l Pro Uaar
Manual
b.
Removing
C-SMART·IPro Uoar
Manual
This
function
is to
decrease fluctuation
in the
rotation
speed of the
motor
handpiece
and the
difference
in
torque
by the contra
angle.
Calibration
is
recommended
when using a
new/other
contra
angle or
after
an
extended
period of
operation,
as the
running properties
can change
with
usage,
cleaning
and
sterilization.
Sliding
it in the
direction
of the socket and then
removed
with
contra-angle,
Otherwise
it will be
damaged.
The
calibration
steps as
follows:
·Turn
the power
on.
0
SETUP
.&.
Fig.4
Fig.5
A
ld
.
.
,.MII"'
·
A
.,
...
-
. ·
;
.tit
,.
' i
tt
:
l
L
E
EDdiiiJt!Mt.
: T torvw
Engllah
•
ON
•
ON
•
CAUTIONS
When
inserting
and
removing, please
do not
shake,
so as not to
damage
the
plug.
8
=
torNWI,.fMIGIIJMtlll'll
B
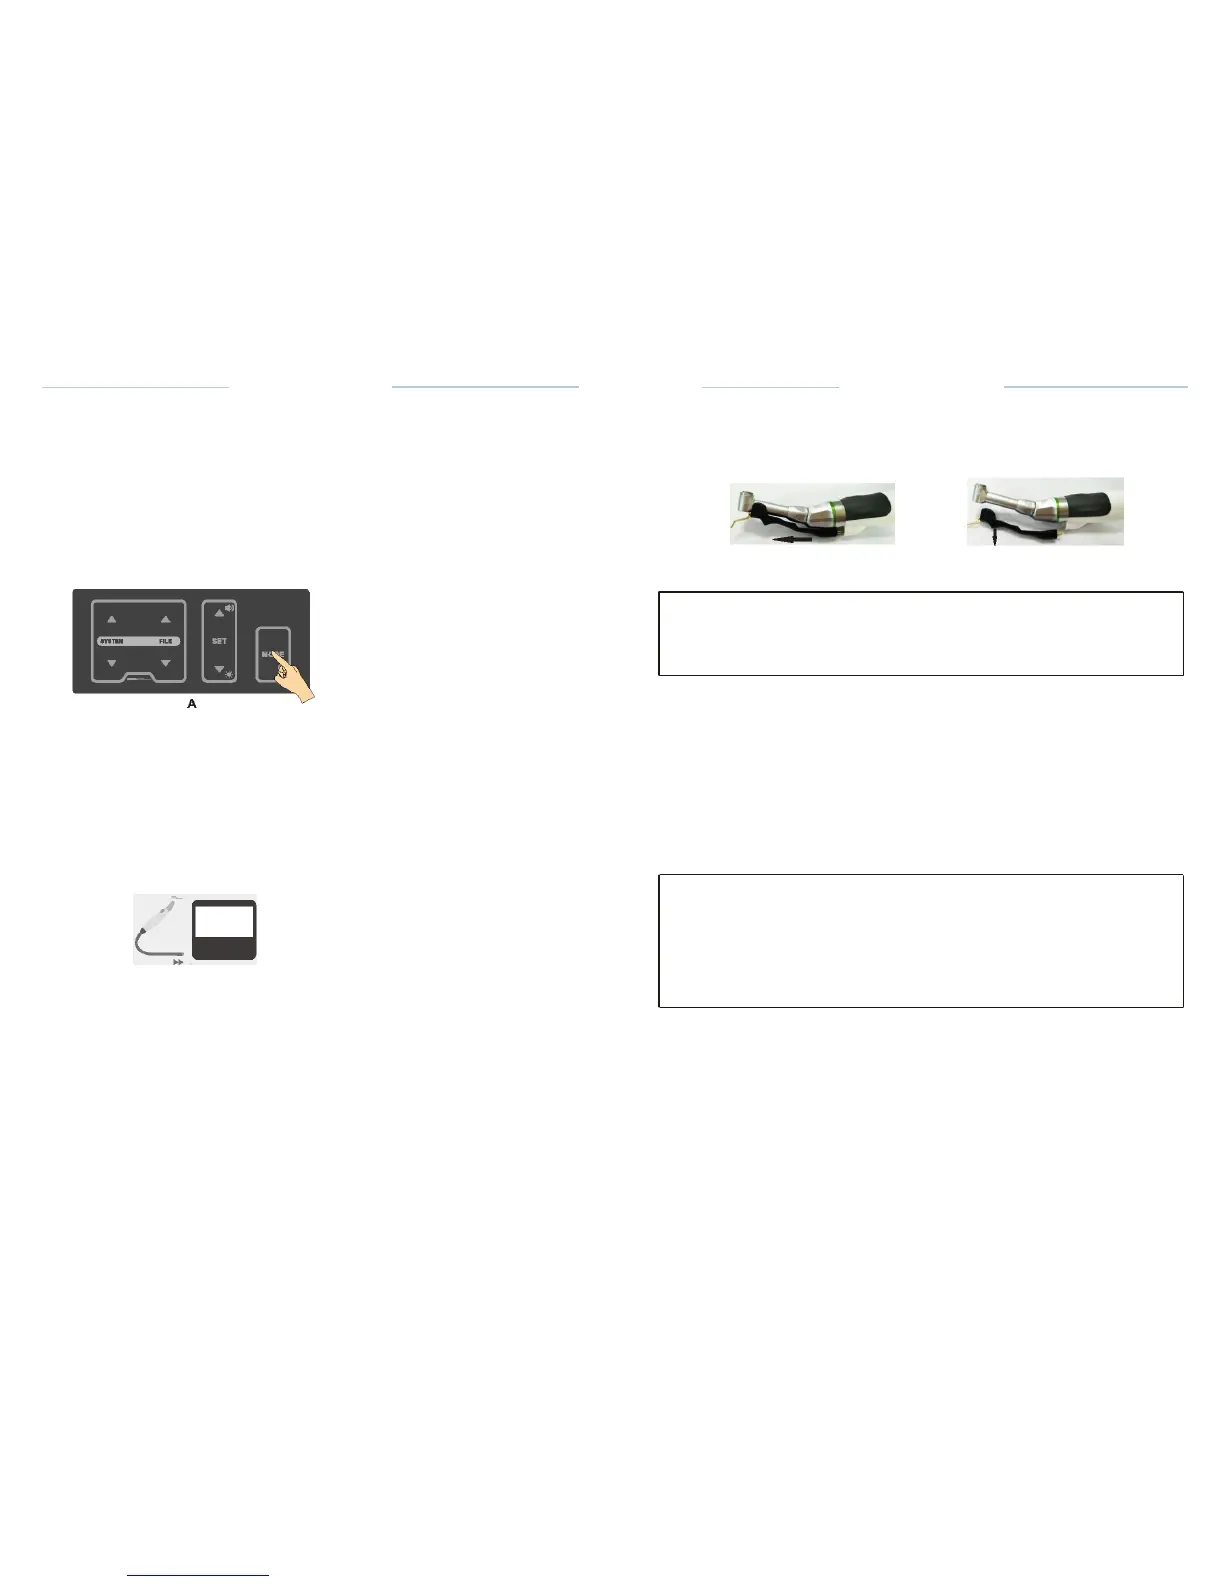
• Press the MODE key for 2
seconds
(A) to enter
setting interface;
• Press Up or Down key to select
calibration (B);
·Press
the SET key to enter the
calibration
state:
• The
screen
will be
prompted
to insert the motor
handpice
(
Fig.37
)
;
•
During
the
calibration process
the
display
will read
(Fig.38):
7.3.4
Inserting
and
Removing
the
Fila
a. File
insertion
• Insert the file into the chuck until it
stops.
•
Lightly
turn the file until
it engages
with the
latch mechanism. Push
inwards
to
click.
b. File
removal
Press the
push-key
and pull out the
file
.
_,
r:::-1
0
0
.
-
.&.
CAUTIONS
•
When
attaching
and
detaching
the file, turn the power off
beforehand.
•
After the file is
locked
in
place, lightly
pull out the file to make sure the
file
is
locked.
•
Always
clean
the shank of the file to be
installed.Allowing
dirt to enter
the
chuck could cause
deterioration
of
chucking
force.
Fig. 37 Insert the motor
handpice
Fig. 38
Cerebration state
·The
motor
handpiece
begins to
rotate: leave
it as
it
is until
it stops.
·When
the
calibration process
is
completed,the rotation
stops and
the
display reads:
·Then,
the
display returns
to its
originalstate.
II