1. Plug in the power cord. Install the heat shield and cooking grates, then close the lid.
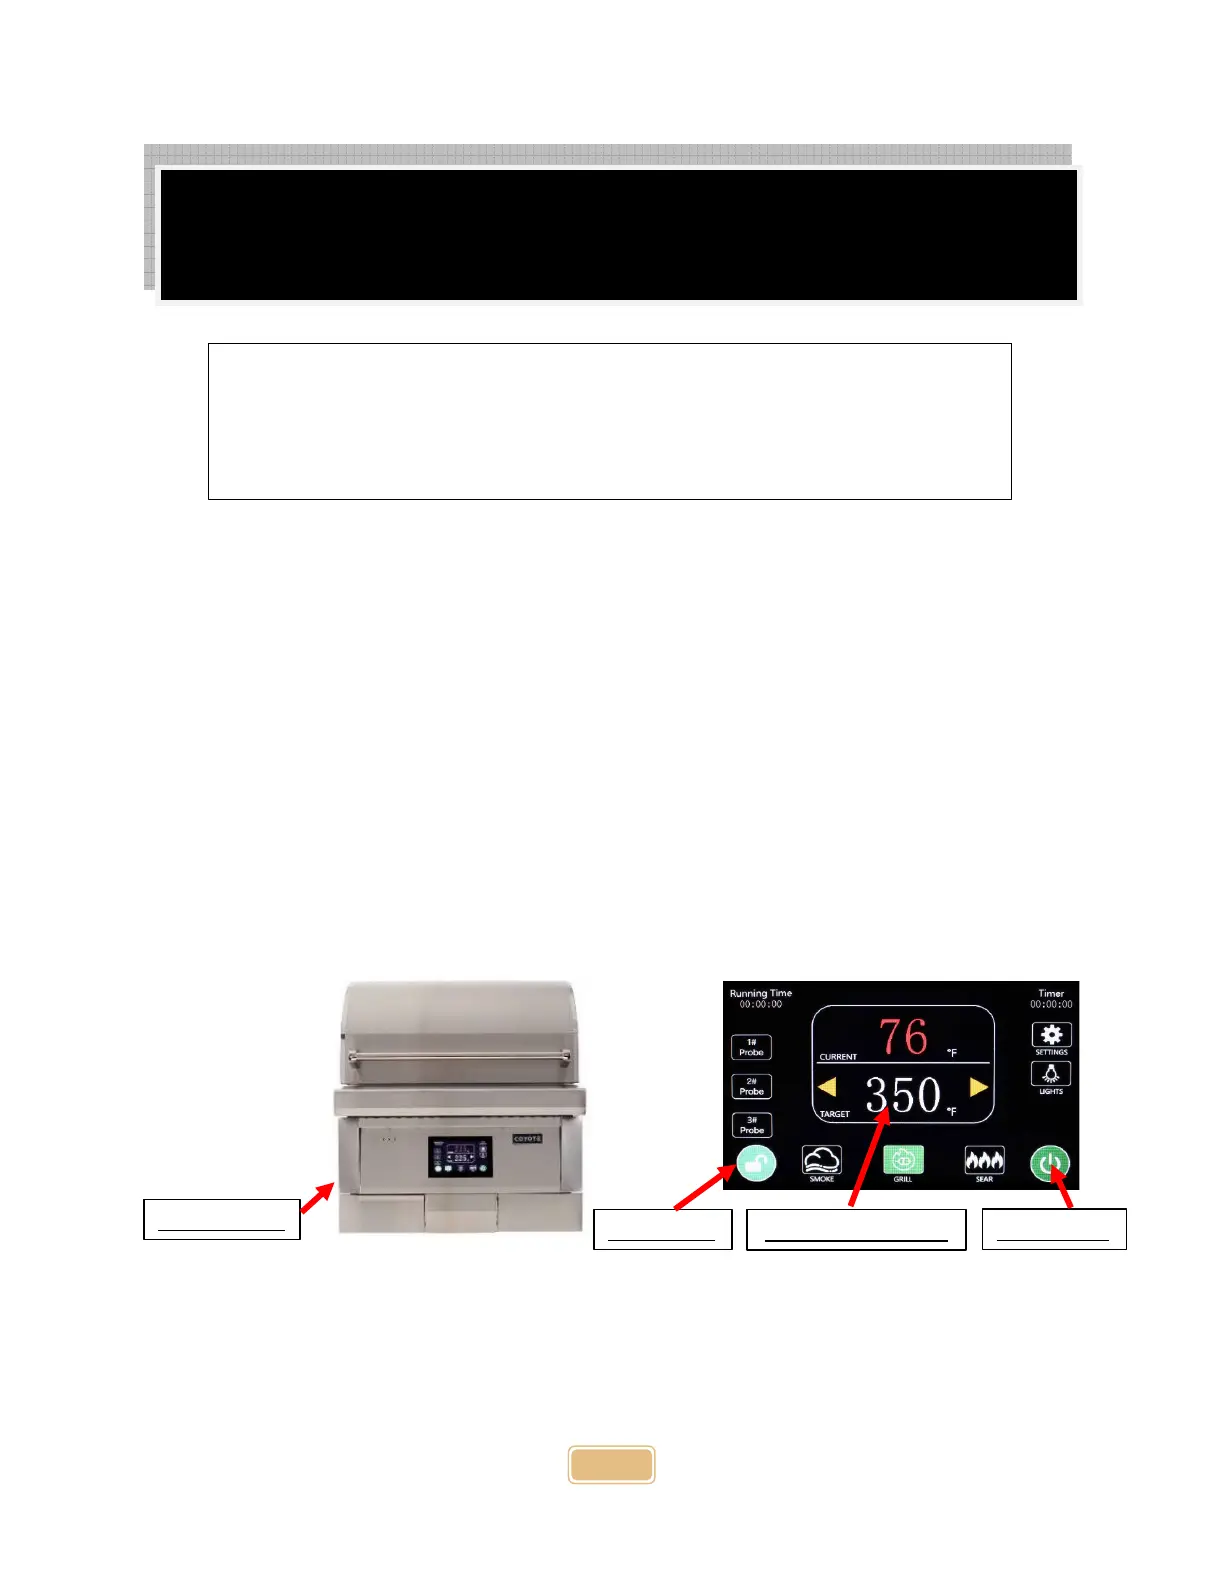
2. Press the power button on the left side of the control panel.
3. Press the red unlock icon on the left side of the display for 3 seconds.
4. Set the desired target temperature on the display. Pressing the digits will display a keypad.
(See “Setting the Temperature” section on page 20 for additional information.)
5. Press the green start button on the right side of the display. The icon will turn into a red
flame, indicating the igniter is on.
6. The grill should begin to smoke in about 3 to 5 minutes. It should be at the target temperature
in about 10 to 15 minutes. (See “Grill Modes” section on page 19 for additional information.)
7. When the cooking is done, press the red stop icon. The grill will go into the cooldown mode.
Quick Start Guide
Always ensure the burner pot is clear of pellets before each use and you are loading
fresh pellets into the hopper.
Install the burner pot under the lip of the chute, as shown on page 15 of this
manual.


 To Next Page