Page 16
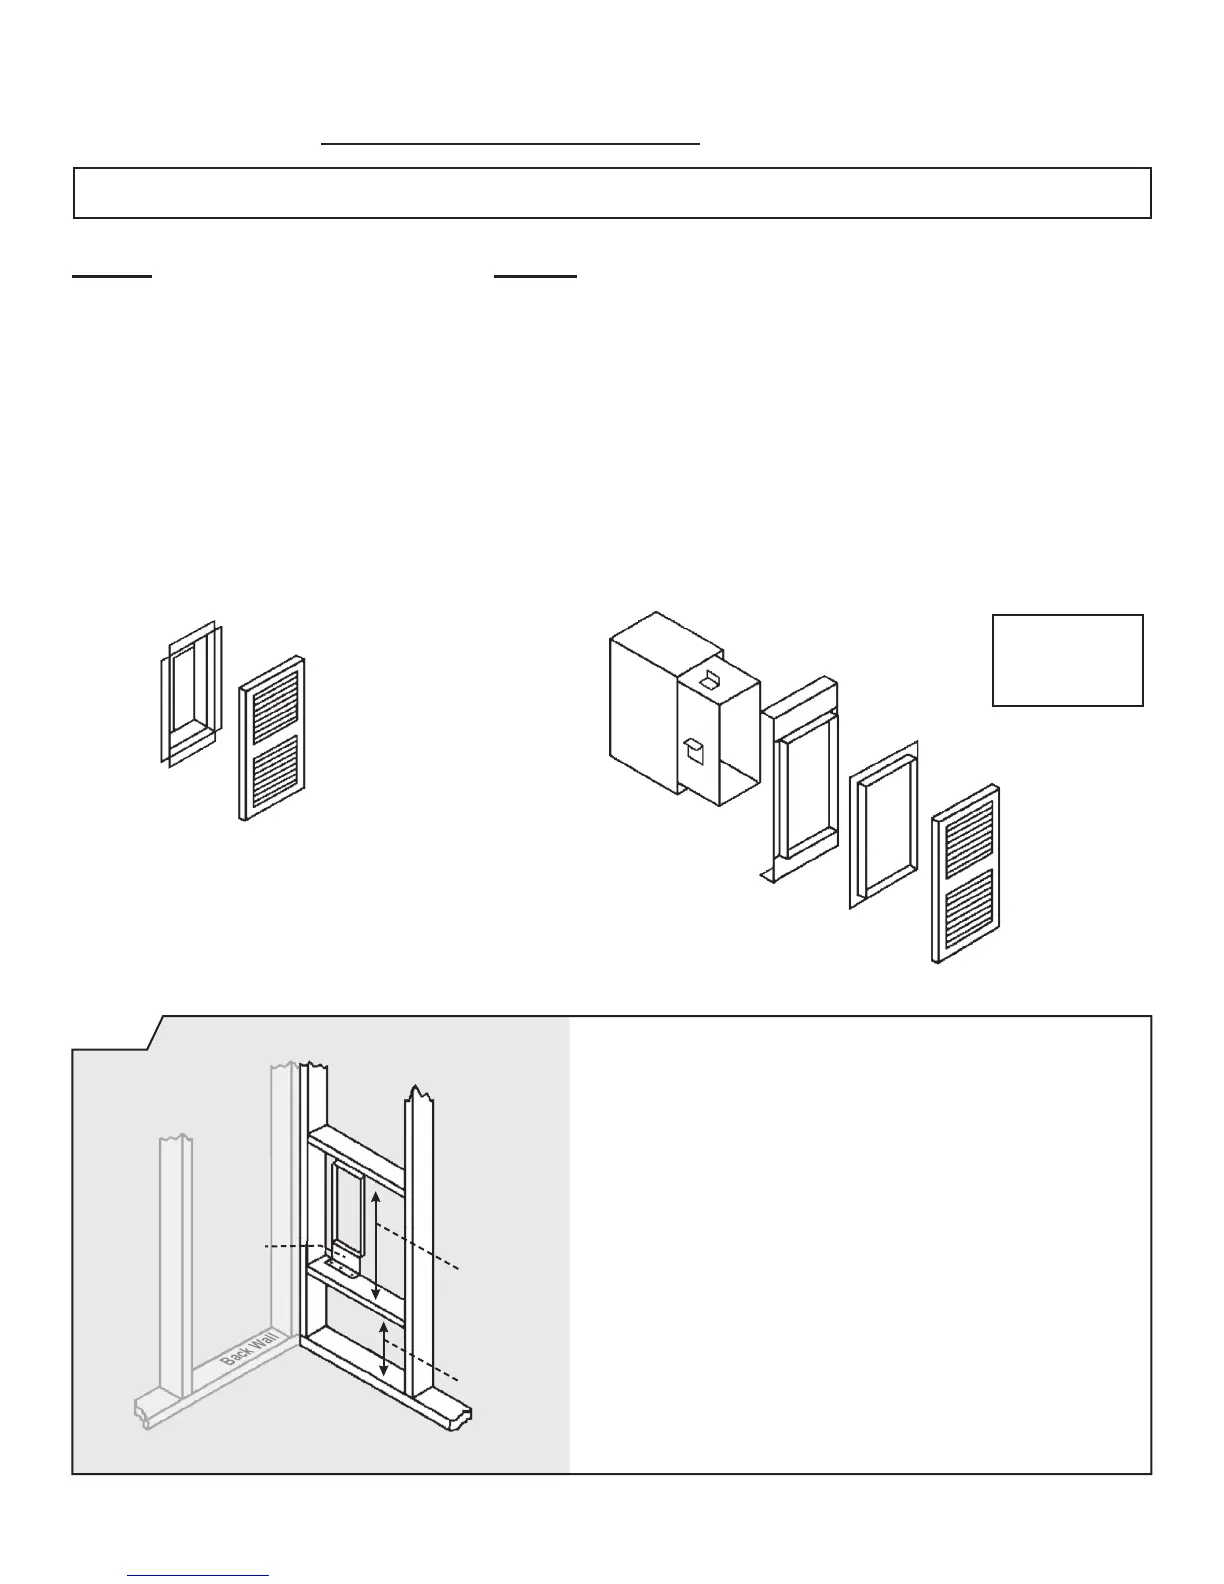
FIG. 11
ROUGH-INS FOR
SIDE DISCHARGE KITS
Install plaster grounds as shown to the left.
NOTE: When side discharge Kit No. 30SRB is being used,
furnace should be set exactly 4” from side wall.
306SR-A
SideDischargeonCasing
1. Cut out and remove embossed area on
casing side.
2. Remove knockout from inner liner.
3. Place 1-1/2” boot from kit through
opening, matching anges of boot to
knockout on inner liner.
4. Mark screw holes and remove boot.
5. Drill holes with a 1/8” drill.
6. Attach inner boot with screws provided.
7. Place grille into position, drill holes into
casing, and attach with screws provided.
306SR & 30SRB: SIDE DISCHARGE KITS (Optional Accessories)
30SRB-A
SideDischargewithExtensionBoot
1. Cut opening in drywall as shown in gure 11, below.
2. Position plaster ground as shown in gure 11, below. (Optional).
3. Cut out and remove embossed section on casing side.
4. Remove knockout on inner liner.
5. Put heater into position.
6. Place inner boot into position, mark and cut boot ush with wall. Place outer
boot into position, mark and cut boot ush with wall.
7. Place boot trim into position, slide INNER BOOT through wall from adjacent
room and attach to inner liner. Slide OUTER BOOT through wall from
adjacent room and attach to casing side.
8. Place grill in position and secure to wall.
NOTE:
Maximum boot
length is 10”
Side Wall
14-3/8”
Plaster
Ground
10-3/16”
CAUTION: These kits must be installed by a qualified installer or service technician.


 To Next Page