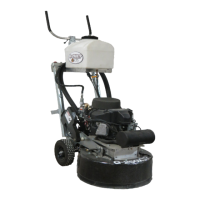
Instructions for Greasing Ring Gear Models
G250, G320D, and G320DPro
We recommend re-greasing the ring gear every 300 hours or so of operation…
1.
Unplug the machine.
2.
Tip the machine on its back…we strongly recommend to either have someone hold
down the handle bars or weigh them down as a safety precaution.
3.
Remove the 6 bolts and inspection plate cover (round plate approximately 6 5/8 inch in
diameter) so you can access the inside of the machine.
4.
Look inside the machine, you will see a plastic cap in the upper plate (about 3inches in
diameter)
5.
Using a flat head screw driver, pry the plastic cap out of the hole…be certain that nothing
drops into the guts of the machine or into the hole while the cap is out of position…if so
be sure to retrieve…just like you do not want to accidentally drop anything into the valve
cover of a car engine when you change the oil.
6.
Using LubriTech 940 Synthetic Grease or equivalent, apply a good amount of grease on
the teeth that can be seen through the hole.
7.
Turn one of the heads a little bit so you can see more teeth of the ring gear which has not
been greased and apply grease.
8.
Repeat step 7 until you have applied new grease all the way around the ring gear.
9.
When the proper amount of grease is used. You will use up approximately 8oz of grease.
10.
Put the plastic cap back in position being certain that the fit is snug.
11.
While the inspection plate is off, this is a good time to inspect the belt for wear. A little
fraying on either side is normal but if the belt appears to be severely worn, consult CPS
for instructions.
12.
Also, while inspecting the belt visually, check the tightness. There should be no more
than a ¼ inch deflection or movement up or down from center.
13.
Listen to each hub to see if there is any noise indicating that bearings may be worn and
in need of changing…they should be silent. If a slight grinding or clicking noise is heard,
consult CPS for instructions.
14.
After completing these tasks, re-seal the inspection plate by thoroughly cleaning the side
that faces the bottom of the grinder as well as the perimeter of the inspection hole. If the
original gasket is no longer useable, apply a small amount of silicone all the way around
the plate where it overlaps the inspection hole and place cover back into position.
15.
Screw all 6 bolts to approximately 8 ft/lbs of pressure (replace if stripped)
16.
Plug machine in and turn the speed dial all the way counter-clockwise (lowest setting)
and turn on. Allow to run approximately 10 minutes to ensure new grease is thoroughly
distributed.
17.
Ready for work.
Concrete Polishing Solutions
184 Cedar Pl.
Norris TN 37828
877-472-8200