9
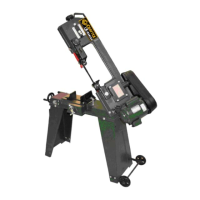
Attach the control handle to the head
assembly by threading its threaded end into
the oil fill hole until it is a tight fit. Make sure
that the trigger switch pointing upwards as
shown in figure-6.
Figure-6 Installing the control handle
Locate the open socket at the side of the
electrical box on the top of the motor and
plug in the control handle cable into the
open socket. Use a wrench to tighten the
cable connector nut. See figure-7.
Figure-7 Connecting the cable to the socket
Attach the support roller to the left side of
the base and align the two holes on the
support roller with the two holes on the
base of the machine. Secure the support
roller using screws and washers, do not
fully tighten the screws at this time.
Place a level across the mouth of the vise
and support roller and raise or lower the
support roller until it is level.
Once the support roller is level with the
mouth of the vise, tighten the screws to
secure the support roller in position. See
figure-8.
Figure-8 Support roller
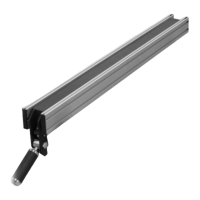
Insert the threaded end of the stop bar into
the hole on the side of the vise and turn it
clockwise until snug. Secure the stop bar by
tightening the hex nut counter-clockwise
onto the stop bar.
Figure-9 Installing the stop bar
Attach the cover plate to the side of the
stand and secure it using screws provided.
See figure-10.
Figure-10 Installing the cover plate
 Loading...