Do you have a question about the Craftsman 113.23111 and is the answer not in the manual?
Essential safety precautions for operating power tools, including personal protection and work area setup.
Guidelines for securing work, tool maintenance, and safe operating procedures to prevent accidents.
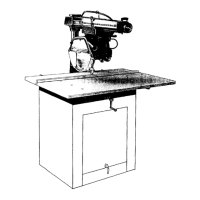
Steps for safely installing the radial saw, including initial checks and setup.
General safety advice to prevent accidents, focusing on operator awareness and tool handling.
Specific safety rules and precautions for performing ripping operations with the radial saw.
Key safety practices and requirements for executing crosscutting operations.
Safety considerations and recommendations when using accessories with the radial saw.
List of manual contents and the tools required for assembly and setup.
Instructions for unpacking parts, checking contents, and initial preassembly steps.
Detailed steps for aligning the radial saw components for optimal performance.
Attaching and leveling the table mounting support channels.
Adjusting column tube for looseness and installing the front work table.
Ensuring the carriage travels in a straight line for accurate crosscuts.
Fine-tuning crosscut travel and leveling the front table for accuracy.
Procedure for positioning and installing the rear table boards and table clamps.
Aligning the saw blade to be square with the work table top.
Adjusting the saw blade to be square with the rip fence (heel/toe adjustment).
Setting up the anti-kickback and spreader assembly for safe ripping operations.
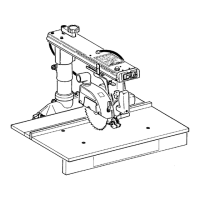
Overview of control locations and functions on the radial arm for basic setup and operation.
How to adjust the elevation crank to set the desired depth of cut for sawing.
Using arm-latch and bevel controls for miter/bevel angles, and yoke pivot for positioning.
How to secure the carriage and adjust the blade angle using specific controls.
Operation of the power switch, including safety features and key usage.
Using the manual brake to reduce blade coasting time after turning off the saw.
Safety guidelines for positioning the anti-kickback and spreader assembly for ripping.
Technique for accurate indexing of machine components to ensure precision.
Prerequisites and safety checks before performing a standard crosscut operation.
Detailed procedure for performing a basic crosscut using the radial saw.
How to perform a miter crosscut at various angles for frame construction.
Procedure for performing a bevel crosscut with the blade tilted to an angle.
Performing a compound crosscut by combining miter and bevel angles.
Essential requirements and safety checks before starting any ripping operation.
Step-by-step guide for performing out-ripping and in-ripping operations using the fence.
Performing bevel ripping operations, which combine ripping with a tilted blade angle.
Instructions for using a dado head for cutting grooves and dados.
Guidance on using molding heads and drum sanders with the radial saw.
Details on the saw's motor specifications and required power supply connections.
Explanation of the motor's thermal-overload protector and its function.
Diagnosing and fixing looseness in the column tube affecting elevation crank operation.
Troubleshooting inaccurate 0° or 45° miter and crosscut angles.
Resolving issues where the saw cuts at angles not 90° to the table or bevel cuts are inaccurate.
Addressing rough saw kerf marks (heel/toe) by checking blade alignment.
Resolving problems like motor stalling, wood binding, or board pulling away from fence during ripping.
Procedure for testing and adjusting carriage bearings for looseness.
Fixing yoke indexing problems and adjusting the yoke clamp handle for proper locking.
Essential maintenance tasks, including cleaning and sharpening anti-kickback pawls.
Specific points requiring periodic lubrication and areas to avoid lubricating.
Exploded views and detailed lists of all replacement parts for the radial saw.