Do you have a question about the Craftsman 113.234940 and is the answer not in the manual?
Describes the terms and conditions of the one-year warranty for Craftsman benchtop tools.
Defines hazard level indicators (DANGER, WARNING, CAUTION) for safety information.
Lists pre-operational checks and conditions required before plugging in the saw.
Provides safety precautions for handling and moving the miter saw.
Details essential inspections and checks to perform before operating the saw.
Emphasizes preparing for safe operation by understanding the tool and hazards.
Guidelines on appropriate personal protective equipment and attire.
Ensuring workpiece is free of hazards and planning cuts to avoid thrown pieces.
Safe practices to follow while the saw is running, including hand position and workpiece control.
Steps to follow after completing a cut, including holding the head and stopping the blade.
Measures to secure the workshop and store the tool safely.
Technical details of the saw's motor and power requirements.
Information on wiring, circuit protection, and grounding for safe electrical connection.
Explanation of double insulation and polarized plug safety features.
Measures to protect the motor from damage due to overloading or improper use.
Guidelines for selecting appropriate wire sizes for extension cords.
Lists the tools necessary for unpacking and initial setup of the saw.
Step-by-step instructions for safely removing the saw from its packaging.
Inventory of all parts shipped with the miter saw.
Identification of safety labels and features for storage, like the lock pin.
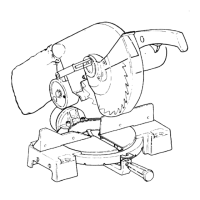
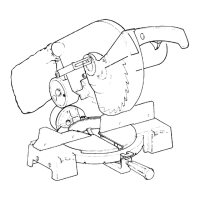
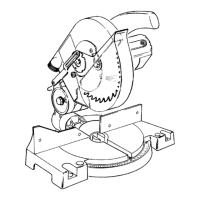
Details on handles and bolts for adjusting miter, bevel, depth, and stops.
Description of the upper and lower blade guards for user protection.
Explanation of the switch, lock-off button, and arbor lock for operation.
Overview of the base, table, rear foot, and hold down clamp.
Procedure for safely removing and installing the 8-1/4 inch saw blade.
Instructions for connecting the dust elbow to the dust nozzle.
Procedure to ensure the blade is square to the table at 0° bevel.
Procedure to ensure the blade is square to the fence at 90° miter.
Calibrating the miter angle indicator to match the saw's setting.
Adjusting the bevel tilting mechanism for smooth movement.
Ensuring the cutting head rises freely after a cut.
Setting the depth stop to limit the blade's downward travel.
Adjusting the rear foot for better saw base stabilization.
Precautions for moving, lifting, and securing the saw to a workbench or support.
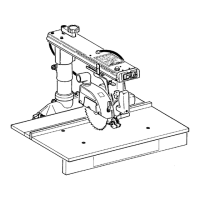
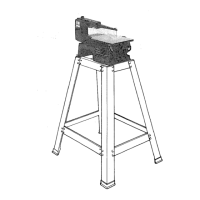
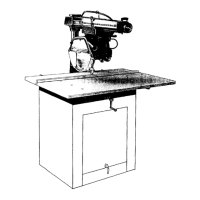
Details on mounting the saw for portable, workbench, or leg set applications.
Essential inspection steps for the saw and its parts before beginning operations.
General safety guidelines and precautions for using the miter saw.
Emphasis on eye protection, attire, and work area safety.
Guidelines for safe operation when the saw is running, including workpiece handling.
Steps to follow after completing a cut, including blade stop and removal.
Overview of common cut types: chop cutting and slide cutting.
Instructions for performing 90° crosscuts using the chop cutting method.
Step-by-step guide for performing cuts with the sliding mechanism.
Guidance on proper body and hand placement for safe and ergonomic cutting.
Instructions on how to set and perform miter cuts.
Instructions on how to set and perform bevel cuts.
Techniques for executing cuts that combine miter and bevel angles.
Proper positioning and cutting methods for bowed or warped workpieces.
Steps for correctly installing the hold down clamp accessory.
Guidelines and precautions for using the hold down clamp effectively.
Methods for providing adequate support for long or large workpieces.
Using the depth adjustment to create grooves (dados) with a chisel.
Tips for making compound cuts for frames and boxes.
Advice for precisely cutting various types of moldings.
Specific setup and application guidance for cutting base moldings.
Methods and settings for cutting crown moldings accurately.
Procedures for cleaning and general upkeep of the saw.
Step-by-step guide for replacing worn carbon brushes.
Instructions for cleaning and maintaining the lower blade guard.
Tips for removing sawdust to ensure smooth operation.
Information on which parts require lubrication and how to apply it.
List of approved accessories and parts recommended by Sears.
Specifications for saw blades, including diameter, RPM, and arbor hole size.
Important safety warnings and conditions for using carbide tipped sawblades.
List of accessories and cutting tools that are prohibited for use with the saw.
Common problems related to the motor, such as brake failure or starting issues.
Solutions for common problems like blade alignment and operational wobbles.
The electrical schematic illustrating the saw's internal wiring.
Specific guidance for qualified service personnel troubleshooting the brake system.
Itemized list of parts for the main assembly, covering items 1-43.
Continuation of itemized parts for the main assembly, covering items 24-44.
Itemized list of parts for the arm assembly, covering items 1-12.
Continuation of itemized parts for the arm assembly, covering items 13-23.
Itemized list of parts for specific components, covering items 1-23.
Continuation of itemized parts for specific components, covering items 24-46.
Phone numbers for ordering replacement parts and scheduling repairs.
Information on how to find the nearest Sears Repair Service Center.
Contact details for purchasing or inquiring about a Sears Maintenance Agreement.
| Model Number | 113.234940 |
|---|---|
| Type | Table Saw |
| Blade Diameter | 10 inches |
| Voltage | 120V |
| Table Size | 20 x 26 inches |
| No Load Speed | 5000 RPM |