Do you have a question about the Craftsman 113.2433 and is the answer not in the manual?
Read GENERAL and ADDITIONAL SAFETY INSTRUCTIONS carefully.
Read and understand the owner's manual and labels affixed to the tool.
Ensure the tool is properly grounded via a 3-prong plug.
Ensure guards are in working order, and in proper adjustment and alignment.
Make sure switch is in "OFF" position before plugging in.
Wear safety goggles (must comply with ANSI Z87.1) at all times.
Carefully check damaged parts to ensure proper operation.
Wear safety goggles, face shield, ear plugs, and avoid gloves.
Use caution when cutting irregular or round material to prevent pinching.
Always adjust blade tension and guides correctly for the blade used.
Do not substitute pulleys to increase speed; it could be dangerous.
Always wear safety goggles complying with ANSI Z87.1 before commencing operation.
Read and understand instructions on the instruction plate on the front of the saw/sander.
Details on RPM, HP, VOLTS, and CATALOG NO. for motors.
Ensuring proper grounding and using a 110-120V outlet.
Guidelines for selecting appropriate wire size for extension cords.
List of necessary tools including screwdrivers and wrenches.
Itemized list of parts included in the package for assembly.
Assemble End and Side Stiffeners, then attach legs to the frame.
Attach support channels and motor support to the assembled legs.
Install and adjust leveling feet for proper stability.
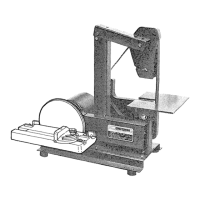
Place the Band Saw on the Steel Legs and align mounting holes.
Install motor, pulleys, V-belt, and belt guards correctly.
Place elbow in opening and attach with clamp and screws.
Apply rubber gasket around the clamp to prevent leakage.
Place table on trunnions and secure with bolt, washer, sleeve, and handle.
Install blade tension knob, remove guard, and adjust guide bar lock screw.
Use a square and setscrew to ensure the table is perpendicular to the blade.
Attach pointer to indicate table tilt angle.
Insert key to turn machine on or off, and lock switch in OFF position.
Feature prevents unauthorized and hazardous use by children.
Diagrams and descriptions of tension, guides, table tilt, and other adjustments.
Adjusting blade tension, guides, and thrust bearings for proper operation.
Remove blade guard, table insert, and blade before installation.
Adjust guide bar and lower thrust bearing for sanding setup.
Attach sanding platen and ensure correct belt direction and tracking.
Install alignment plate to insert for proper sanding belt tracking.
Do not sand iron or steel due to spark ignition risk.
Use both hands, gentle pressure, and proper blade selection for cutting.
Practice with scraps, press workpiece gently, and move until smooth.
Clean tires, table, guides, and bearings; apply wax.
Lubricate motor bearings; prevent foreign material entry.
List of available accessories for the band saw/sander.
Addresses blade tracking, breaking, dulling, and cutting speed issues.
Covers motor noise, power, overheating, and switch problems.
Diagram illustrating parts for Model 113.243300 & 113.243311.
Key numbers, part numbers, and descriptions for all listed components.
Diagram illustrating parts for Model 113.243300 & 113.243311.
Key numbers, part numbers, and descriptions for all listed components.
List of parts specific to Model 113.243311, including hardware.
Instructions for connecting green, white, and black wires to motor terminals.
Close motor connector box, ensure cord is seated, and tighten cover.
Information on contacting Sears Service Centers for repair or service.
Details on providing model number and part description for ordering.