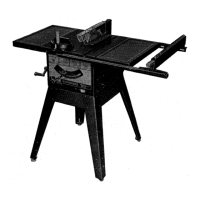
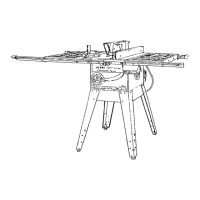
Do you have a question about the Craftsman 113.2941 and is the answer not in the manual?
Instructions for ordering replacement parts, including necessary information.
Information on Sears' nationwide service and replacement parts availability.
Emphasizes reading the manual thoroughly, especially safety precautions.
Advises thorough inspection of the tool before use to ensure all parts are included.
Highlights the importance of following operating instructions to prevent accidents.
Recommends appropriate workshop attire, avoiding loose clothing.
Recommends safety glasses or eye shields for all power tool operations.
Stresses correct voltage, grounding, and plug usage for electrical connections.
Advises checking all clamps and holding fixtures for tightness before operation.
Recommends using sharp blades and cutters to prevent rough cuts and accidents.
Warns against exceeding the tool's capacity to prevent damage or injury.
Advises keeping bystanders away from the operating saw.
Recommends using available safety guards for enhanced protection.
Encourages careful planning of each operation before turning on the tool.
Details voltage, amperes, cycles, phase, and RPM for the saw motor.
Describes wiring for 115-volt operation, referencing Figure 1.
Details wiring for 230-volt operation, referencing Figure 2.
Explains how to change the power cord for 230-volt operation, referencing Figure 3.
Explains the manual-reset thermal overload protector and its function.
Provides a table of recommended wire sizes based on conductor length and voltage.
Guides through attaching the front table board to the saw channels.
Details how to check and adjust for looseness in the column tube.
Instructions for ensuring the saw blade is square to the table top.
Procedures for correcting blade heel (left/right) issues.
Step-by-step guide to adjust table parallelism relative to the radial arm.
How to check and adjust the saw blade's squareness to the table.
Procedures for adjusting the saw blade to eliminate heel.
Recommends rechecking previous squaring adjustments for accuracy.
Steps for safely removing the saw blade from the motor shaft.
Instructions for correctly installing the saw blade.
How to set and calibrate the rip scale indicators for accurate measurements.
Explains the color coding system for various saw controls.
How to adjust the radial arm's height using the elevation crank.
Instructions for locking the carriage in position on the radial arm.
Details controlling the radial arm's rotation and locking it at specific angles.
How to adjust and lock the motor's angular position using the latch pin handle.
Instructions for moving and locking the yoke's swivel position.
Method for precise indexing to ensure accuracy in operations.
Guidelines on appropriate clothing and personal safety in the workshop.
Warnings against dangerous hand placements during operation.
Caution against twisting the workpiece to prevent binding and kickback.
Procedure for removing looseness between the column tube and support.
How to adjust the yoke clamp handle for proper locking engagement.
Steps to adjust carriage ball bearings for smooth movement.
Identifies components that do not require lubrication.
Lists parts requiring periodic lubrication with SAE No. 10-30 oil.
Explains how to perform cross-cutting operations safely and accurately.
Details the procedure for in-ripping cuts using the fence as a guide.
Explains how to perform out-ripping cuts, typically for wider stock.
Guides on making bevel, miter, and compound miter cuts.
Instructions for using the dado head for grooves and dados.
How to use the molding cutter head for shaping operations.
Steps for routing and dovetailing using specific chucks.
How to convert the saw for horizontal boring.
Instructions for using the saw as a sander with a disc.
Describes the three positions for locating the fence.
Importance of using stabilizing washers with thin blades.
Explains the function of the built-in electro-mechanical brake.
Suggests protecting the laminated table surface with plywood.
Tip for preventing automatic indexing by loosening the arm lock handle.
How to correct warped table boards by planing or slotting.
Procedure for slotting the fence to correct warpage.
Emphasizes keeping cutting tools sharp and avoiding forced feed.
Outlines the one-year guarantee for material and workmanship defects.
Addresses problems like blade 'heeling' and cuts not being square.
Troubleshooting for motor not running, fuses blowing, or low power.
Covers issues with elevation crank, loose components, and indexing.
Diagnosing why the motor fails to start.
Troubleshooting low power, slow starting, or overheating motors.
Addressing issues with the starting relay and motor stalling.