SELECTINGANDINSTALLING[ABLEINSERTS
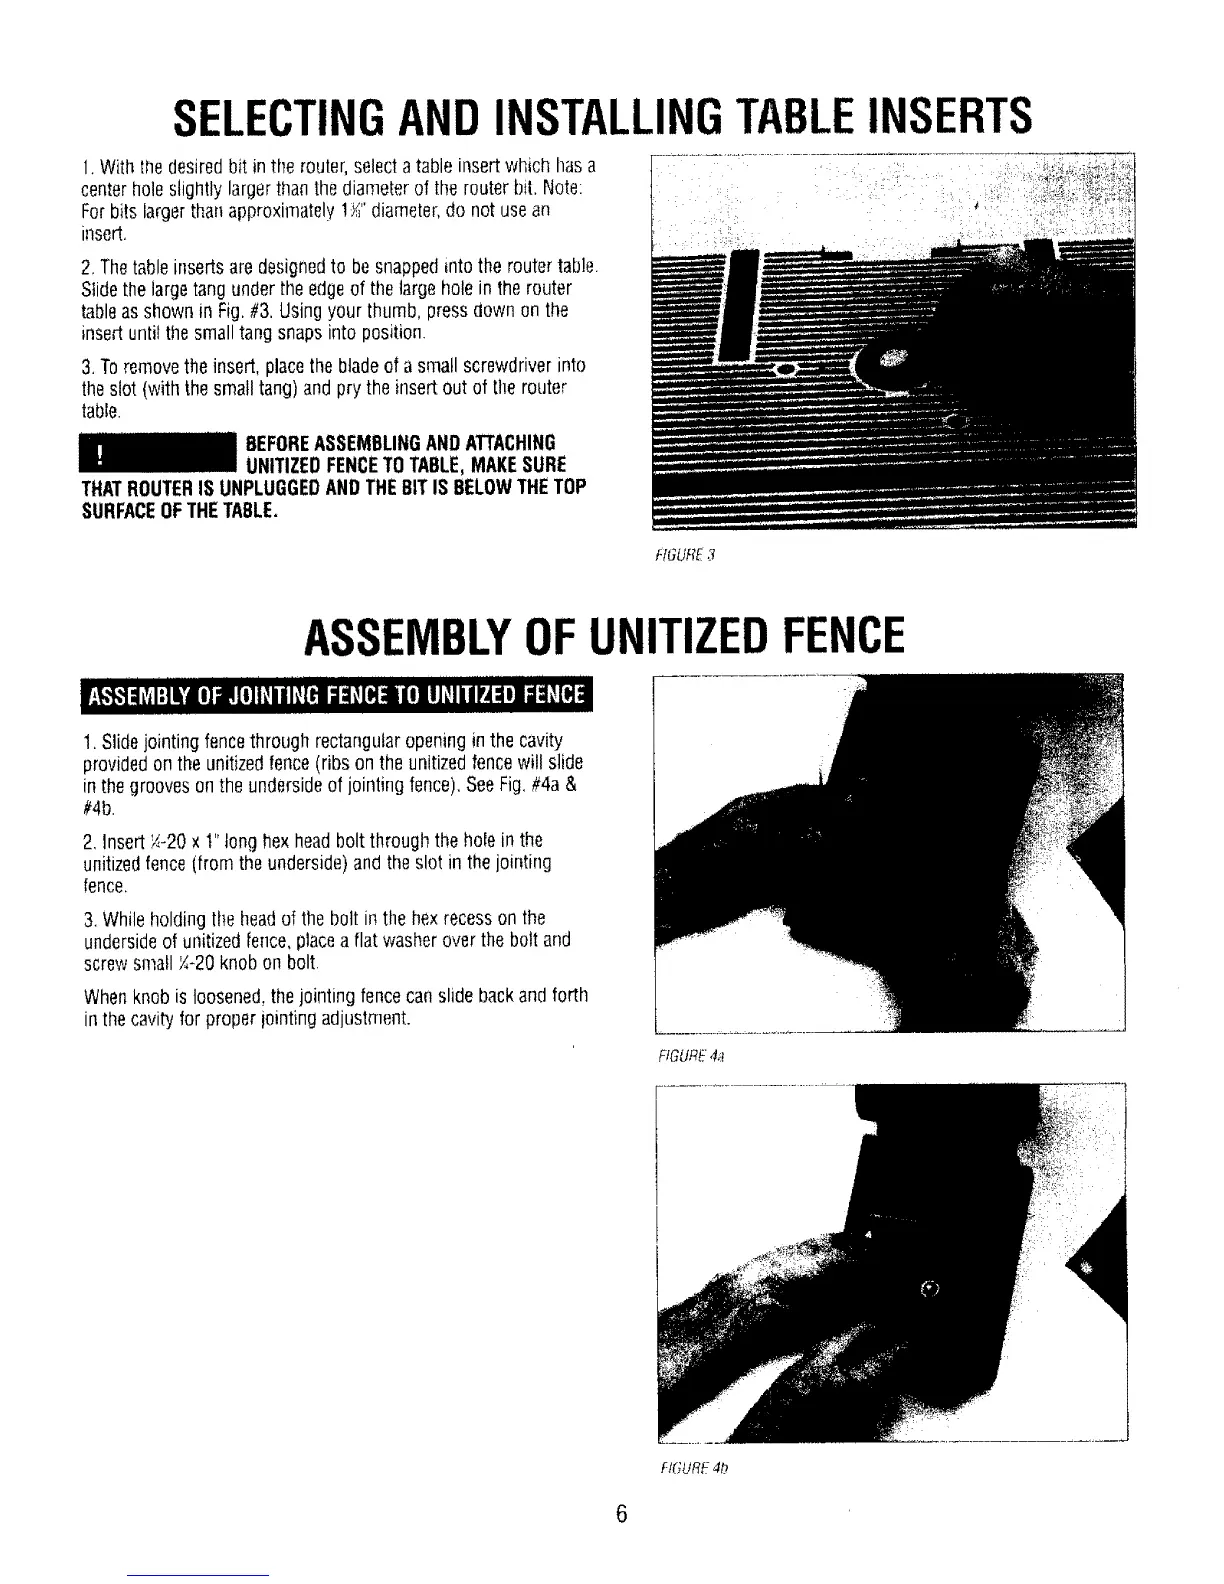
1.With the desiredbit in the router,selectatable insertwhich has a
centerholeslightly largerthanthe diameterof the router [)it. Note:
Forbits largerthan approximately!_;" diameter,do not usean
insert,
2, Thetable insertsare designedto besnappedinto the router table.
Stidethe largetang under the edgeof thelargehole in the router
tableas shownin Fig.#3.Usingyour thumb, pressdown on the
insertuntilthe smalltang snaps into position
3,Toremovethe insert, placethebladeof asmall screwdriverinto
theslot (with the smalltang)and prythe insert out of [he router
table.
BEFOREASSEMBLINGANDATTACHING
UNITIZEDFENCETOTABLE,MAKESURE
THATROUTERIS UNPLUGGEDANDTHEBITIS BELOWTHETOP
SURFACEOFTHETABLE.
HGURE3
ASSEMBLYOFUNITIZEDFENCE
1, Slidejointing fencethrough rectangularopeningin the cavity
providedon the unitizedfence(ribs on the unitizedfencewill slide
in thegrooveson the undersideof jointingfence).SeeFig.#4a &
#4b.
2, Insert;./.-20x t" tonghexheadbolt through the hole in the
unitizedfence (from theunderside)and the slot in the jointing
fence,
3.Whileholdingthe headof the bolt in thehex recesson the
undersideof unitized[ence,placea flat washeroverthebolt and
screwsmall _-20 knob on bolt.
Whenknob is loosened,the jointing fencecanslide backand forth
in thecavityfor proper iointing adjustment.
FIGURe."4a
FIGURE4b
6