EasyManua.ls Logo

Craftsman CMXEOCG982 - User Manual

Craftsman CMXEOCG982
100 pages
Print Icon
To Next Page IconTo Next Page
Loading...
Owner's Manual
SMART GARAGE DOOR OPENER
For Residential Use Only
MODELS CMXEOCG322, CMXEOCG572,
CMXEOCG772, and CMXEOCG982
READ AND FOLLOW ALL SAFETY RULES AND OPERATING INSTRUCTIONS BEFORE FIRST USE
OF THIS PRODUCT.
FASTEN THE MANUAL NEAR THE GARAGE DOOR AFTER INSTALLATION.
PERIODIC CHECKS OF THE OPENER ARE REQUIRED TO ENSURE SAFE OPERATION.
DO NOT INSTALL ON A ONE-PIECE DOOR IF USING DEVICES OR FEATURES PROVIDING
UNATTENDED CLOSE.
UNATTENDED DEVICES AND FEATURES ARE TO BE USED ONLY WITH SECTIONAL DOORS. SEE
PAGE 3.
WRITE DOWN THE CRAFTSMAN
®
SERIAL NUMBER LOCATED ON THE GARAGE DOOR OPENER:
WWW.CRAFTSMAN.COM

Table of Contents

Question and Answer IconNeed help?

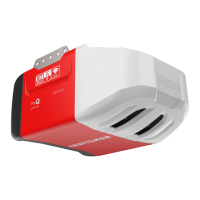
Do you have a question about the Craftsman CMXEOCG982 and is the answer not in the manual?

Summary

Introduction to Garage Door Opener

Preparing Your Garage Door for Installation

Critical Safety Preparations

Covers essential safety warnings and cautions before opener installation.

Planning for One-Piece Door Installation

Rail and Trolley Assembly Steps

Step 1: Assemble Rail and Install Trolley

Guides on assembling the rail sections and inserting the trolley.

Step 2: Fasten Rail to Motor Unit

Instructions for securely attaching the rail assembly to the motor unit.

Idler Pulley Installation

Step 3: Install the Idler Pulley

Explains the process of installing the idler pulley into the rail.

Belt Installation and Tensioning

Step 4: Install the Belt

Guides on installing the drive belt onto the trolley and sprocket.

Step 5: Tighten the Belt

Details how to properly tension the drive belt using the spring trolley nut.

Final Assembly Steps and Installation Warnings

Important Installation Safety Instructions

Crucial safety warnings to reduce the risk of severe injury or death during installation.

Header Bracket Location Determination

Step 1: Determine Header Bracket Location

Guides on selecting the correct location for the header bracket based on door type and clearance.

Header Bracket Installation Procedures

Step 2: Install the Header Bracket

Instructions for installing the header bracket on the wall or ceiling.

Rail Attachment to Header Bracket

Step 3: Attach Rail to Header Bracket

Details connecting the rail assembly to the header bracket.

Opener Positioning for Installation

Step 4: Position the Opener

Instructions for positioning the opener unit correctly relative to the door.

Hanging the Opener Unit

Step 5: Hang the Opener

Guides on securely hanging the opener unit to structural supports.

Lights and Emergency Release Installation

Step 7: Attach Emergency Release Rope

Guides on attaching the emergency release rope and handle.

Door Bracket Installation for Sectional Doors

Step 8: Fasten the Door Bracket

Instructions for attaching the door bracket to sectional doors, including reinforcement.

Door Bracket Installation for One-Piece Doors

Fasten Door Bracket on One-Piece Doors

Specific instructions for fastening the door bracket to one-piece garage doors.

Door Arm Connection to Trolley (Sectional)

Door Control Installation

Safety Reversal System Installation

Step 12: Install Safety Reversing Sensors

Instructions for installing and aligning the safety reversing sensors.

Safety Reversal Sensor Bracket Installation

Wiring Safety Reversing Sensors

Electrical Requirements and Sensor Alignment

Installation Step 14: Aligning Safety Reversing Sensors

Explains how to align sensors for proper operation, including LED indicators.

Programming Travel Limits and Force Setup

1 - Program the Travel

Step-by-step guide to setting the up and down travel limits for the door.

2 - Automatic Force Set Up

Details the automatic force sensing operation after travel limits are set.

Safety and Protector System Testing

3 - Test the Safety Reversal System

Instructions for testing the safety reversal system with an obstruction.

4 - Test the Protector System

Instructions for testing the safety reversing sensors' functionality.

Operation Safety Instructions

Important Safety Instructions for Operation

Comprehensive safety guidelines for operating the garage door opener safely.

Manual Door Operation and Maintenance

Manual Door Operation Safety and Procedures

Safety precautions for manual door operation using the emergency release.

Troubleshooting Common Opener Issues

Diagnostic Chart for Opener Codes

A chart mapping diagnostic codes (flashes) to symptoms and solutions.

Garage Door Opener Safety Guide

Routine Maintenance Procedures

Craftsman CMXEOCG982 Specifications

General IconGeneral
TypeGarage Door Opener
Drive TypeChain Drive
Max Door Height7 feet
Max Door Weight500 lbs
Warranty1 year
Power SourceAC
Voltage120V
Safety FeaturesSafety Sensors
Remote ControlYes

Related product manuals