Do you have a question about the Creality 3D Pad Mini and is the answer not in the manual?
Step-by-step guide for updating the 3D Pad Mini firmware via SD card, including website download instructions.
Key guidelines on voltage, installation checks, cable connections, and general upkeep for optimal performance.
Instructions for downloading the Creality 3D software from the official website and starting the application.
Overview of the software's main interface elements, model view, and print setting configurations.
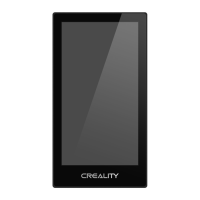
The Creality 3D Pad Mini is a user-friendly interface designed to enhance the 3D printing experience, offering intuitive control and monitoring capabilities. It functions as a dedicated control panel for 3D printers, streamlining various operations from preparation to printing and maintenance.
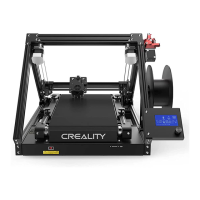
The primary function of the 3D Pad Mini is to provide a centralized and accessible control point for your 3D printer. It replaces the often less intuitive built-in screens, offering a graphical user interface (GUI) that simplifies complex tasks. The device allows users to prepare their printer for a print job, initiate printing from selected files, adjust various print settings in real-time, and perform essential maintenance tasks like bed leveling.
One of its core functions is to facilitate the printing process. Users can navigate through a list of G-code files stored on an SD card, select the desired file, and begin printing. During a print, the 3D Pad Mini displays crucial information such as print progress, estimated time remaining, and current temperatures. It also provides options to pause, resume, or stop a print, offering greater control over ongoing jobs.
Beyond basic printing, the 3D Pad Mini integrates with a filament sensor, which is a key feature for preventing failed prints due to filament run-out. When connected, the pad can detect if the filament has run out and prompt the user to load new filament, ensuring continuous operation.
Another significant function is bed leveling. This is a critical step for successful 3D prints, and the 3D Pad Mini simplifies it by guiding the user through the process. It allows for precise adjustments of the Z-axis, either manually or with an auto-adjust option, to achieve an optimal first layer.
The device also serves as a hub for firmware upgrades for both itself and the connected 3D printer's mainboard. This ensures that the printer and the control pad can stay up-to-date with the latest features and bug fixes, improving overall performance and compatibility.
The 3D Pad Mini is designed for ease of use, making 3D printing more accessible to both beginners and experienced users. Its graphical interface, presented on a 4.3-inch screen, replaces cryptic text-based menus with clear icons and intuitive navigation.
To begin using the 3D Pad Mini, users first need to prepare their printer. This involves selecting the "Prepare" option from the main menu, which then allows for actions such as "Auto Home" to bring the nozzle to its starting position. This initial setup is crucial for ensuring the printer is ready for a job.
Once prepared, users can access the "Print" menu to select a G-code file from the SD card. The interface displays a list of files, often with a visual representation of the model, making it easy to identify the correct print job. After selecting a file, the printing process can be initiated.
During an active print, the 3D Pad Mini offers real-time control. Users can enter the "Settings" interface to adjust parameters such as nozzle temperature, bed temperature, and print speed. This on-the-fly adjustment capability is invaluable for fine-tuning print quality or addressing issues that may arise during a long print. The ability to toggle the nozzle fan on or off also provides an additional layer of control for specific material requirements.
Bed leveling is a standout usage feature. From the main menu, selecting "Level" brings up an interface that allows for precise Z-axis adjustments. Users can choose different movement increments (e.g., 0.1mm, 1mm, 10mm) to fine-tune the nozzle height relative to the print bed. This granular control helps achieve perfect first layer adhesion, which is fundamental to print success. An "Auto Adjust" option further simplifies this process for compatible printers.
The 3D Pad Mini also supports creative 3D usage through its associated software. Users can download and install "Creative3D" software, which likely provides tools for model preparation, slicing, and other pre-printing tasks. This integration expands the capabilities of the 3D Pad Mini beyond just a control interface, making it part of a larger ecosystem for 3D printing.
Maintaining the 3D Pad Mini and ensuring its optimal performance involves several key practices outlined in the manual. Firmware upgrades are a crucial maintenance feature. The device supports upgrading its own firmware as well as the mainboard firmware of the connected 3D printer. This process typically involves formatting an SD card, downloading the appropriate firmware from the Creality website, inserting the card into the 3D Pad Mini, and powering it on. The pad then reads the card and performs the upgrade, displaying a progress bar and a "successful" message upon completion. It's important to remove the SD card after the upgrade to prevent repeated programming.
Beyond firmware, general care and handling are emphasized. Users are advised to unplug the original screen before installing the 3D Pad Mini and to ensure the printer matches the reserved interface. The filament sensor cable must be correctly connected, and filament inserted into the sensor hole for its functionality.
Safety is a key aspect of maintenance. Users are instructed to always turn off the power or physical switch of the 3D printing device before installing the 3D Pad Mini. This prevents electrical hazards and potential damage to the components. The pad itself must be securely fixed to the 3D printing device to prevent accidental dislodgement or damage during operation.
Compatibility notes are also part of maintenance. The manual specifies that certain 3D Pad Mini firmware versions (e.g., 4.2.2 and 4.2.7) are only compatible with specific mainboard versions (V4.2.2 and V4.2.7, respectively). Adhering to these compatibility requirements is essential for proper function and to avoid issues.
Finally, general cleanliness and inspection are recommended. Users should ensure that the power cord and data cable are not damaged, and that plugs or ports are not corroded or aged. Keeping the equipment's surroundings free of debris accumulation and maintaining a clean and tidy environment contributes to the longevity and reliable operation of the 3D Pad Mini and the printer.
| Product Name | Creality 3D Pad Mini |
|---|---|
| Processor | Quad-core ARM Cortex-A7 |
| Operating System | Android |
| Connectivity | Wi-Fi, USB |
| Power Input | 5V/2A |
| Compatibility | Creality 3D printers |
| Resolution | 800 x 480 pixels |
| Installation Method | Magnetic Adsorption |
| Screen Size | 4.3 inch |