43 • IV-CAMA3-20-N-W-1B, IV-CAMA3-20-N-SLVR-1B, IV-CAMA3-20-W-1B, and IV-CAMA3-20-
SLVR-1B
Product Manual — Doc.
9323C
3. To store Preset 0, select the number 0 from the drop-down menu and click Set.
Preset 1 - The Tracking Shot
Preset 1 determines how tightly the camera frames a presenter while tracking and the maximum
amount of zoom and upwards tilt-motion of the tracking shot.
To configure Preset 1, have someone act as a subject to determine the optimal camera position and
zoom in. Position the camera to ensure the subject fits in the frame in the following situations:
l
The subject stands with outstretched arms.
l
The subject raises a hand (to simulate writing on a blackboard or gesturing).
l
Depending on the height of the subject, add enough headroom to allow taller presenters. The
headroom defined in Preset 1 limits how far up the camera will tilt while tracking.
NOTE:If the Tracking Shot is not set (Preset 1) it can lead to the camera not being framed correctly,
and can lead to poor presenter tracking. Confirm that there is a Tracking Shot (Preset 1) set by
Calling Preset 1 in the bottom left of the Main View.
Adjust White Balance
As the lighting in presentation spaces can change frequently due to projectors, displays or windows, set
the camera to static white balance in order to guarantee the most reliable tracking performance.
Additional white balance settings are detailed in the OSD Menu Tree on page 51.
The most reliable way to achieve accurate static white balance is to focus the camera on a white object
like a white board or a white balance target and perform a One-Push white balance measurement.
1. Focus on a white Object
Pan / tilt / zoom until the white object fills the entire frame.
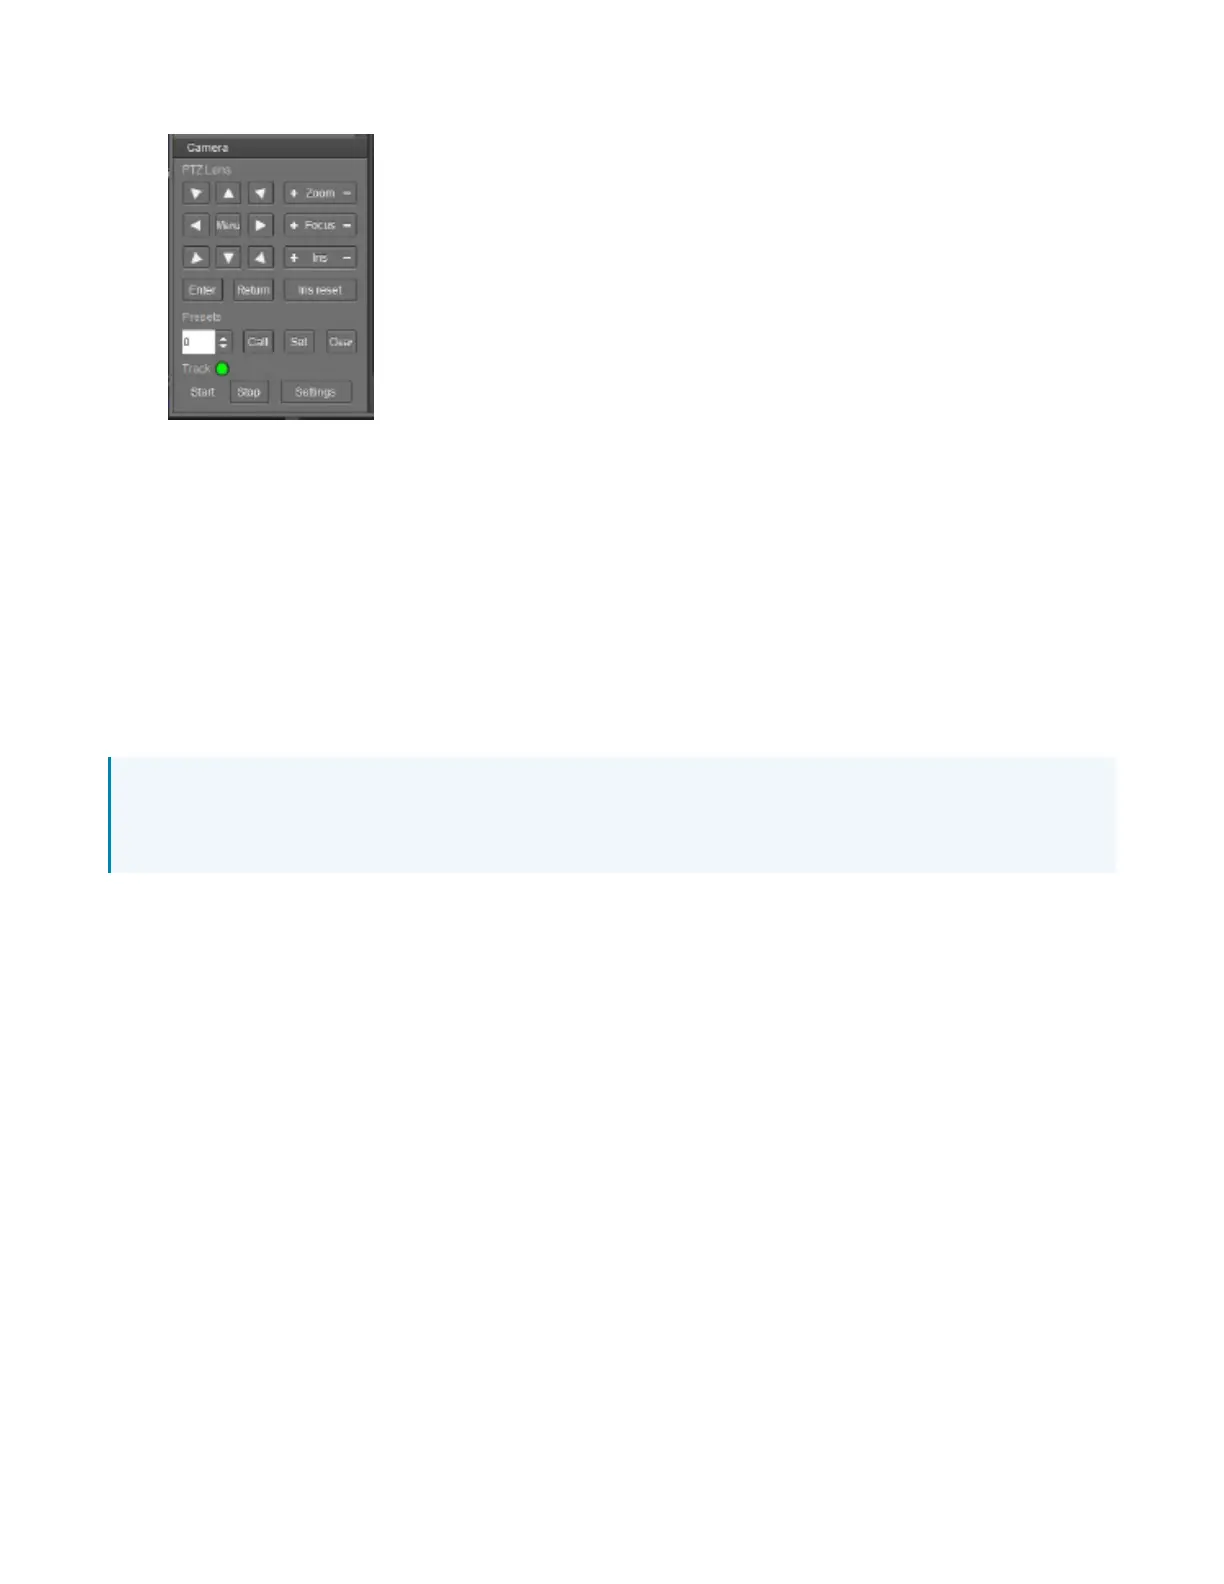
2. Open the OSD Menu
Click the Menu button in the center of the PTZ controller to toggle the camera’s onscreen menu.
This menu will appear overlaid on top of the tracking shot / PTZ feed.
3. Enter COLOR Settings
Using the down-arrow, navigate to the COLOR option and click Enter to confirm your selection.
4. Cycle to the ONE PUSH option using the right-arrow button and select ONE PUSH TRIGGER to
initiate the white balance adjustment.
 Loading...