Crestron TPS-6L Isys
®
5.7” Wall Mount Touchpanel
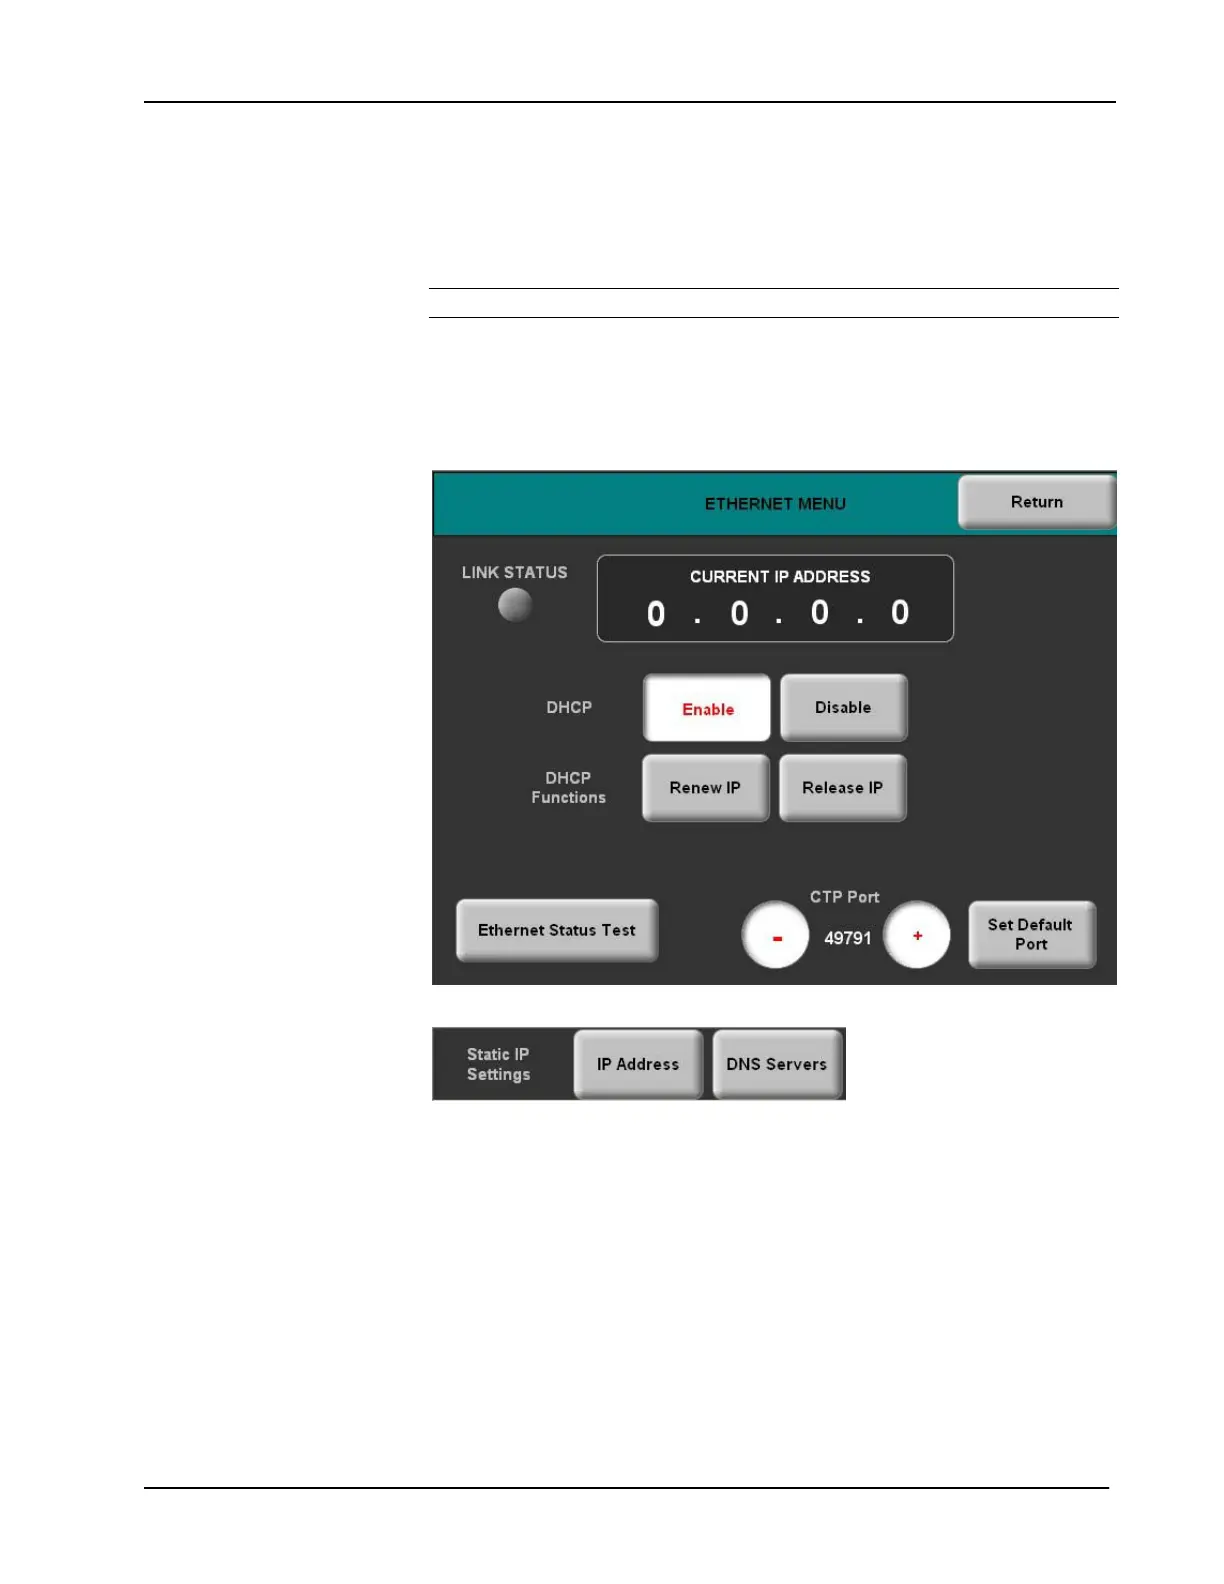
The menu shows the current IP address. The LINK STATUS button shows if the
Ethernet link is active (green) or inactive (gray).
With DHCP enabled (default), the bottom buttons let you renew or release DHCP
functions. When you press each button, the button legend changes to Working until
the selected function is completed.
NOTE: If DHCP is unable to locate an IP address, a notice appears on the screen.
Press the DHCP Disable button to display the Static IP Settings submenu, shown
below, in place of the DHCP Functions submenu. The bottom buttons are now used
to select static IP settings IP Address and DNS Servers. Refer to subsequent
illustrations on pages 18 and 19.
ETHERNET MENU
Static IP Settings Submenu
• Press the IP Address button to display the STATIC IP SETTINGS menu,
as shown on the following page.
• Pressing the DNS Servers button displays the STATIC DNS SETTINGS
menu as shown on page 18.
Press the Ethernet Status Test button to see an on-screen report of the status of the
Ethernet link, including details if there is an error.
Use the + and – buttons to adjust the setting of the CTP port. To select the default
port, press the Set Default Port button.
Operations & Installation Guide – DOC. 6630A Isys
®
5.7” Wall Mount Touchpanel: TPS-6L • 17
 Loading...