58
200+-20kgf-cm 200+-20kgf-cm
SERVICE - 12 - 3
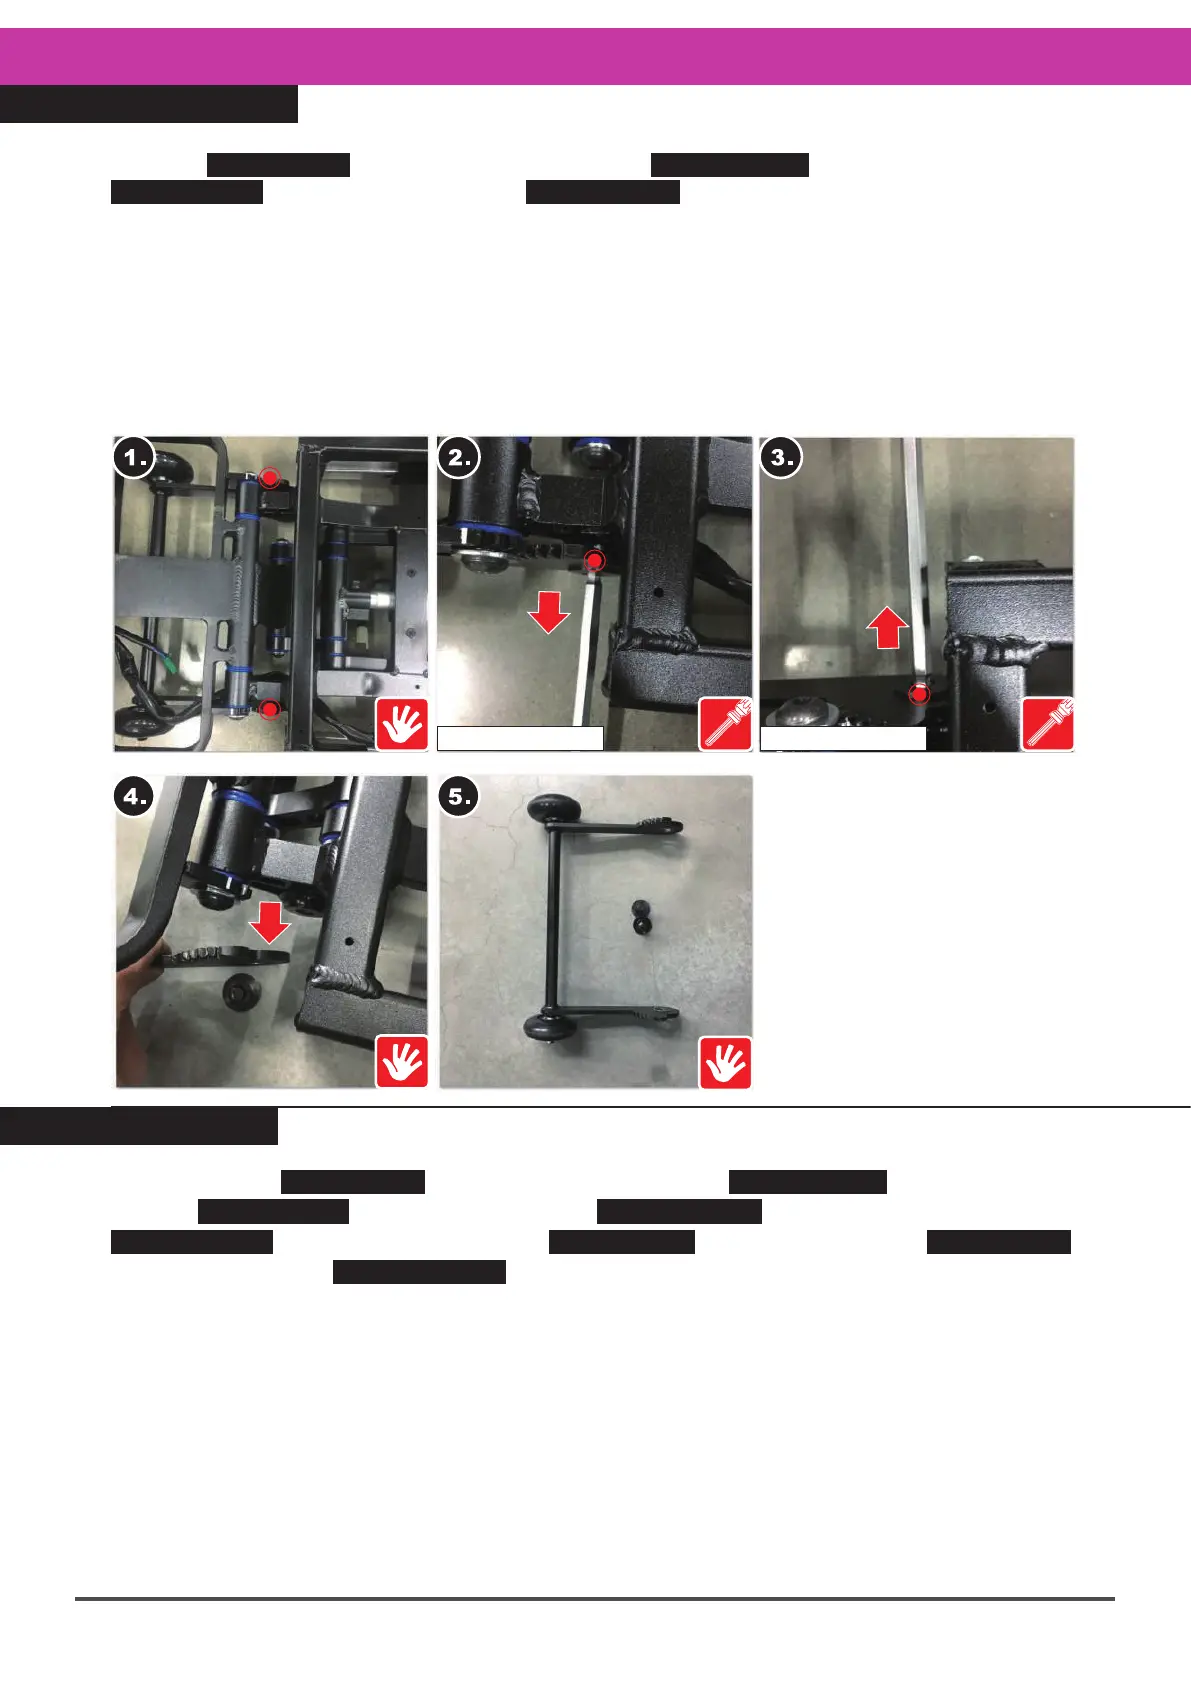
Supporting Wheel Repair
Refer to SERVICE-9 Front Lower Cover Repair SERVICE-10 Front Top Cover Repair
SERVICE-11 Rear Top Cover Repair SERVICE-12 Rear Lower Cover Repair, and after
removing the above items, then :
1.Secure the two fastening points on the supporting heel and the rear frame.
2&3.Use an Allen key or wrench (#10) to remove the holding screws (14mm, 2pcs) on
both sides.
4.Disengage from the gear on the front frame.
5.Take the supporting wheel off.
※When reinstalling, make sure to carry out these steps in the exact reverse sequence.
SERVICE - 13
Frame Repair :
Please refer to SERVICE-9 Front Lower Cover Repair SERVICE-10 Front Top Cover
Repair SERVICE-4 Front Wheel Repair SERVICE-11 Rear Lower Cover Repair
SERVICE-12 Rear Top Cover Repair SERVICE-5 Rear Wheel Repair SERVICE-2
Steering Bar Repair SERVICE-11-1 DR Controller Repair, and after removing the above
items, then :
1.Use an Allen key or driver (#6) to unfasten the screw on one side (underneath the front
and rear frames) and then remove the screws (20mm, 2pcs) and washers on the other side.
2.After removing the screws at one end, use a rubber hammer and metal tool to knock
out the small metal rod.
3.Use an Allen key or driver (#6) to unfasten a screw on one side the top of the front and
rear frames; then remove the screws (20mm, 2pcs), washers and gears on the other side.
4.Then, as is step 2, use a rubber hammer and metal tool to knock out the large metal rod.
5.Take off the front frame.
6.Take off the rear frame.
※When reinstalling, please carry out these steps in the exact reverse sequence, and refer
to the following re-installation instructions.