20 | JetScan
®
MPX 8200 strapping and corner module | Stopping conditions and recovery steps
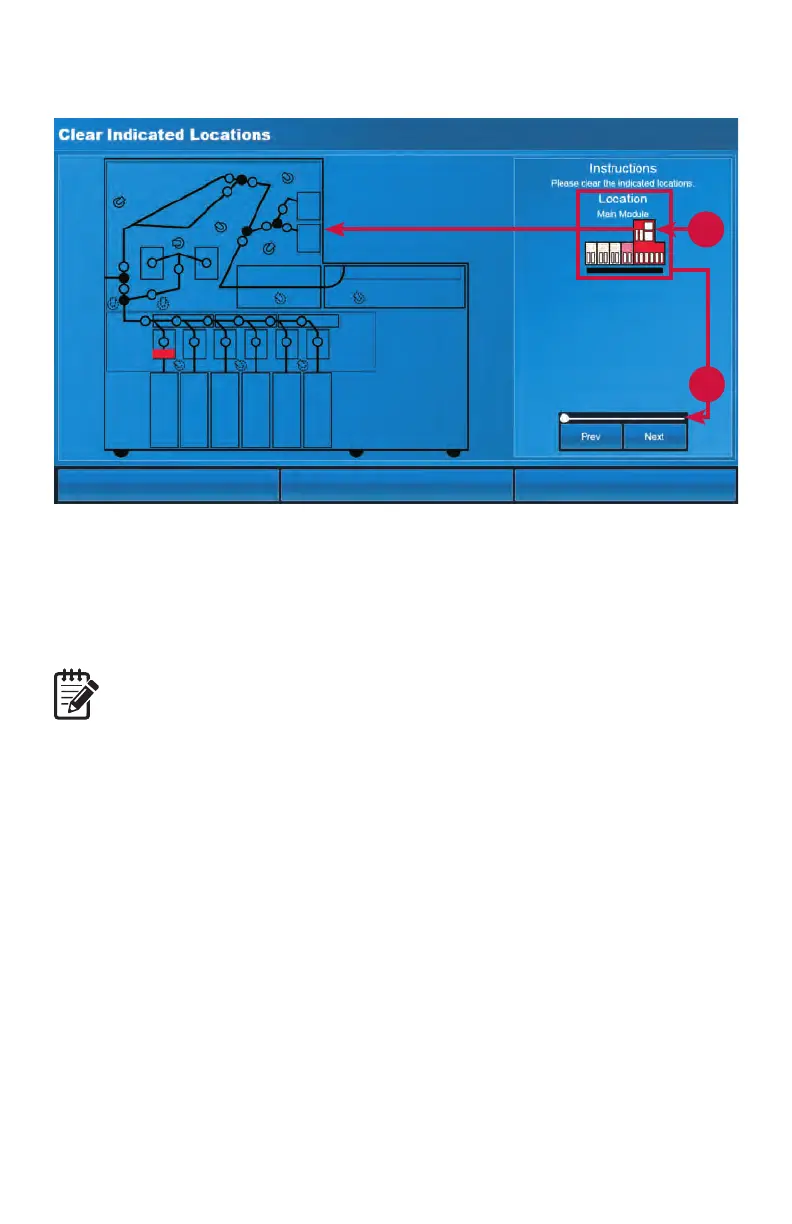
10. The ClearIndicatedLocations screen appears when steps 8 and 9 are complete.
The screen indicates locations where documents must be removed.
11. Review the system diagram under Location on the right side of the screen. The red
component is shown in detail on the left side of the screen. Other locations where
documents must be removed are marked in pink.
12. Open access doors if needed. Remove documents from the red location.
Topreventcountingerrors,onlyremovedocumentsthatthescreenidenties.
13. Press Prev (previous) or Next in the bottom right corner of the screen to select
the next component closest to the MPX 8200 main unit and remove documents
from this location. Continue this process until all documents are removed and the
system diagram under Location is white.
11
11
13
 Loading...