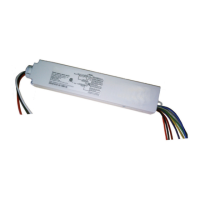
Wireless Adapter (WA100-PM)
Test Suite 2:
Any Driver + Occupancy Sensor
1. Press and immediately release the blue Reset button. The red Error LED flashes once, then pauses and repeats.
2. Check that the connected lights cycle On and Off, or cycle from maximum to minimum brightness then turn
Off per the DIP switch configuration.
3. Press and immediately release the blue Reset button again. The red Error LED flashes twice,
then pauses and repeats.
4. Trigger the occupancy sensor. The light connected to the driver turns On. When the sensor
times out the light turns Off.
5. Press and immediately release the Reset button to exit testing.
6. Press and hold the blue RESET button on the WA100-PM for 3 seconds to reset the unit. Release the button
when the green Joined LED and the red Error LEDs begin flashing.
Test Suite 3:
Dimming Driver + Occupancy Sensor + Photosensor
1.
Press and immediately release the blue Reset button. The red Error LED flashes once, then pauses and repeats.
2. Check that the lights connected to the driver cycle from maximum to minimum brightness then turn Off,
then repeat.
3.
Press and immediately release the blue Reset button. The red Error LED flashes twice, then pauses and repeats.
4. Trigger the occupancy sensor. The green Joined LED turns On and the light connected to the driver turns On.
When the sensor times out the Joined LED and light turns Off.
5. Press and immediately release the blue Reset button again. The red Error LED flashes three times, then pauses
and repeats.
6. The light connected to the driver turns On.
7. The light’s output is proportional to the amount of light received by the photosensor.
•
For dimming lights, shine a bright light at the photosensor – the light gets brighter.
Cover the photosensor –
the light gets dim.
• For switched lights, cover the photosensor – the light turns Off.
Shine a bright light at the photosensor – the light turns On.
8. Press and immediately release the Reset button to exit testing.
9. Press and hold the blue RESET button on the WA100-PM for 3 seconds to reset the unit. Release the button
when the green Joined LED and the red Error LEDs begin flashing.
23

 Loading...