INSTALLATION WALKTHROUGH:
For more information log onto www.curtmfg.com, & for helpful towing tips log onto www.hitchinfo.com
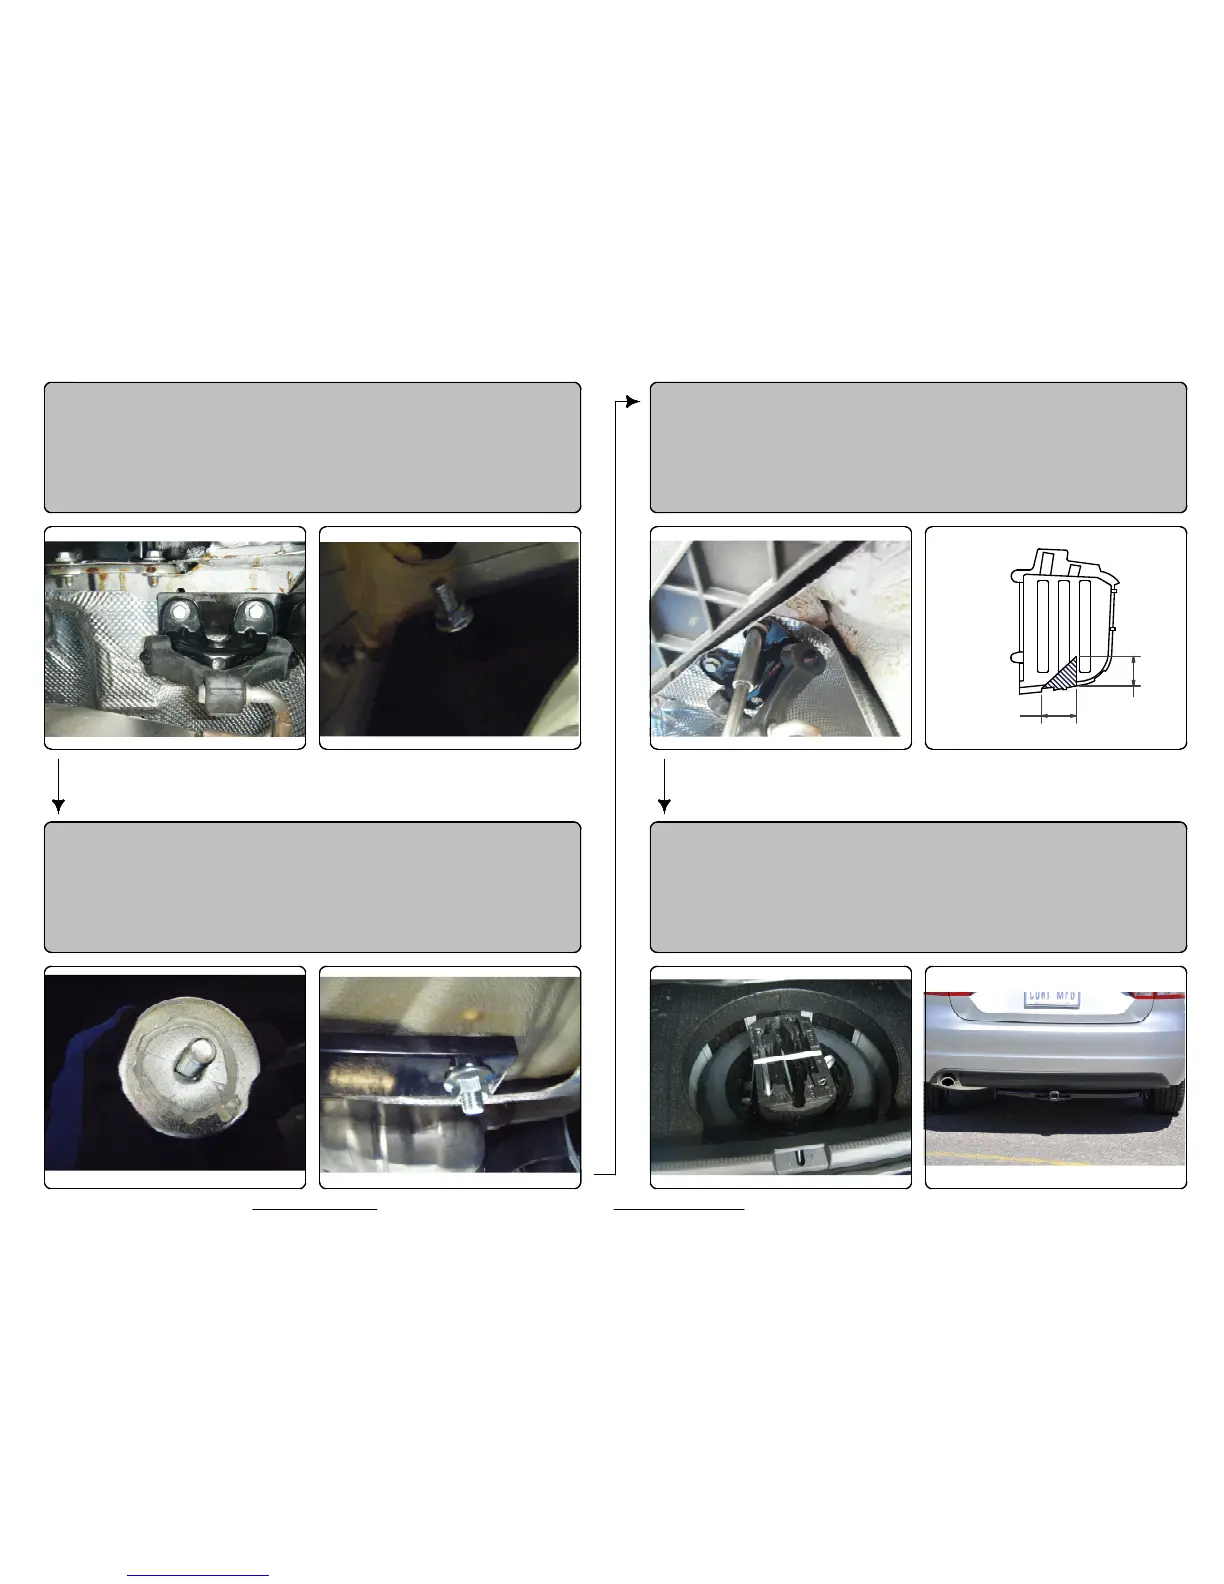
7. Position the driver side mount plate between the exhaust
hanger bracket and the driver side frame rail and secure
using the (2) M8 hex flange bolts. Fishwire the remaining
7/16" carriage bolt and CM-SP2 spacer through the access
hole and out the slotted hole on the outer side of passenger
side frame rail as shown and secure with a hex flange nut.
8. Use silicone caulk (or equivalent) to seal the tire well plug
hole from exhaust fumes and water by putting a bead around
the CM-SP62 spacer. Place the CM-SP62 spacer onto the
hole and put a bead of caulk around the square hole. Install
a 1/2" carriage bolt and secure with a hex flange nut from
under the vehicle as shown.
9. Torque all M8 hardware to 17 ft-lbs., all 7/16" hardware
to 70 ft-lbs. and all 1/2" hardware to 110 ft-lbs. Trim rear
underbody panel to clear the passenger side plate as
shown in the Underbody Panel Trim Diagram. Reinstall
the underbody panel using the torx head screws and hex
nuts removed in Step 1.
10. Return spare tire and other items removed from the trunk.
Install is now complete.
7.00 in
7.00 in