58
Installing and Removing the Infant Carrier
Installing the Infant Carrier Only Using Lap/Shoulder Belts (Alternate)
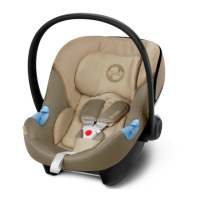
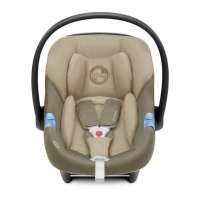
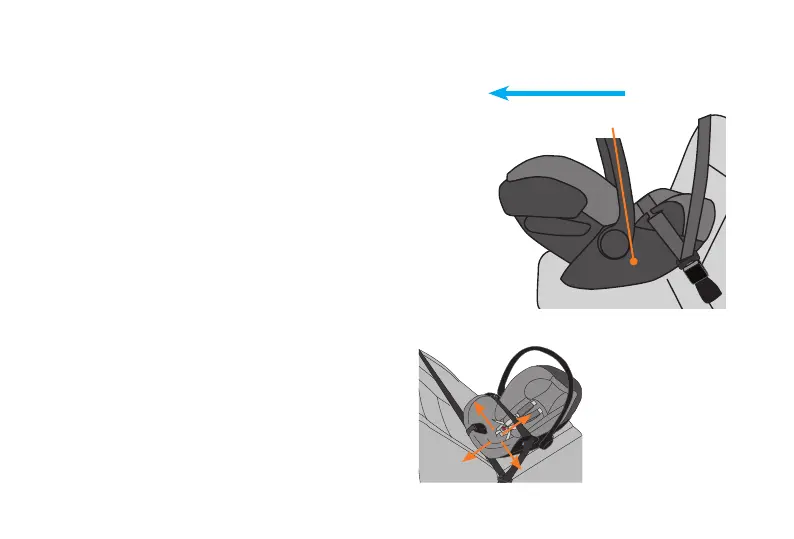
6. Check the recline angle. Adjust the seat
angle until the BLUE LEVEL LINE on the
Infant Carrier is level with the ground. A
tightly rolled towel or pool noodle (pg. 65)
may be placed under the Infant Carrier,
near the vehicle seat back to adjust the
angle, if necessary.
The CLOUD G/CLOUD G LUX is allowed
to touch the vehicle seat(s) in front of it,
as long the recline angle of the CLOUD
G/CLOUD G LUX is not affected.
7. Grab the Infant Carrier at the Belt Guides
and pull from side to side and front to
back to make sure it is installed correctly.
The Infant Carrier should not move more
than 2.5 cm (1 in) in any direction.
If the Infant Carrier moves too much,
tighten the vehicle belts more and
recheck. You may try a different vehicle
seat or installation method, or both.
8. If the Infant Carrier is next to a vehicle
door or panel, extend the adjacent L.S.P.
device (pg. 31).
LINE MUST BE LEVEL WITH GROUN
WHEN INSTALLED WITHOUT BASE
FRONT OF VEHICLE
LINE MUST BE LEVEL WITH GROUND
WHEN INSTALLED WITHOUT BASE
FRONT OF VEHICLE
yy
uu