© 2021 Cypress Solutions Manual: CTM-ONE (Revision 1.0)
5. Installing the CTM-ONE.
Select an installation location that will provide optimal cable routing for external connections to vehicle
diagnostic port or power, external sensors, etc. Consider mounting locations that will take advantage of the
internal antennas . In some cases external antennas may need to be used to provide adequate Cellular/Wi-
Fi/GNSS operation. Optimal in vehicle mounting locations includes areas that have clear visibility of the sky such
as under dash/under window locations. Be careful not to mount the CTM-ONE in areas where materials would
shield radio signals.
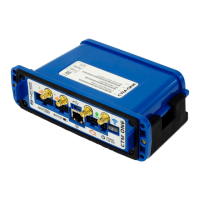
The CTM-ONE has accessory covers that can be installed to provide ingress protection for mounting in areas of
excessive moisture and dust. These covers also can also provide a degree of tamper protection if mounted
correctly with sealed cable glands and fasteners properly torqued. Accessory covers can be secured with #8-32
screws.
Do not overtighten, recommended torque value: 8-10 in-lb
5.1 Mounting
The CTM-ONE includes a flexible mounting bracket that has four 5mm mounting holes suitable for #10 screws.
Take care not to over-tighten these screws and damage the bracket. Once this has been installed in the required
location, clip the CTM-ONE into the 4 tabs of the bracket. The bracket can be used as drill guide template. There
are a total of 4 mounting holes (1.75 (44.5 mm) ” x 3.75 (95.25 mm)” center to center distance).