<INSPECTION OF WINKER>
Turn a main switch “ON”. Check the lamp
for proper operation (front/rear and
right/left) and sound by operating the
switch, and also a lens for damage or
contamination.
<INSPECTION OF STOP LAMP>
Turn a main switch “ON”. Check a stop
lamp for proper operation by operating the
front wheel and the rear wheel brakes, and
also a lens for damage or contamination.
●Be sure to turn a main switch "OFF"
prior to replacement of a bulb.
●Use only a bulb of rated capacity.
●After replacement with new bulb, check
for proper operation.
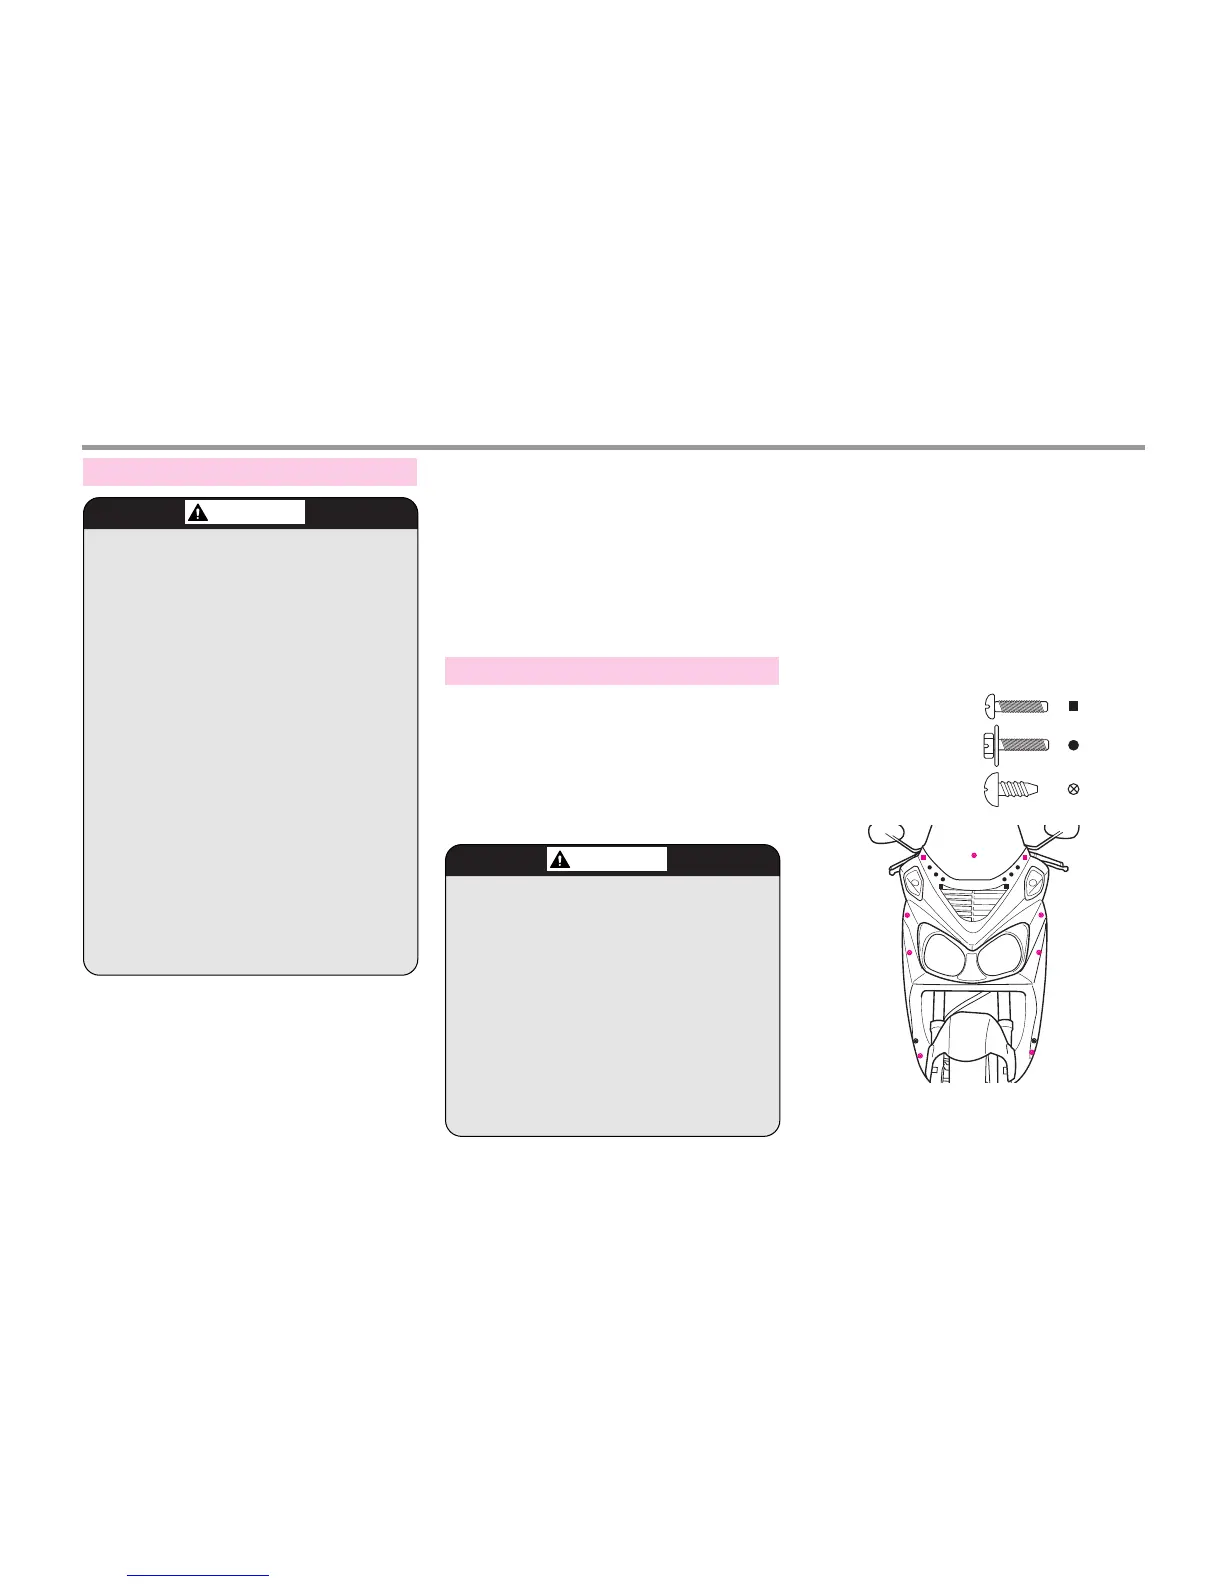
<HEADLIGHT BULB>
(1) Loosen 4 special screws and remove
the front cover.
(2) Loosen 4 washer bolts and disconnect
the windscreen.
(3) Loosen 2 washer bolts and 9 tapping
screws, and then disassemble the front
under cover.
28
LIGHTS AND WINKER INSPECTION
BULB REPLACEMENT METHOD
●
SPECIAL SCREW
●
WASHER BOLT
●
TAPPING SCREW
BLACK : FRONT ASSEMBLY
RED : REVERSE SIDE ASSEMBLY
●The lighting head light emits very hot
heat. If you touch with naked hand, it
may be burned.
●When replacing head light lamp, stop
lame and winker lamp, use only a
bulb of rated capacity. Using a lamp
exceeding the rated capacity can
cause over-discharge of battery and
wire burning. It can lead a fire.
●If the head light is turned off due to
aging while driving at night, it will
cause an accident by obstructing
driver’s view. Check the condition
daily.
●If the tail light is off while driving at
night, it will cause an accident by
failure of notice by the other drivers.
Check the condition daily.
●Care is to be taken to avoid leaving
fingerprints on a headlight bulb.
Failing to observe this may cause
early damage of the headlight bulb
resulted from concentration of heat.
●Be sure to wear clean gloves when
replacing a bulb. If touched to it with
bare hands, clean it with a cloth
soaked with alcohol to prevent from
early damage.
 Loading...