Do you have a question about the Dahua Technology DH-TPC-BF5421-T and is the answer not in the manual?
Defines the area and people flow using safety barriers and marking.
Illustrates correct and wrong placement relative to camera and blackbody line of sight.
Shows placement for left-to-right or right-to-left flow, emphasizing no line-of-sight blockage.
Step-by-step guide on mounting the blackbody to the tripod using a bracket.
Instructions for powering up the blackbody and setting its temperature to 35°C.
Guide on mounting the camera to the tripod using the provided bracket and screws.
Details specific distances (3m, 1.8m, 2m) for camera and blackbody placement.
Connects the camera, IVSS server, and PoE switch using Ethernet cables.
Explains how to connect the monitor via HDMI and the mouse for IVSS control.
Guides through initial IVSS server setup, region, language, and terms.
Covers adding the camera to IVSS, searching, initializing, and setting up measurement rules.
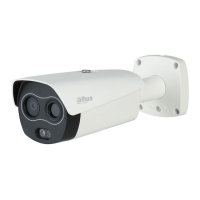
| Model | DH-TPC-BF5421-T |
|---|---|
| Category | Measuring Instruments |
| RAM | 512 MB |
| Aperture | F1.0 |
| Thermal Technology | Uncooled VOx Microbolometer |
| Pixel Interval | 17 μm |
| Response Waveband | 8 μm–14 μm |
| Lens | Fixed |
| Aperture (Thermal) | F1.0 |
| Protection Grade | IP67 |
| Frame Rate | 25/30 fps |
| Frame Rate (Thermal) | 25 Hz |
| Focus | Fixed |
| Protection Level | IP67 |
| Type | Thermal Camera |
| NETD | < 50 mK @ f/1.0 |
| Close Focus Distance (Thermal) | 0.5 m |
| Angle Adjustment | Pan: 0° to 360°; Tilt: 0° to 90°; Rotation: 0° to 360° |
| Power Supply | 12 VDC/PoE |
| Temperature Measurement Range | -20°C to +150°C |
| Accuracy | ±2°C, ±2% |
| Weight | 1.1 kg |
| Thermal Sensitivity | <50 mK |
| Spectral Range | 8 μm to 14 μm |
| Storage Temperature | -40 °C to +70 °C (-40 °F to +158 °F) |
| Weight (Approximate) | 1.1 kg |
| Resolution (Thermal) | 400 x 300 |
| Image Sensor | 1/2.8" CMOS |