User’s Manual
68
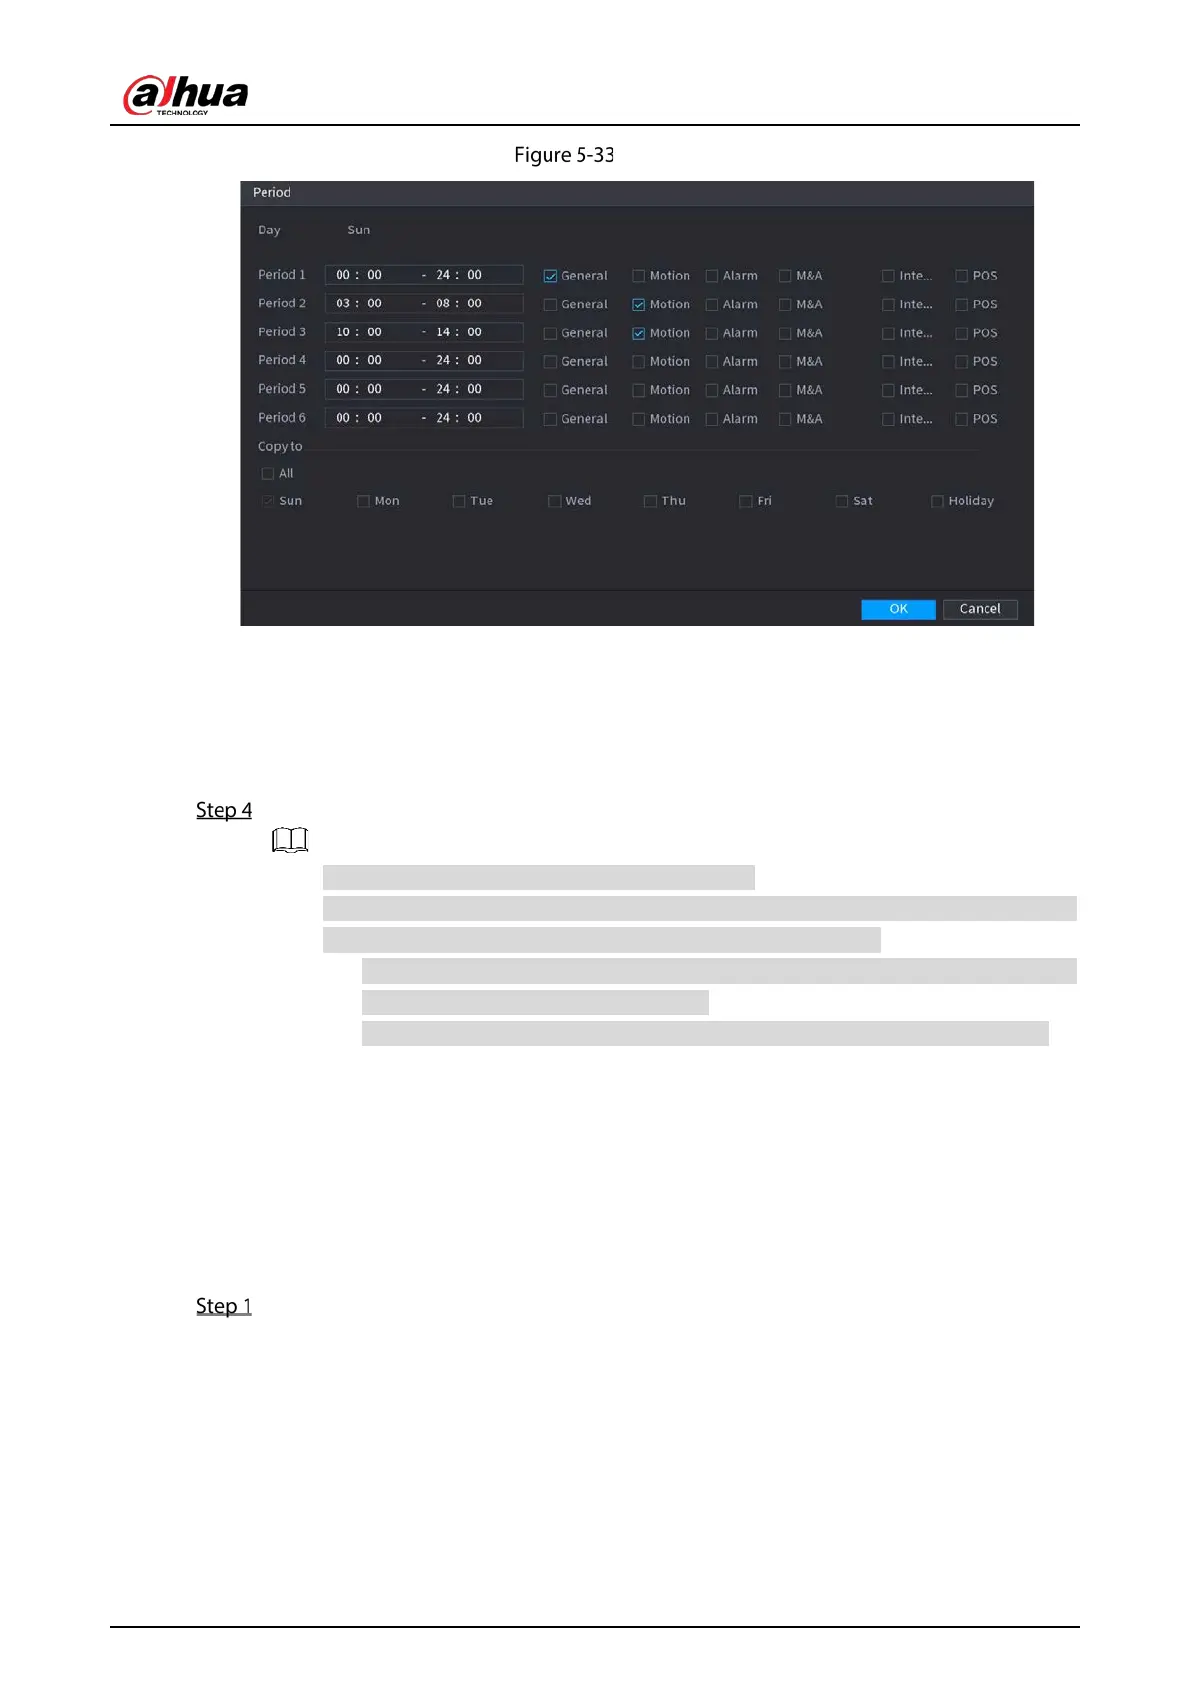
Period
5) Enter the time frame for the period and select the event checkbox.
There are six periods for you to set for each day.
Under
Copy to, select All to apply the settings to all the days of a week, or select
specific day(s) that you want to apply the settings to.
6) Click
OK to save the settings.
Click OK to complete the settings.
Click Copy to copy the settings to other channels.
After configuring the recording schedule settings, you need to perform the following
operations to start recording according to the defined schedule.
Enable the alarm event and cofigure the settings for the recording channel. For
details, see "5.10 Alarm Events Settings."
You need to enable the recording function, see "5.9.1 Enabling Record Control."
5.1.4.10 Configuring Snapshot Storage Schedule
You can configure the storage schedule for the snapshot such as channels to take snapshot, alarm
settings, and the armed period.
You can also configure snapshot storage settings by selecting
Main Menu > STORAGE > Schedule >
Snapshot.
After you have configured the video recording settings, on the Record page, click Next.
 Loading...