Home
Daikin
Air Conditioner
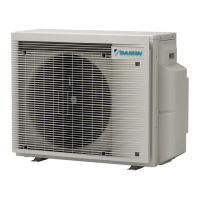
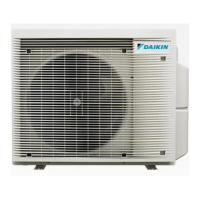
2MXM50M3V1B9
Daikin 2MXM50M3V1B9 User Manual
4
of 1
of 1 rating
76 pages
Give review
Manual
Specs
To Next Page
To Next Page
To Previous Page
To Previous Page
Loading...
15
|
Troubleshooting
Installer reference guide
67
2(A)MXM40+50 + 2(A)MXF40+50
R32 Split series
4P600463-2C – 2020.08
DANGER: RISK OF ELECTROCUTION
▪
When
the
unit
is
not
operating,
the
LEDs
on
the
PCB
are
turned
off
in
order
to
save power.
▪
Even when the LEDs are off, the terminal block and the PCB may be powered.
66
68
Table of Contents
Default Chapter
2
Table of Contents
2
1 About the Documentation
4
About this Document
4
2 General Safety Precautions
5
About the Documentation
5
Meaning of Warnings and Symbols
5
For the Installer
6
General
6
Installation Site
7
Refrigerant - in Case of R410A or R32
11
Brine
12
Water
13
Electrical
13
3 Specific Installer Safety Instructions
16
4 About the Box
22
Overview: about the Box
22
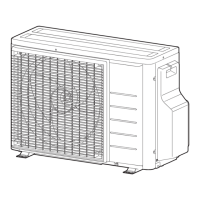
Outdoor Unit
22
To Unpack the Outdoor Unit
22
To Remove the Accessories from the Outdoor Unit
23
5 About the Unit
25
Overview: about the Unit
25
Identification
25
Identification Label: Outdoor Unit
25
6 Unit Installation
26
Preparing the Installation Site
26
Installation Site Requirements of the Outdoor Unit
27
Additional Installation Site Requirements of the Outdoor Unit in Cold Climates
29
Opening the Unit
30
About Opening the Unit
30
To Open the Outdoor Unit
30
Mounting the Outdoor Unit
30
About Mounting the Outdoor Unit
30
Precautions When Mounting the Outdoor Unit
31
To Provide the Installation Structure
31
To Install the Outdoor Unit
32
To Provide Drainage
32
To Prevent the Outdoor Unit from Falling over
33
7 Piping Installation
34
Preparing Refrigerant Piping
34
Refrigerant Piping Requirements
34
Refrigerant Piping Insulation
35
Refrigerant Piping Length and Height Difference
35
Connecting the Refrigerant Piping
36
About Connecting the Refrigerant Piping
36
Precautions When Connecting the Refrigerant Piping
36
Guidelines When Connecting the Refrigerant Piping
38
Pipe Bending Guidelines
38
To Flare the Pipe End
38
Connections between Outdoor and Indoor Unit Using Reducers
39
Using the Stop Valve and Service Port
40
To Connect the Refrigerant Piping to the Outdoor Unit
42
Checking the Refrigerant Piping
42
About Checking the Refrigerant Piping
42
Precautions When Checking the Refrigerant Piping
43
To Check for Leaks
43
To Perform Vacuum Drying
44
8 Charging Refrigerant
46
About Charging Refrigerant
46
About the Refrigerant
47
Precautions When Charging Refrigerant
48
To Determine the Additional Refrigerant Amount
48
To Determine the Complete Recharge Amount
48
To Charge Additional Refrigerant
48
To Fix the Fluorinated Greenhouse Gases Label
49
9 Electrical Installation
50
About Connecting the Electrical Wiring
50
Precautions When Connecting the Electrical Wiring
50
Guidelines When Connecting the Electrical Wiring
52
Specifications of Standard Wiring Components
53
To Connect the Electrical Wiring to the Outdoor Unit
53
10 Finishing the Outdoor Unit Installation
55
To Finish the Outdoor Unit Installation
55
To Close the Outdoor Unit
55
11 Configuration
56
About ECONO Mode Prohibition Setting
56
To Turn on ECONO Mode Prohibition Setting
56
About Night Quiet Mode
57
To Turn on the Night Quiet Mode
57
About Heat Mode Lock
57
To Turn on Heat Mode Lock
57
About Standby Electricity Saving Function
58
To Turn on Standby Electricity Saving Function
58
12 Commissioning
59
Overview: Commissioning
59
Precautions When Commissioning
59
Checklist before Commissioning
59
Checklist During Commissioning
60
Trial Operation and Testing
60
To Perform a Test Run
60
Starting up the Outdoor Unit
61
13 Hand-Over to the User
62
14 Maintenance and Service
63
Overview: Maintenance and Service
63
Maintenance Safety Precautions
63
Checklist for Yearly Maintenance of the Outdoor Unit
63
About the Compressor
64
15 Troubleshooting
65
Overview: Troubleshooting
65
Precautions When Troubleshooting
65
Solving Problems Based on Symptoms
65
Symptom: Indoor Units Fall, Vibrate or Make Noise
65
Symptom: the Unit Is NOT Heating or Cooling as Expected
66
Symptom: Water Leakage
66
Symptom: Electrical Leakage
66
Symptom: Unit Does NOT Function or Burn Damage
66
Solving Problems Based on LED Behaviour
66
Fault Diagnosis Using LED on Outdoor Unit PCB
66
16 Disposal
68
Overview: Disposal
68
To Pump down
68
To Start and Stop Forced Cooling
69
To Start and Stop Forced Cooling Using the Indoor Unit ON/OFF Switch
69
To Start and Stop Forced Cooling Using the Indoor Unit User Interface
69
17 Technical Data
70
Wiring Diagram
70
Unified Wiring Diagram Legend
70
Piping Diagram: Outdoor Unit
72
18 Glossary
74
Other manuals for Daikin 2MXM50M3V1B9
Installation Manual
28 pages
4
Based on 1 rating
Ask a question
Give review
Questions and Answers:
Need help?
Do you have a question about the Daikin 2MXM50M3V1B9 and is the answer not in the manual?
Ask a question
Daikin 2MXM50M3V1B9 Specifications
General
Brand
Daikin
Model
2MXM50M3V1B9
Category
Air Conditioner
Language
English
Related product manuals
Daikin 2MXM50M
114 pages
Daikin 2MXM50M2V1B
26 pages
Daikin 2MXM50A2V1B
72 pages
Daikin 2MXM50N2V1B9
76 pages
Daikin 2MXM50A2V1B9
24 pages
Daikin 2MXM40M
114 pages
Daikin 2MXM-N9
76 pages
Daikin 2MXM40M4V1B
76 pages
Daikin 2MXM68A2V1B
84 pages
Daikin 2MXM40A2V1B
72 pages
Daikin 2MXM40A2V1B9
24 pages
Daikin 2MXM68A2V1B9
84 pages
 Loading...