ESIE16-02B | Part 2. Troubleshooting 2.4. Component checklist
Page 52 4/04/17 | Version 1.1
RA R32 Split & multi split M-Series
2.4.2.5. High pressure sensor
PRELIMINARY ACTIONS
1. Switch off the Daikin unit via the user interface.
2. Switch off the Daikin unit with the field supplied circuit breaker.
3. Remove plate work when required.
PROCEDURE
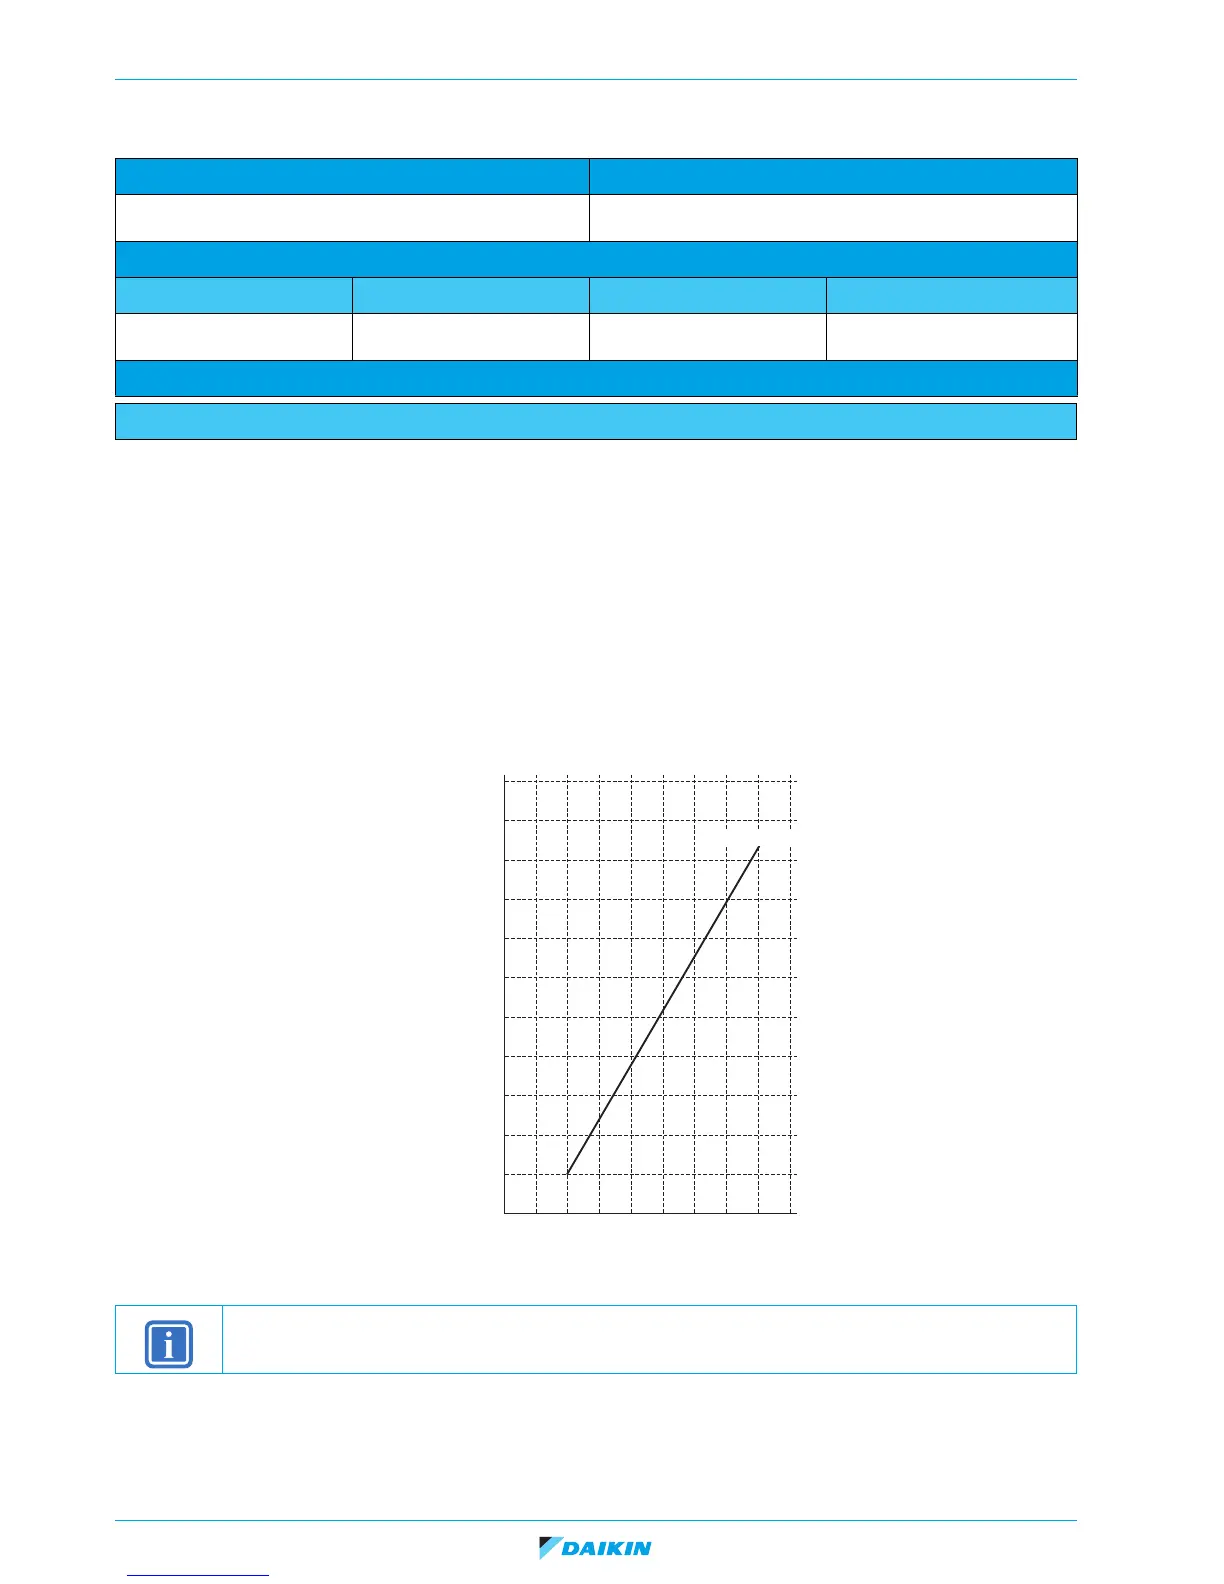
1. Connect a pressure gauge to the high pressure service port and read the pressure.
2. From the graph below, determine the expected sensor output signal.
3. Power the Daikin unit.
4. Measure the voltage across high pressure sensor connector: pin 1-3 on the PCB; compare the measured voltage with the
expected voltage.
Technical specification Description
The pressure sensor is an analog pressure sensor. The pressure sensor measures the pressure in the high pressure
section of the refrigerant circuit.
Location
Piping diagram Wiring diagram Switch box Component overview of unit
See "Outdoor unit" on
page 104.
See "Outdoor unit" on
page 99.
See "Outdoor unit" on
page 111.
See "Outdoor unit" on page 110.
Check procedure
Electrical check
INFORMATION
To know where to plug in the pressure sensor connector, see "Component checklist" on page 111.
-5.1
-0.5 0 0.5 1 1.5 2 2.5 3 3.5 4
0
5.1
10.2
15.3
20.4
25.5
30.6
35.7
40.8
45.9
51.0
Detected Pressure
P
H
(kg/cm
2
)
P
H
= 1.38V
H
-0.69
V
H
: Output Voltage (High Side) V
DC
Output Voltage (V
H
, V
L
)
High Pressure (P
H
)