ESIE16-02B | Part 5. Appendix 5.1. Field setting
RA R32 Split & multi split M-Series
Page 94 4/04/17 | Version 1.1
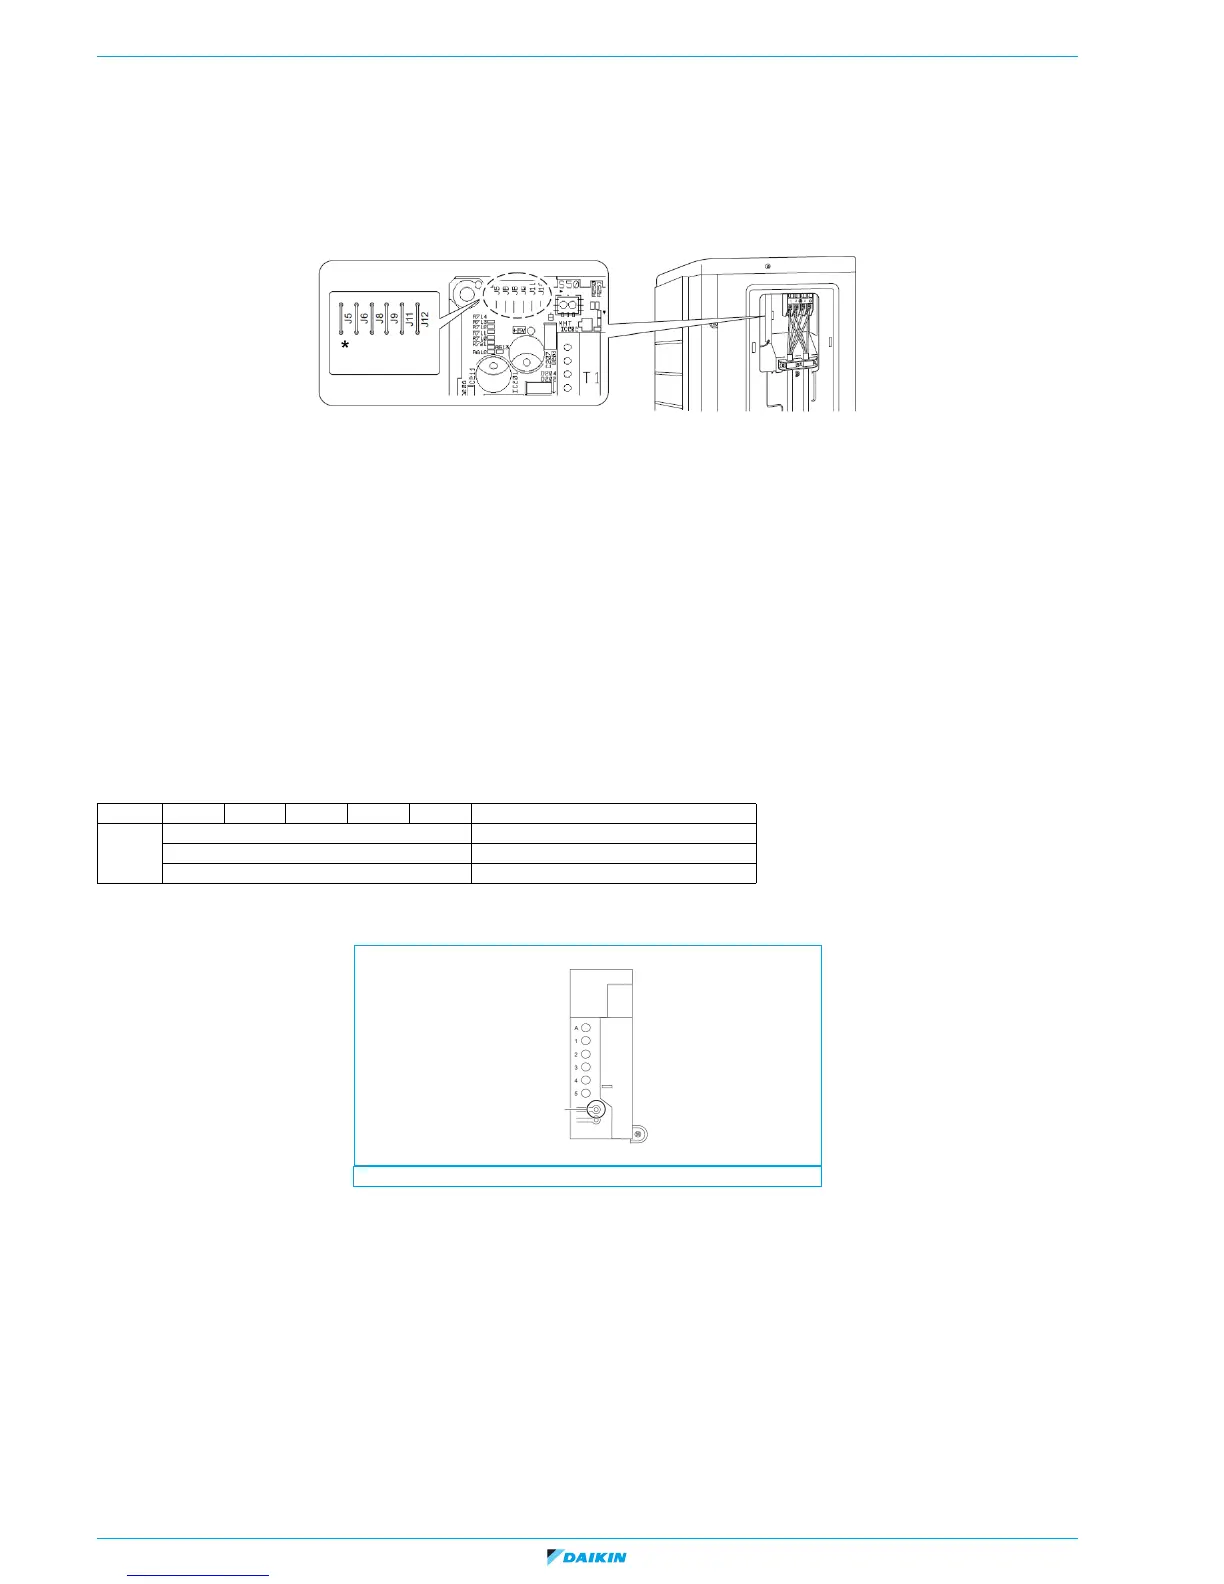
5.1.2. Outdoor unit
5.1.2.1. Facility setting for outdoor split units
This function is designed for facilities such as equipment or computer rooms. It is never to be used in a residence or office where people occupy the space.
Cutting jumper 6 (J6) on the circuit board will expand the operation range down to -15°C. However it will stop if the outdoor temperature drops below -20°C and start back up once the
temperature rises again.
Figure 5-2: Jumper settings
* Cut J6 with nippers or a similar tool
Other jumper settings
J5: No function for this unit.
J8: Cold region setting (changing the operating range from - 10°C to -15°C).
J9: No function for this unit.
J11: Protection for error memory overwrite (only to be used during development).
J12: No function for this unit.
5.1.2.2. Multi split outdoor
5.1.2.2.1 Wiring error check
This product is capable of automatic correction of wiring error.
Press the “wiring error check switch” on the outdoor unit service PC board. However, the wiring error check switch will not function for 3 minutes after the safety breaker is turned on; or
depending on the outside air conditions (see note 2). About 15 - 20 minutes after the switch is pressed, the errors in the connection wiring will be corrected.
If self-correction is not possible, check the indoor unit wiring and piping in the usual manner.
Figure 5-3: Service PC board wiring error check switch location
Note
1. For two rooms, LED3, 4 and 5 are not present, and for three rooms, LED4 and 5 are not present, and for four rooms LED 5 is not present.
2. If the outside air temperature is 5°C or less, the wiring error check function will not operate.
3. After wiring error check operation is completed, LED indication will continue until ordinary operation starts.
This is normal.
4. Follow the product diagnosis procedures (details of product error diagnosis are listed on the back of the fight side plate).
LED12345 Message
Status
All flashing (simultaneously)
Autonomic correction impossible
Flashing (on after another)
Autonomic correction completed
w (one or more LEDs 1 to 4 are ON)
Abnormal stop (note 4)
1. Wiring error check switch (SW3)
 Loading...