ESIE16-02B | Part 2. Troubleshooting 2.4. Component checklist
4/04/17 | Version 1.1 Page 53
RA R32 Split & multi split M-Series
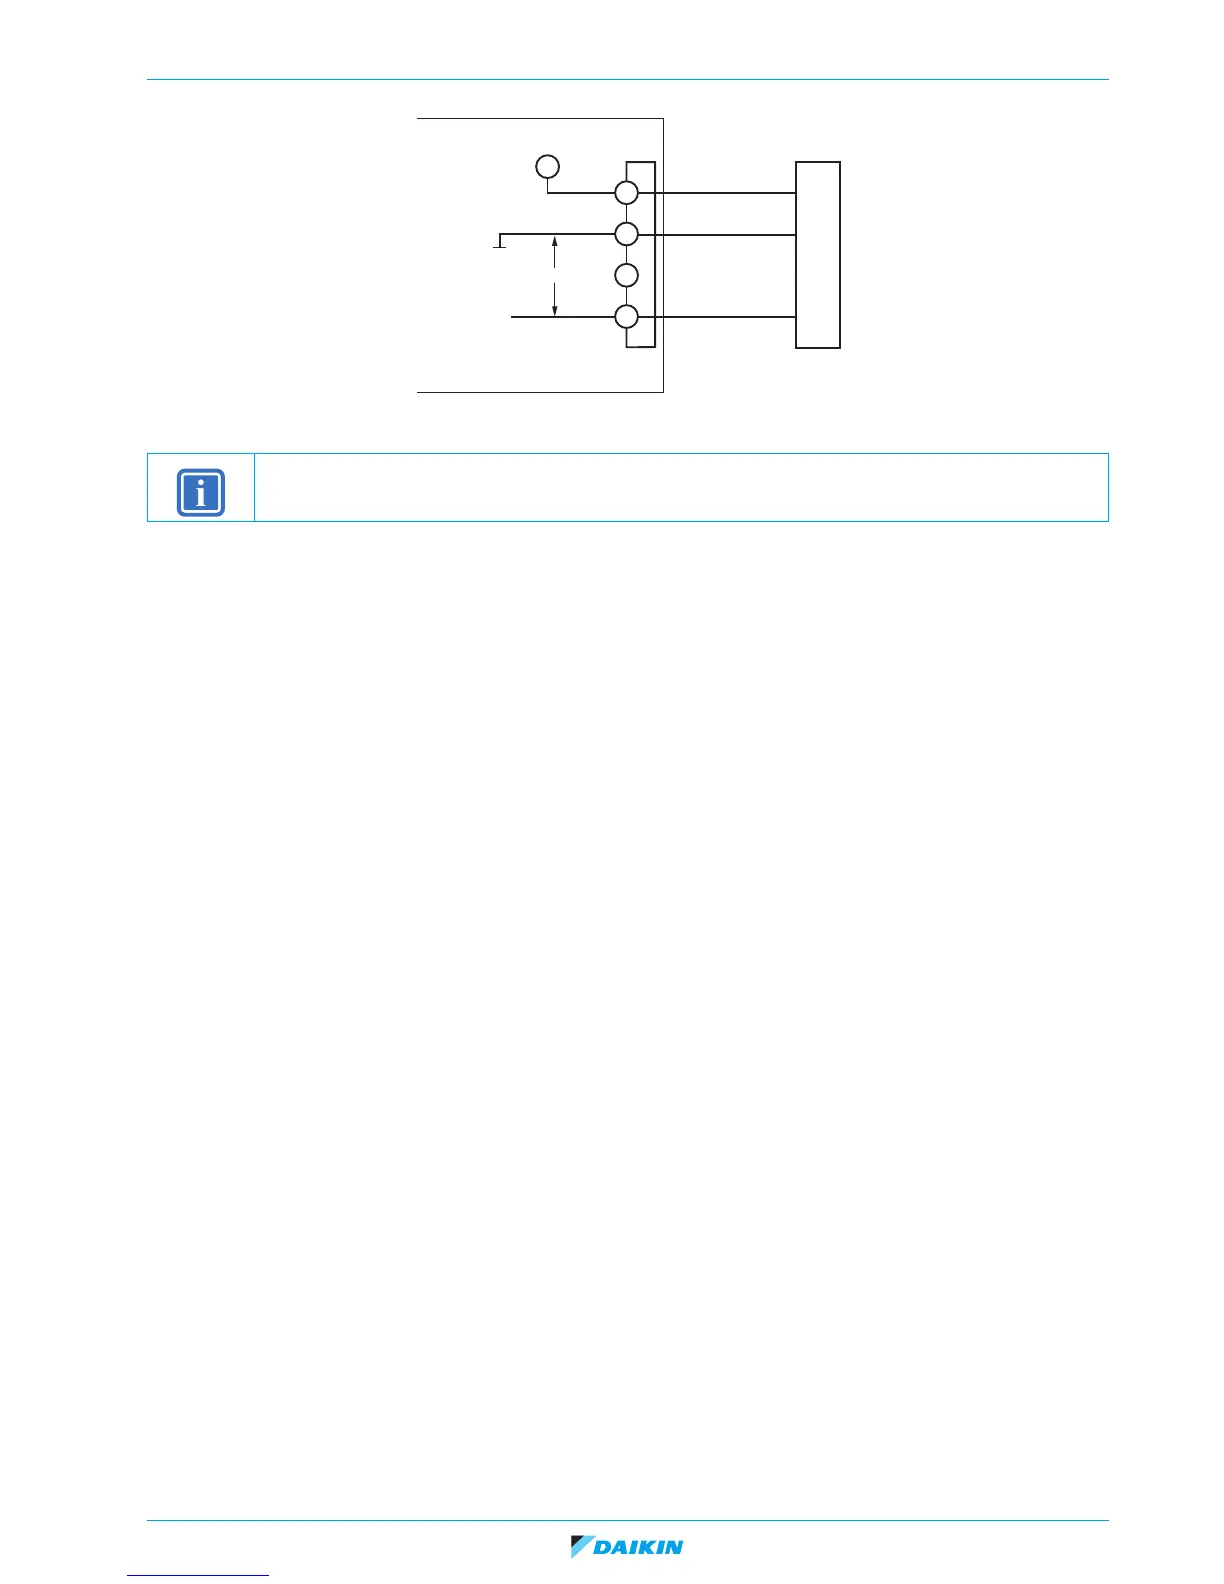
5. In case no voltage is measured across high pressure sensor connector: pin 1-3; do following checks:
Check 1
1. Check main PCB (refer to "Replacing main PCB" on page 84).
Check 2
1. Check if the high pressure sensor connector is plugged into PCB.
Check 3
1. Measure the voltage across high pressure sensor connector: pin 4-3; the measured voltage must be 5 VDC, if not replace
PCB.
2.4.2.6. Main PCB
Not available yet.
INFORMATION
If 1 or more checks fail, replace the high pressure sensor.
+5V
Red
S60
GND
Black
White
High pressure sensor
Microcomputer
A/D input
Measure DC voltage here
Outdoor unit PCB
1
2
3
4