4 Set-up and installation
Installation and maintenance instructions
14
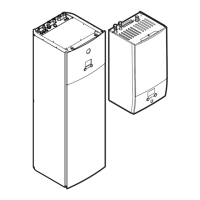
Daikin Altherma EHS(X/H)(B)-D
Heat pump (indoor unit) with integrated heat accumulator
008.1444099_01 – 11/2018 – EN
Installation area
▪ The base must be level and smooth and have a sufficient ground
load-bearing capacity of 1050kg/m² plus safety factor. Install a
pedestal if necessary.
▪ Observe the installation dimensions (see Chap. 4.1).
Minimum distance
DANGER: RISK OF BURNING
The plastic wall of the storage tank on the indoor unit can
melt under the effects of external heat (>80 °C) and, in the
extreme case, can catch fire.
▪ Only install the indoor unit at a minimum clearance of
1m from other heat sources (>80°C) (e.g. electrical
heater, oil heater, chimney) and combustible material.
CAUTION
If the indoor unit is not installed at a sufficient dis-
tance below the flat solar panels (the top edge of the stor-
age tank is higher than the bottom edge of the solar pan-
els), the unpressurised solar system in the outdoor area
will not be able to drain completely.
▪ When a solar connection is used, install the indoor unit
low enough under the flat solar panels (observe the min-
imum gradient of the solar connection lines).
Recommended minimum distances:
To the wall: (back) ≥100mm, (sides) ≥500mm
To the ceiling: ≥1200mm, at least 480mm.
Distances from the outdoor unit:
When selecting the installation location, the information in the table
Tab. 4-3must be taken into account.
Maximum refrigerant line length between the indoor
and outdoor unit
30m
Minimum refrigerant line length between the indoor
and outdoor unit
3m
Maximum height difference between the indoor and
outdoor unit
20m
Tab.4-3
4.3.2 Installing the device
WARNING
When unfilled, the indoor unit is top-heavy and could tip
over during transport. That could put persons in danger or
damage the unit.
▪ Secure the indoor unit well, transport carefully, use the
handles.
Precondition
▪ The installation site complies with applicable country-specific reg-
ulations and meets the minimum requirements described in
Chap. 4.3.1.
Installation
Fig.4-6 Installing the handles
Item Designation
A Handle
B cover panel
F Threaded piece
Tab.4-4
1 Remove packing and dispose of it in an environment-friendly
manner.
2 Pull off the cover screens from the storage tank (Fig. 4-6, itemB)
and unscrew the threaded fittings (Fig. 4-6, itemF) from the
openings at which the handles are to be fitted.
3 Screw the handles (Fig. 4-6, itemA) into the now uncovered
threaded holes.
4 Carefully transport the indoor unit to the installation site, use the
handles.

 Loading...