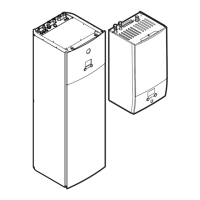
Fig.4-15 Removing the bottom thermal insulation
INFORMATION
The thermal insulation is installed in reverse order.
4.4.6 Opening the vent valve
1 Removing the thermal insulation (see Chap. 4.4.5).
2 Open the vent valve on the pump by one turn.
Fig.4-16 Opening the vent valve
4.4.7 Aligning the connections of the heating
inflow and return flow
CAUTION
When working on the hydraulics, pay attention to the in-
stallation position of the O-rings to avoid damaging them
and causing leaks.
▪ Always place O-rings on the part to be inserted after dis-
assembly or before assembly (see Fig. 4-18).
▪ The heating lines must be connected free of tension via
the plug connectors. Establish a suitable strain relief es-
pecially when connecting with flexible lines (not open to
diffusion!) (see ).
CAUTION
If the plug brackets cannot be put on properly, the coup-
lings can be detached from their mountings to ensure a
very strong or continuous escape of liquid can occur.
▪ Before putting on a plug bracket, make sure that the stir-
rup engages in the coupling groove. To do so, insert the
coupling far enough into the mounting that the groove is
visible through the plug bracket mounting.
▪ Insert the plug bracket up to the end stop.
The connections of the heating inflow and return flow can be direc-
ted upwards or backwards in order to adapt it optimally to the struc-
tural conditions of the installation site.
The device is supplied with upwards aligned connections as stand-
ard. The following conversion steps are required in order to direct
the connections to the rear out of the device:
1 Remove the protective cover and top thermal insulation
(seeChap. 4.4.2).
Fig.4-17 Aligning the heating inflow and return flow upwards
2 Pull the two plug brackets off the connection couplings
(Fig. 4-17, itemC).
3 Pull off the two connection couplings (Fig. 4-17, itemB).
Fig.4-18 Hydraulic system plug connectors
4 Remove the retaining plate (Fig. 4-17, itemA).
5 Pull off the sealing plug bracket (Fig. 4-17, itemD).
6 Pull out the sealing plug (Fig. 4-17, itemE).
7 Turn the elbow (Fig. 4-17, itemH) 90° to the rear.
8 Pull the plug bracket off the manifold (Fig. 4-17, itemG).

 Loading...