7 Inspection and maintenance
Installation and maintenance instructions
39
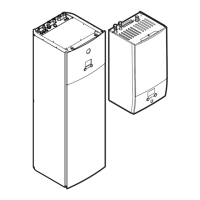
Daikin Altherma EHS(X/H)(B)-D
Heat pump (indoor unit) with integrated heat accumulator
008.1444099_01 – 11/2018 – EN
WARNING
Polluted domestic water is hazardous to health.
▪ When filling the heating system, make sure that heating
water cannot flow back into the domestic water pipe.
INFORMATION
Comply with the instructions for the water connection (see
Water connection) and water quality (see ).
1 Connect the filling hose (Fig. 7-2, item 1) with the non-return
valve (1/2") and an external pressure gauge (on the building
side) to the combined filling and draining valve (Fig. 7-2, item 2)
and secure it against slipping off with a hose clamp.
2 Connect the drain hose to the vent valve, and route it away from
the device. Open the vent valve with the hose connected; check
to make sure that the other vent valve is closed.
3 Open the water tap (Fig. 7-2, item4) on the feed pipe.
4 Open the combined filling and draining valve (Fig. 7-2, item2)
and monitor the pressure gauge.
5 Fill the system with water until the external pressure gauge
shows that the system target pressure is reached (system height
+2m; 1m water column = 0.1bar). The overpressure valve
must not actuate!
6 Close the manual vent valve as soon as water emerges free of
bubbles.
7 Close the water tap (Fig. 7-2, item4). The combined filling and
draining valve must remain open in order to read off the water
pressure on the external pressure gauge.
8 Switch on the power supply of the indoor unit.
9 In the controller RoCon+ HP in the "Operating mode" menu, se-
lect the "Heating" operating mode [→Main menu →Operating
mode].
– After the start phase, the indoor unit runs in hot water heat-
ing operation.
10 Constantly check the water pressure on the external pressure
gauge during hot water heating mode, and top up water via the
combined filling and draining valve (Fig. 7-2, item2) if neces-
sary.
11 Vent the entire heating system as described inChap. 5.1.3
(open the system's control valves. At the same time, the under-
floor heating system can be filled and flushed by the underfloor
distributor.
12 Again check the water pressure on the external pressure gauge,
and top up water via the combined filling and draining valve
(Fig. 7-2, item2) if necessary.
13 Disconnect the filling hose (Fig. 7-2, item1) with non-return
valve from the combined filling and draining valve (Fig. 7-2,
item2).
Fig.7-2 Filling the heating circuit
Item Designation
1 Filling hose with non-return valve (and pressure
gauge
(2)
)
2 Combined filling and draining valve
3 Heater ball cock - inflow
4 Heater ball cock - return flow
5.1 Valve drive
5.2 Unlocking key of the drive lock
6 Water tap
7 Automatic vent valve
8 Manometer
3UVDHW 3-way switch valve
3UVB1 3-way mixer valve
MAG Diaphragm expansion vessel
Tab.7-2 Legend for Fig. 7-2
(2)
if not already installed in the heating system

 Loading...