3Installation
Installationmanual
4
AZQS100~140B8V1B+AZQS100~140B7Y1B
Splitsystemairconditioners
4P3855281–2014.08
3 Installation
3.1 Mountingtheoutdoorunit
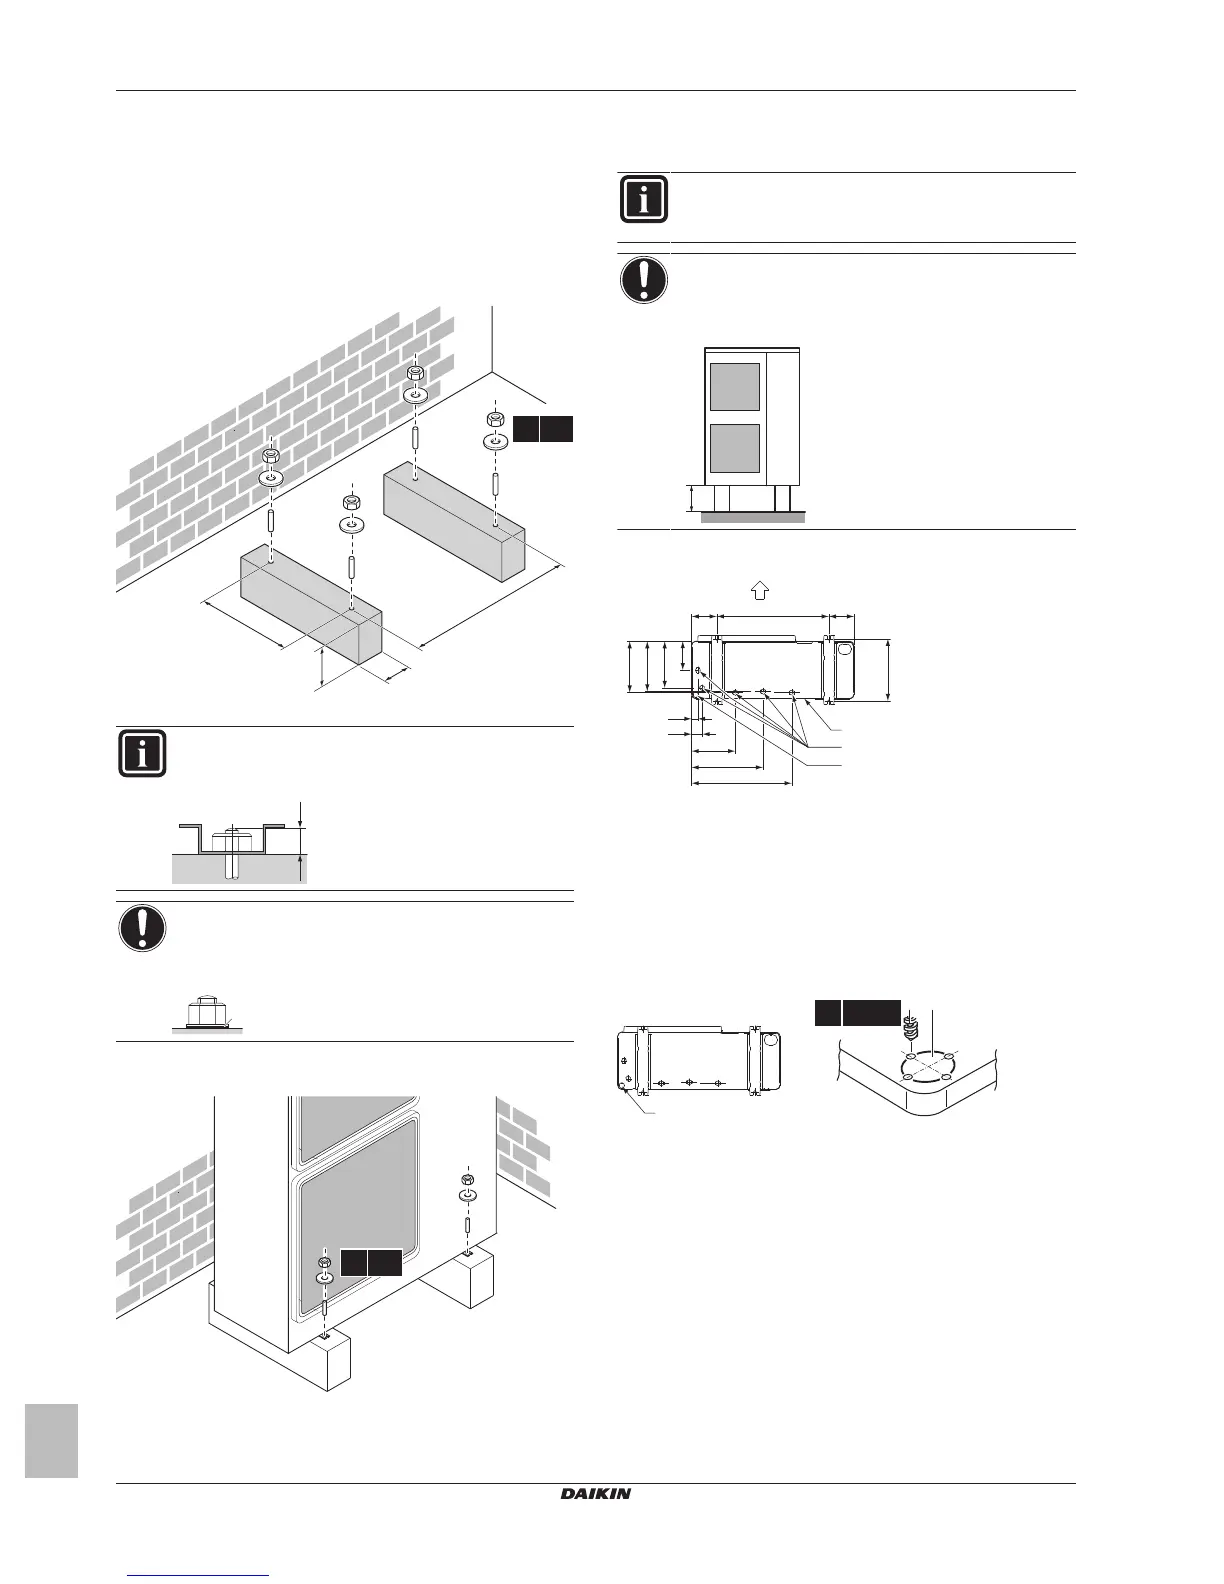
3.1.1 Toprovidetheinstallationstructure
Prepare 4 sets of anchor bolts, nuts and washers (field supply) as
follows:
(mm)
>150
620
350
(345-355)
4× M12
a
a Makesurenottocoverthedrainholes.
INFORMATION
The recommended height of the upper protruding part of
theboltsis20mm.
NOTICE
Fixtheoutdoorunittothefoundationboltsusingnutswith
resin washers (a). If the coating on the fastening area is
strippedoff,thenutsrusteasily.
3.1.2 Toinstalltheoutdoorunit
3.1.3 Toprovidedrainage
Makesurethatcondensationwatercanbeevacuatedproperly.
INFORMATION
Ifnecessary,youcan useadrain plugkit(field supply)to
preventdrainwaterfromdripping.
NOTICE
Ifdrainholesoftheoutdoorunitarecoveredbyamounting
base or by floor surface, raise the unit to provide a free
spaceofmorethan150mmundertheoutdoorunit.
Drainholes(dimensionsinmm)
A
B
B
C
D
E
160 160620
36
61
262
416
595
285
279
260
161
(345~355)
A Dischargeside
B Distancebetweenanchorpoints
C Bottomframe
D Drainholes
E Knockoutholeforsnow
Snow
Inregionswithsnowfall,snowmightbuildupandfreezebetweenthe
heat exchanger and the external plate. This might decrease the
operatingefficiency.Topreventthis:
1 Drill(a,4×)andremovetheknockouthole(b).
2 Remove the burrs, and paint the edges and areas around the
edgesusingrepairpainttopreventrusting.