3Installation
Installationmanual
6
AZQS100~140B8V1B+AZQS100~140B7Y1B
Splitsystemairconditioners
4P3855281–2014.08
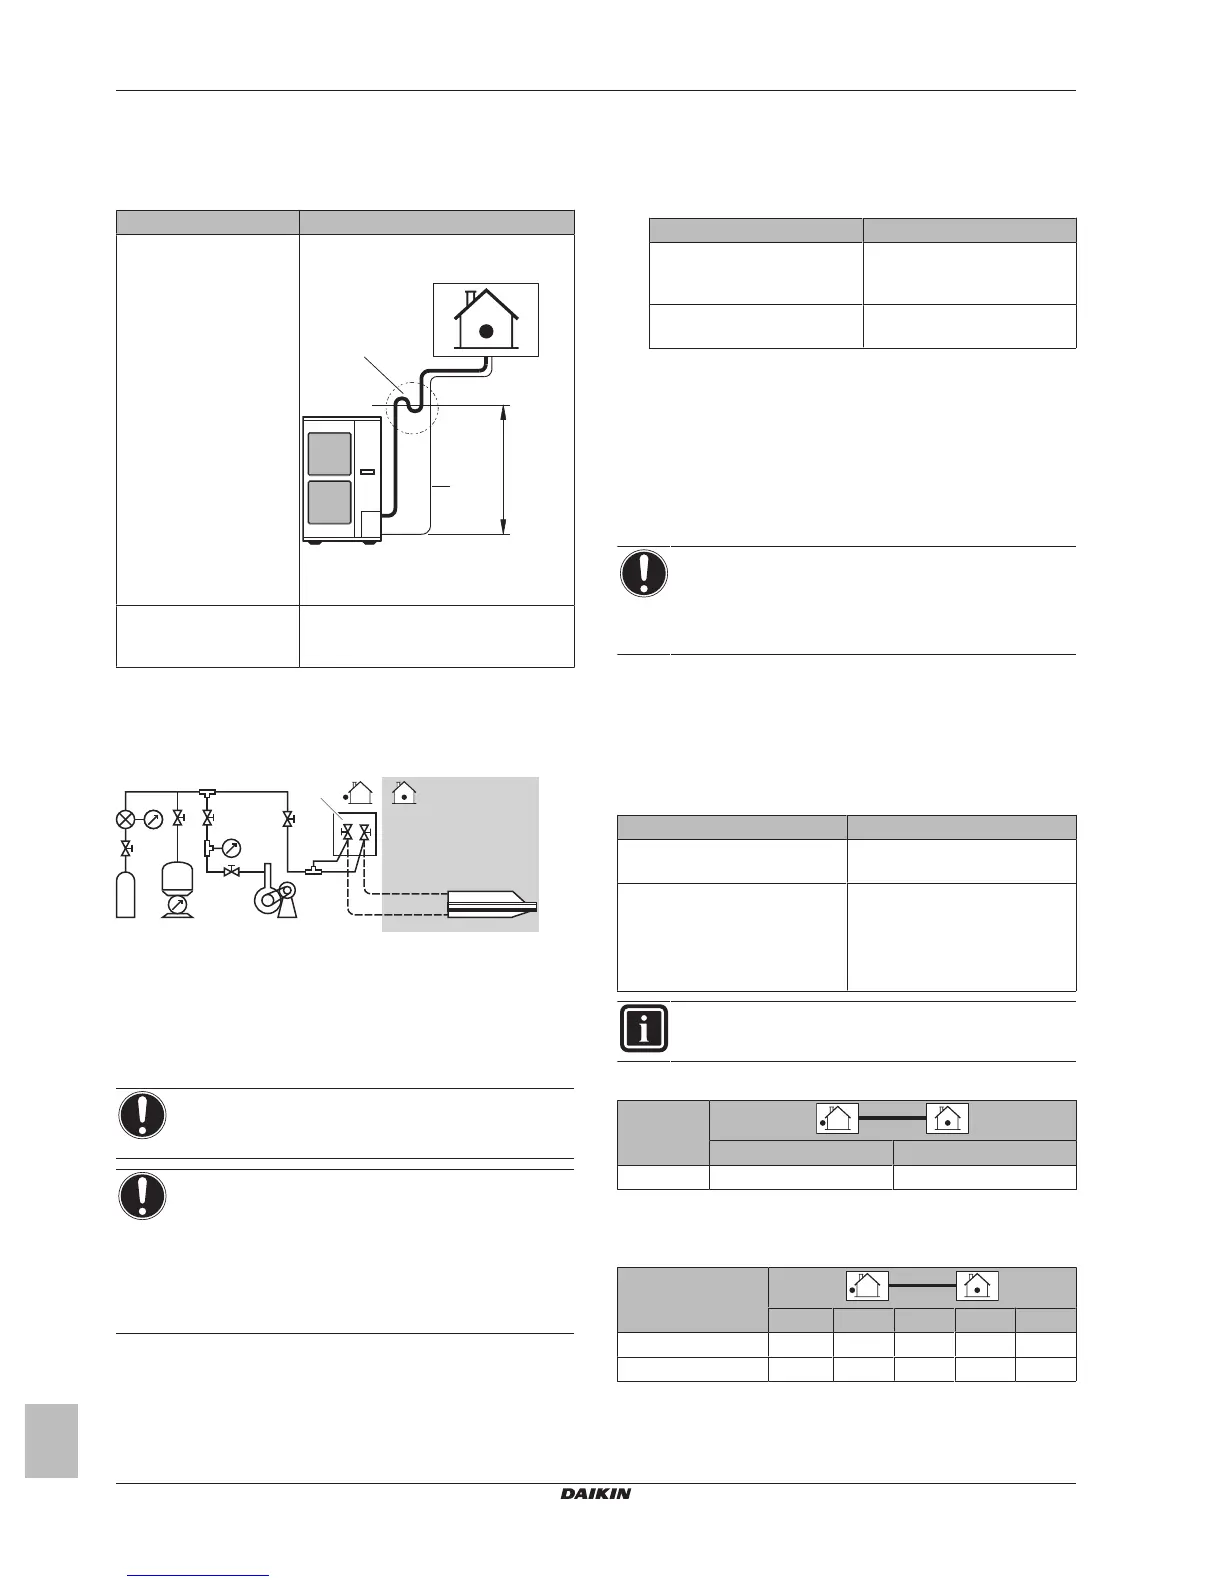
3.2.2 Todetermineifoiltrapsarerequired
Ifoilflowsbackintotheoutdoorunit'scompressor,thismightcause
liquidcompressionordeteriorationofoilreturn.Oiltrapsintherising
gaspipingcanpreventthis.
If Then
Theindoorunitisinstalled
higherthantheoutdoor
unit
Installanoiltrapevery10m(height
difference).
aRisinggaspipingwithoiltrap
bLiquidpiping
Theoutdoorunitis
installedhigherthanthe
indoorunit
OiltrapsareNOTrequired.
3.3 Checkingtherefrigerantpiping
3.3.1 Checkingrefrigerantpiping:Setup
a Pressuregauge
b Nitrogen
c Refrigerant
d Weighingmachine
e Vacuumpump
f Stopvalve
3.3.2 Tocheckforleaks
NOTICE
DoNOTexceedtheunit'smaximumworkingpressure(see
"PSHigh"ontheunitnameplate).
NOTICE
Make sure to use a recommended bubble test solution
from your wholesaler. Do not use soap water, which may
causecrackingofflarenuts(soapwatermaycontainsalt,
which absorbs moisture that will freeze when the piping
gets cold), and/or lead to corrosion of flared joints (soap
water may contain ammonia which causes a corrosive
effectbetweenthebrassflarenutandthecopperflare.
1 Chargethesystemwithnitrogengasuptoagaugepressureof
at least 200 kPa (2 bar). It is recommended to pressurize to
3000kPa(30bar)inordertodetectsmallleaks.
2 Check for leaks by applying the bubble test solution to all
connections.
3 Dischargeallnitrogengas.
3.3.3 Toperformvacuumdrying
1 Vacuumthesystemuntilthepressureonthemanifoldindicates
−0.1MPa(−1bar).
2 Leaveasisfor45minutesandcheckthepressure:
Ifthepressure… Then…
Doesnotchange Thereisnomoistureinthe
system.Thisprocedureis
finished.
Increases Thereismoistureinthe
system.Gotothenextstep.
3 Evacuateforat least 2 hours to a pressure on the manifold of
−0.1MPa(−1bar).
4 After turning OFF the pump, check the pressure for at least
1hour.
5 IfyoudoNOTreachthetargetvacuumorcannotmaintainthe
vacuumfor1hour,dothefollowing:
▪ Checkforleaksagain.
▪ Performvacuumdryingagain.
NOTICE
Make sure to open the stop valves after installing the
refrigerantpipingandperformingvacuum drying. Running
the system with the stop valves closed may break the
compressor.
3.4 Chargingrefrigerant
3.4.1 Todeterminetheadditionalrefrigerant
amount
Todetermineifaddingadditionalrefrigerantisnecessary
If Then
L1≤30m(chargelesslength) Youdonothavetoadd
additionalrefrigerant.
L1>30m Youmustaddadditional
refrigerant.
Forfutureservicing,encirclethe
selectedamountinthetables
below.
INFORMATION
Pipinglengthistheonewaylengthofliquidpiping.
Todeterminetheadditionalrefrigerantamount(Rinkg)
30~40m 40~50m
R: 0.5kg 1.0kg
3.4.2 Todeterminethecompleterecharge
amount
Model
5~10 10~20 20~30 30~40 40~50
AZQS100+125 1.9 2.4 2.9 3.4 3.9
AZQS140 3.0 3.5 4.0 4.5 5.0