the unit. (An electric shock or injury may result)
Humidifying Filters
Replace
Replace about every 10 years*
*
Time until humidifying capacity drops to 50% of the rated humidifying capacity
About part replacement timing
• Replacement timing depends on usage patterns and the
location of the unit.
Standard replacement time is about 10 years assuming
that the lters are used 8 hours per day, 6 months per
year, and are cleaned periodically. Replace the
humidifying lters if dirt/stains cannot be removed or there
is a reduction in humidifying capacity (water usage rate).
About purchasing and disposal
• Refer to “Separately Sold Parts”.
►
Page 29
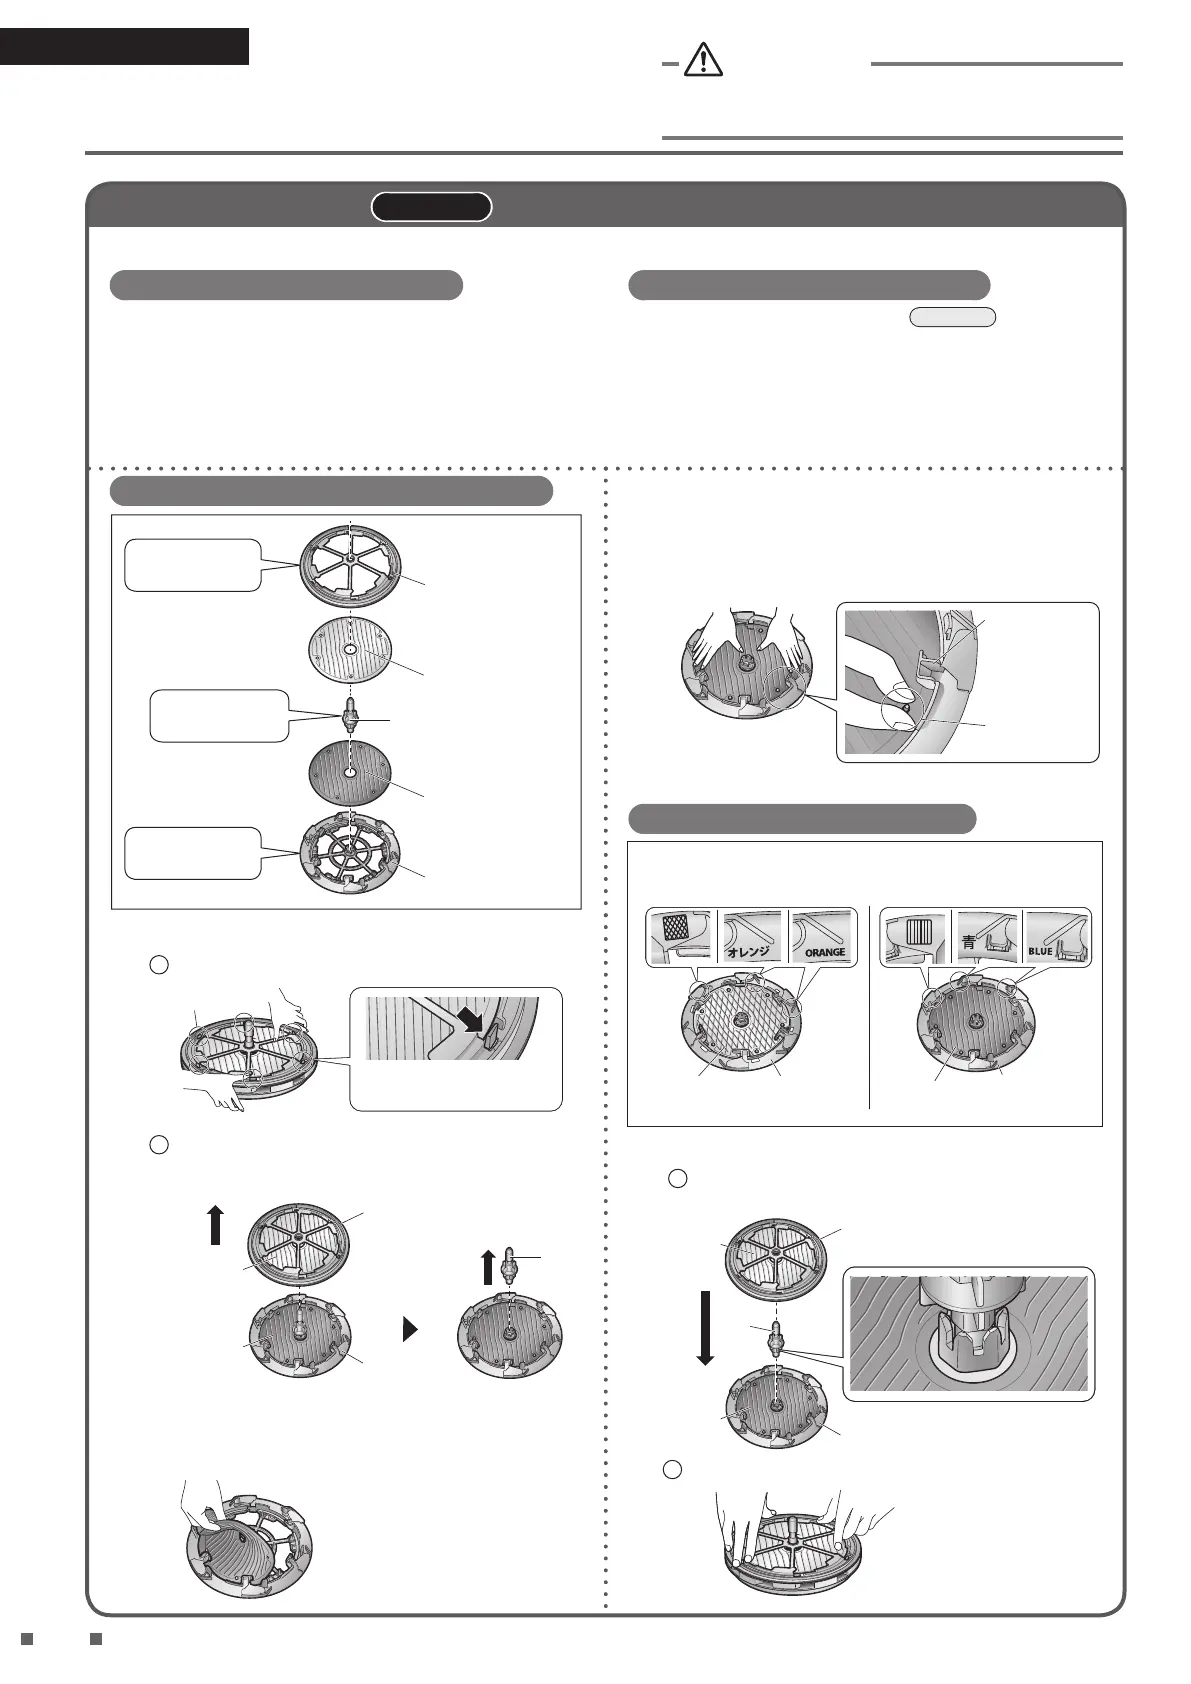
Humidifying lter unit parts breakdown
Do not dispose of
the frame
Do not dispose of
axle
Do not dispose of
the frame
Frame (upper half)
Frame (lower half)
Humidifying lter
(orange)
Humidifying lter
(blue)
Axle
3.
Attach new humidifying lters to each frame.
(Both humidifying lters have a front and back.)
• Align the protrusions (6 places) on each frame with
the holes in each lter. (Water leakage may result if
not correctly attached.)
Illustration is example of
the frame (lower half) and
the humidifying lter (blue).
Insert lter
securely under
each holding
member
(6 places)
Protrusion
(6 places)
Filter and frame combinations
Frame
(upper half)
Frame
(lower half)
Humidifying
lter (orange)
Humidifying
lter (blue)
•
Attach the lters to the frames so that the colour and weaving
pattern of each lter matches the markings on the frame.
4.
Attach the frames and axle.
1
Align the grooves in the frames (upper half and lower
half) with the projections on the axle when attaching.
Humidifying
lter
(orange)
Humidifying
lter (blue)
Axle
Frame
(upper half)
Frame
(lower half)
2
Insert the hooks (6 places) until you hear a catching sound.
1. Remove the frame and axle.
1
Release the frame hooks (6 places).
Hooks (6 places)
Push frame hooks
in direction of arrow.
2
Remove the frame (upper half) and pull out the axle
from the frame (lower half).
Axle
Frame
(upper half)
Frame
(lower half)
Humidifying lter
(orange)
Humidifying lter
(blue)
2. Remove the humidifying lters.
• Detach the humidifying lters from each frame.
Illustration is example of
the frame (lower half) and
the humidifying lter (blue).