8 Commissioning
Installation manual
42
RWEQ96~432TAYCU
VRV W T-Series water-cooled system air conditioner
4P540122-1B – 2018.11
Field wiring
Be sure that the field wiring has been carried out
according to the instructions described in the chapter
"5.8 Connecting the electrical wiring" on page 30,
according to the wiring diagrams and according to the
applicable legislation.
Power supply voltage
Check the power supply voltage on the local supply panel.
The voltage must correspond to the voltage on the
nameplate of the unit.
Ground wiring
Be sure that the ground wires have been connected
properly and that the ground terminals are tightened.
Insulation test of the main power circuit
Using a megger tester for 500 V, check that the insulation
resistance of 2MΩ or more is attained by applying a
voltage of 500 V DC between power terminals and
ground. Never use the megger tester for the transmission
wiring.
Fuses, circuit breakers, or protection devices
Check that the fuses, circuit breakers, or the locally
installed protection devices are of the size and type
specified in the chapter "4.5.1 Safety device
requirements" on page 18. Be sure that neither a fuse nor
a protection device has been bypassed.
Internal wiring
Visually check the control box and the inside of the unit on
loose connections or damaged electrical components.
Pipe size and pipe insulation
Be sure that correct pipe sizes are installed and that the
insulation work is properly executed.
Stop valves
Be sure that the stop valves are open on both liquid and
gas side.
Damaged equipment
Check the inside of the unit on damaged components or
squeezed pipes.
Refrigerant leak
Check the inside of the unit on refrigerant leakage. If there
is a refrigerant leak, try to repair the leak. If the repair is
unsuccessful, call your local dealer. Do not touch any
refrigerant which has leaked out from refrigerant piping
connections. This may result in frostbite.
Oil leak
Check the compressor for oil leakage. If there is an oil
leak, try to repair the leak. If the repairing is unsuccessful,
call your local dealer.
Air inlet/outlet
Check that the air inlet and outlet of the unit is not
obstructed by paper sheets, cardboard, or any other
material.
Additional refrigerant charge
The amount of refrigerant to be added to the unit shall be
written on the included "Added refrigerant" plate and
attached to the rear side of the front cover.
Installation date and field setting
Be sure to keep record of the installation date on the
sticker on the rear of the upper front panel and keep
record of the contents of the field setting(s).
Inspect the water strainer at the inlet piping of the outside
unit. Clean if it is dirty.
The piping work has been carried out according to this
document and the applicable legislation. Make sure that
following components are positioned at their correct
places:
▪ waterstrainer,
▪ airpurgevalve,
▪ automaticwatersupplyvalve,and
▪ expansiontank.
Water circuit
Make sure that the water circuit is filled.
Water flow
Make sure that the calculated water flow rate can be
reached.
Power supply voltage
Check the power supply voltage on the local supply panel.
The voltage must correspond to the voltage on the
nameplate of the unit.
8.4 About test run
The procedure below describes the test operation of the complete
system. This operation checks and judges following items:
▪ Check for incorrect wiring (communication check with indoor
units).
▪ Checkofthestopvalvesopening.
▪ Judgmentofpipinglength.
▪ Make sure to carry out the system test operation after the first
installation. Otherwise, the malfunction code
will be displayed
on the user interface and normal operation or individual indoor unit
test run cannot be carried out.
▪ Abnormalities on indoor units cannot be checked for each unit
separately. After the test operation is finished, check the indoor
units one by one by performing a normal operation using the user
interface. Refer to the indoor unit installation manual for more
details concerning the individual test run.
INFORMATION
▪ Itmaytake10minutestoachieveauniformrefrigerant
state before the compressor starts.
▪ Duringthetestoperation,therefrigerantrunningsound
or the magnetic sound of a solenoid valve may become
loud and the display indication may change. These are
not malfunctions.
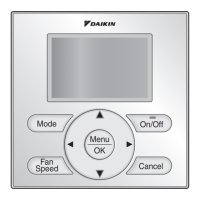
8.5 To perform a test run
1 Close all front panels in order to not let it be the cause of
misjudgment (except the control box inspection opening service
cover).
2 Make sure all field settings you want are set; see "7.2Making
field settings" on page 35.
3 Turn ON the power to the outside unit and the connected indoor
units.
NOTE
Be sure to turn on the power 6 hours before operation in
order to have power running to the crankcase heater and
to protect the compressor.
 Loading...


