5. Install solenoid with three cap screws (D050) using a 4 mm internal hex wrench and torque screws to
5 N•m [4 lbf•ft].
6. Install coil using a 12 point 27 mm socket and torque coil nut to 5 N•m [3.7 lbf•ft].
7. Reconnect electrical connections and test the pump for proper operation.
Control Solenoids Repair
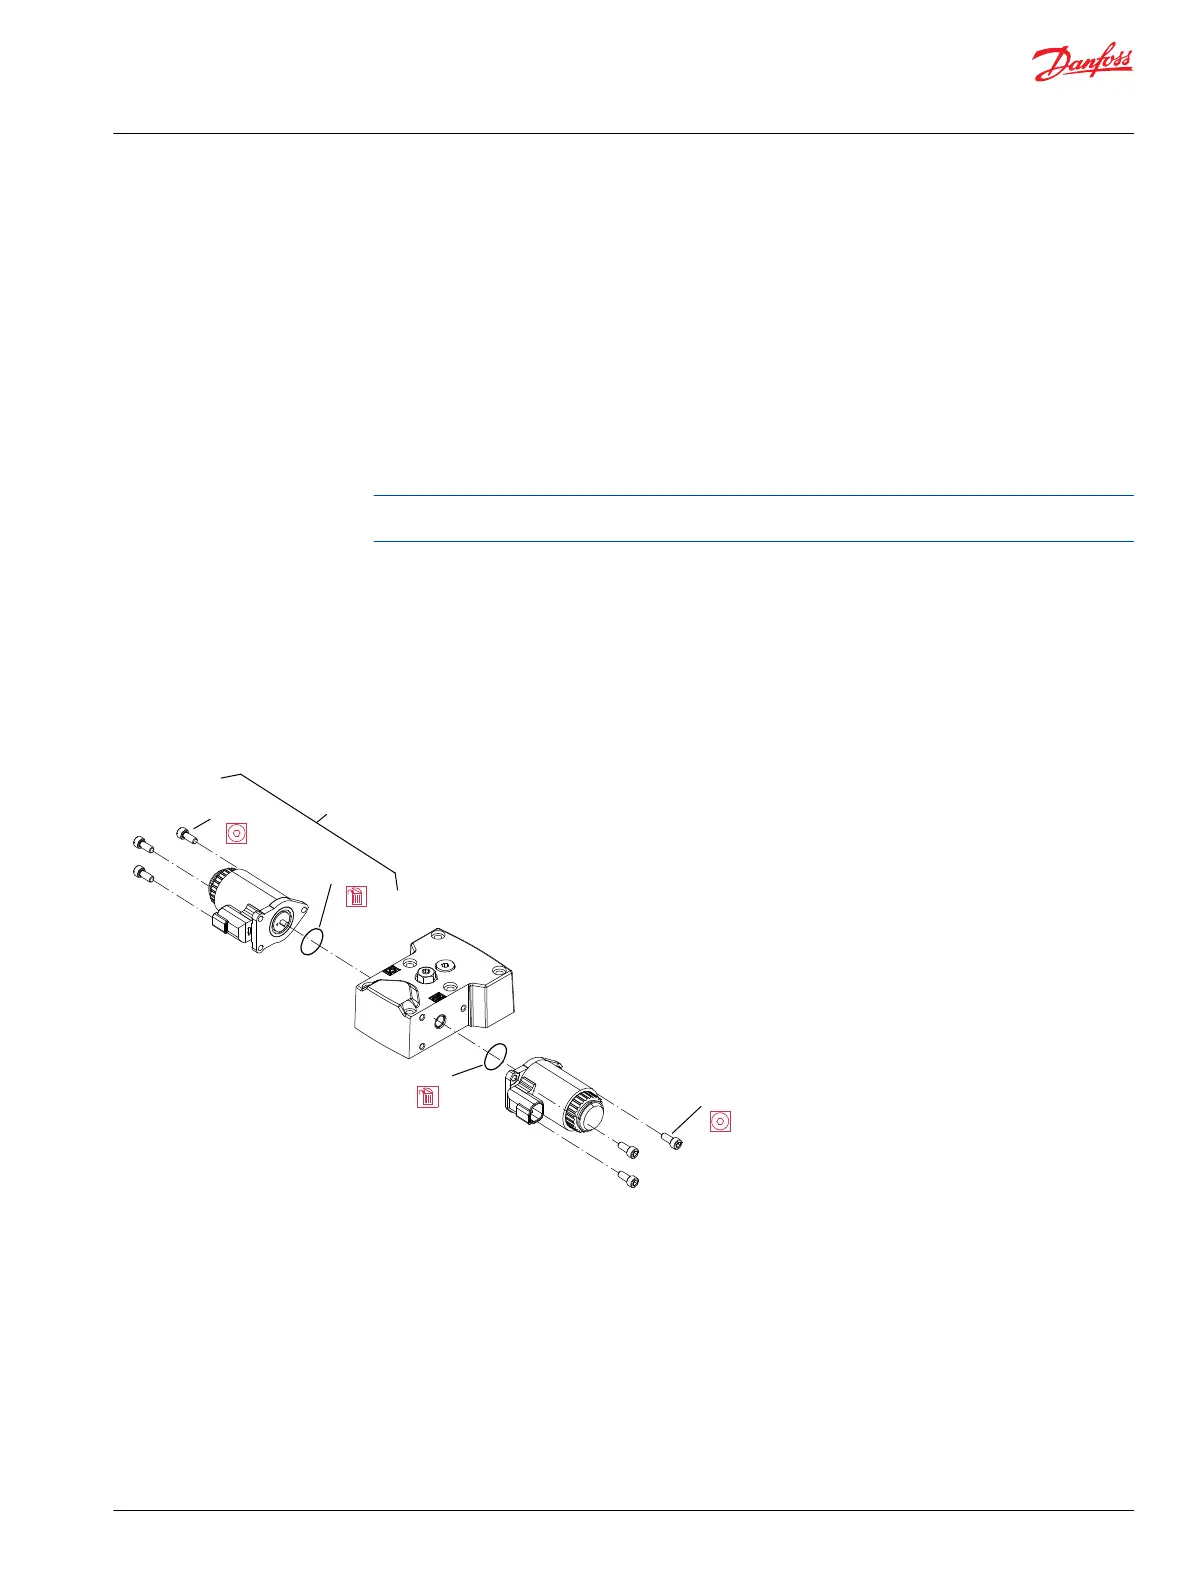
1. Disconnect electrical connection and remove the three cap screws (D050) using a 4 mm internal hex
wrench.
2. Remove the solenoid (D025) and O-ring (D025A). Discard the O-ring.
3. If necessary, remove the coil using a 12 point 26 mm socket.
Inspect the machined surfaces on the control and top of the pump. If you find any nicks or scratches,
replace the component.
4. Lubricate new O-ring (D025A) using petroleum jelly and install.
5. Install solenoid with three cap screws (D050) using a 4 mm internal hex wrench and torque screws to
5 N•m [4 lbf•ft].
6. Install coil using a 12 point 27 mm socket and torque coil nut to 5 N•m [3.7 lbf•ft].
7. Reconnect electrical connections and test the pump for proper operation.
MDC Control Repair
D025
D025A
D025A
D050 (3X)
4 mm
D050 (3X)
4 mm
MDC Repair Legend:
D80 – Solenoid
D81 – O-ring
D098 – Retaining ring
D750 – Neutral start switch
D751 – O-ring
Service Manual
H1P 069—H1P 250 Axial Piston Single Pumps
Minor Repair
©
Danfoss | September 2020 AX152886482551en-000504 | 45

 Loading...