1. Install a new gasket (D150).
2. If previously removed, install orifices using a 3 mm internal hex wrench and torque to 2.5 N•m [1.8
lbf•ft].
3. Install the control module and six cap screws (D250).
4. Using a 5 mm internal hex wrench, torque the cap screws (D250) to 13.3 N•m [9.8 lbf•ft].
Torque sequence
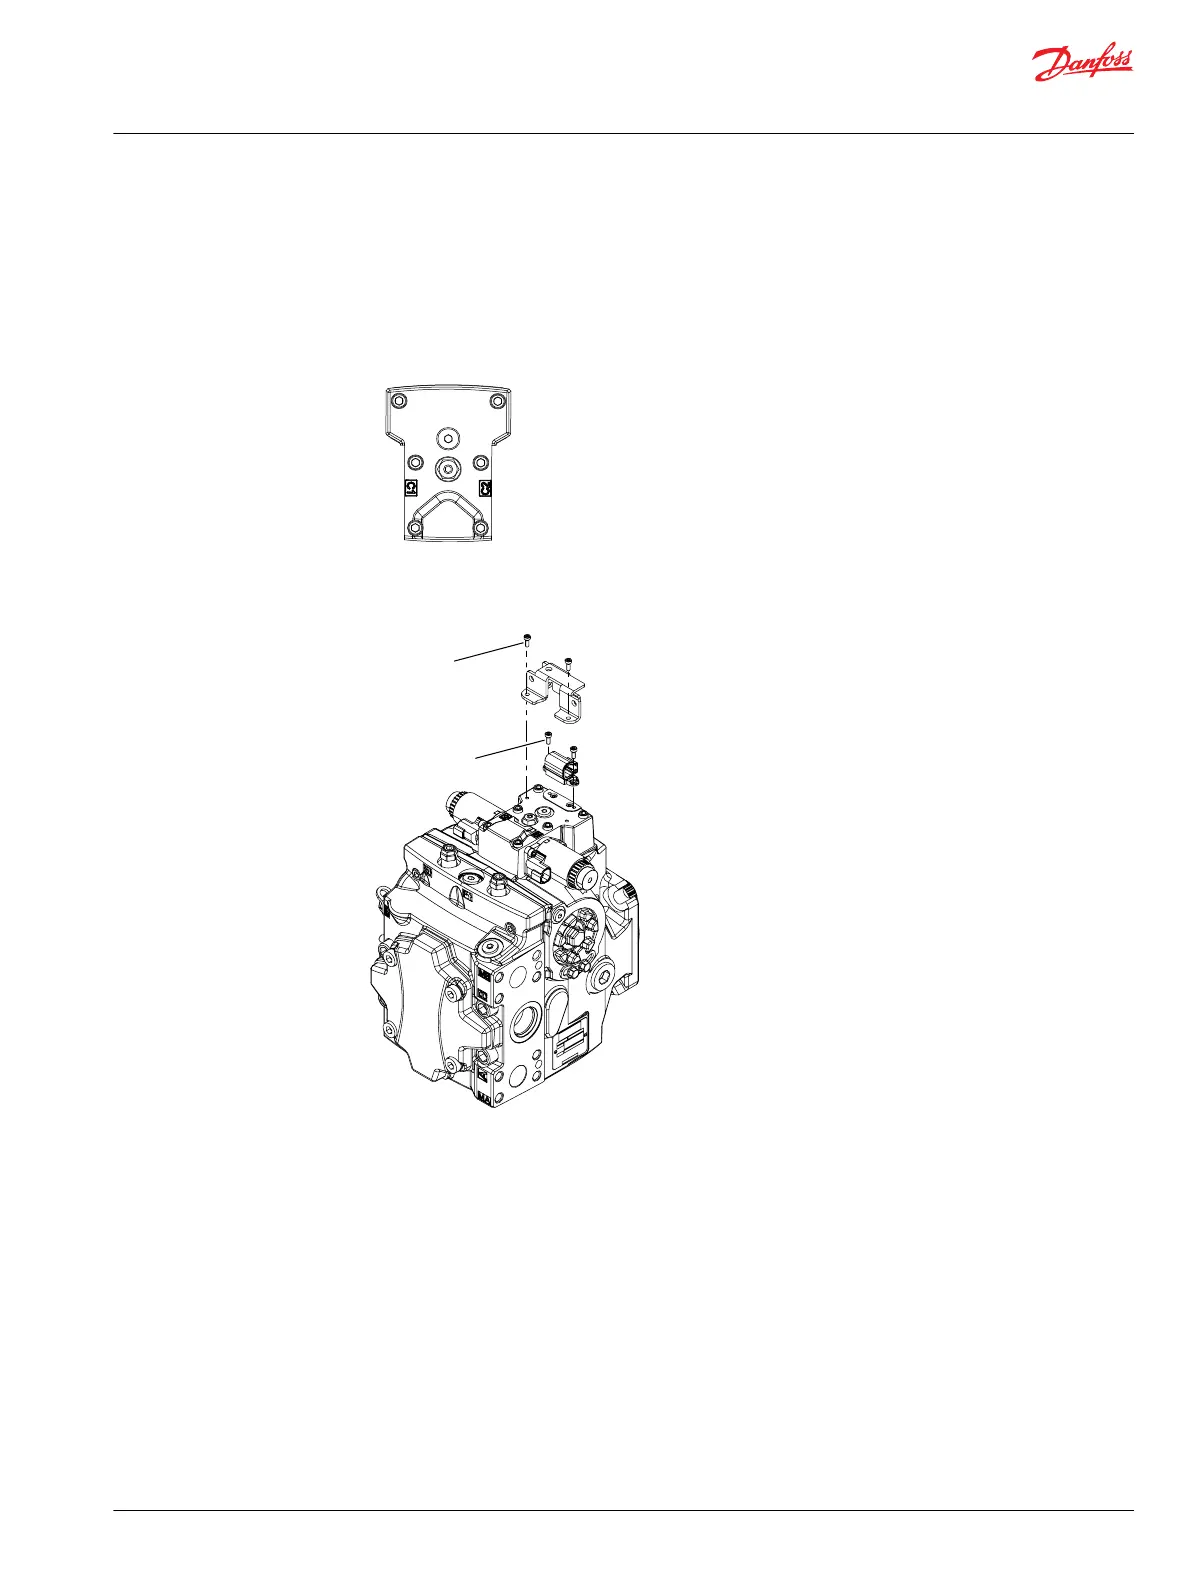
Angle sensor on EDC Repair
1. Clean the exterior of the pump to remove debris.
2. Remove protection cover screws (D767) using a 4 mm internal hex wrench.
3. Remove the protection cover from the control.
4. Discard the protection cover if it is damaged.
5. Remove sensor screws (D770) using a 4 mm internal hex wrench.
6. Remove and discard the sensor.
7. Position a new sensor on control housing.
8. Using a 4 mm internal hex wrench, fasten sensor to control housing with screws (D770). Torque
screws to 1.85 N•m [1.36 lbf•ft].
9. Position protection cover on control housing over sensor.
10. Using a 4 mm internal hex wrench, fasten protection cover with screws (D767). Torque screws to 1.85
N•m [1.36 lbf•ft].
Service Manual
H1P 069—H1P 250 Axial Piston Single Pumps
Minor Repair
©
Danfoss | September 2020 AX152886482551en-000504 | 47

 Loading...